|
|
#16 |
|
Moderator
Join Date: Oct 2016
Location: Houma, La.
Posts: 11,713
|
Steak, Bacon. Man, I'm getting hungry just looking at those pictures. Nice view, I'm jealous.
__________________
2024 Linhai 300 ATV 4x4 2023 Lifan Lycan 250 Chopper 2023 Venom Evader 2022 Lifan KPX250 2020 Kawasaki Vulcan S (Sold) 2004 Honda ST 1300 2016 Black Hawk 250 (sold) Keihin PE30 carb,125 main,38 slow.Pod filter,ported & decked head 10:1 CR,Direct Ignition Coil,15/40Sprockets,NGK DPR8EIX-9,De-Cat,Dual Oil Cooler,Digital Cluster 2016 Cazador180 XL 2014 Coolster150 JerryHawk250.com My YouTube Channel |

|
|
|
#17 |
|
Join Date: Nov 2023
Location: Central Arizona
Posts: 60
|
I wanted to share with you guys my no weld cat removal for the 2023 Templar X. I don't have access to a TIG to weld the SS, so this is what I did.
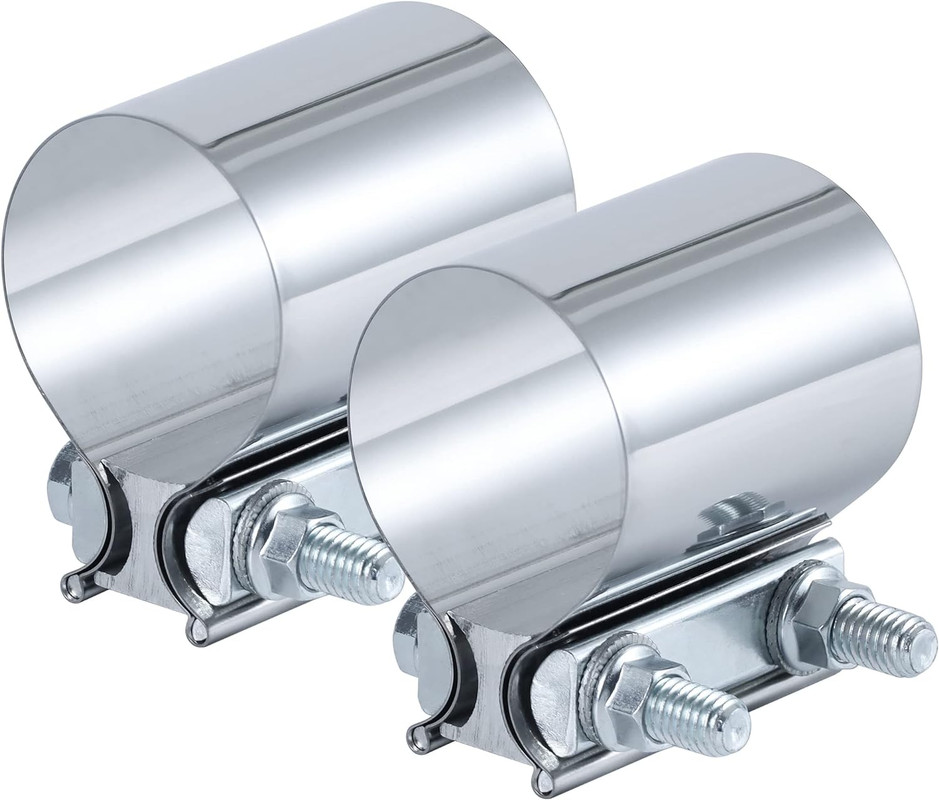
Acquire a 1.75" butt joint exhaust clamp. They look like this:  and are available on amazon for ~$10 and are available on amazon for ~$10I used a pipe cutter to make a straight line around the cat.  I cut the pipe with a cut off wheel and gutted the contents.  Not much flow through this POS...especially at higher rpm's.  Installed the exhaust to the bike left a bit of slack in the bolts so I could slide the rear section of tube forward firmly while tightening the clamp. I used a reasonable layer of high temp RTV on the clamp.(old diesel mechanic's trick for leakproof clamps) and tightened it all up. It is incredibly firm and will not go anywhere. The high temp silicone will probably burn, but the ash layer that remains keeps the clamp sealed.   Wipe off the excess rtv and let it cure overnight for best results. You will probably have to increase your main jet size to compensate for the extra flow. That's it, enjoy your extra ponies for all of ten bucks. I notice the difference most at high rpm. Dave |

|
|
|
#20 |
|
Join Date: Nov 2023
Location: Central Arizona
Posts: 60
|
I believe its running cooler, but have no proof.
|

|
|
|
#21 |
|
Join Date: Feb 2021
Location: Kansas City
Posts: 2,733
|
That empty cat bulb should serve as a resonator now. It is better than a straight pipe to reduce back pressure. Nice!
That section of the pipe will definitely run cooler without the catalyst incinerating the unburnt fuel. It actually caused a fire once when I fell over to the right in dry grass. I don't have access to a large pipe cutter like that. That is a clean cut.
__________________
No matter where you go, there you are Last edited by Thumper; 12-17-2023 at 10:08 AM. |

|
|
|
#22 | |
|
Join Date: Nov 2023
Location: Central Arizona
Posts: 60
|
Quote:
After running it some more...I think anyone who does this will have to increase the pilot jet size as well as the main. Started getting some popping on decel, so time to pull the carb bowl back off and enrichen that one too. |
|

|
|
|
#23 |
|
Join Date: Nov 2023
Location: Central Arizona
Posts: 60
|
The seat on my bike has been a source of irritation. It is quite firm and uncomfortable partially due to it's small section width. I decided to see if I could improve on the posterior padding. I removed the original cover and foam. I reassembled the seat retention brackets with loc-tite since two of them were loose.
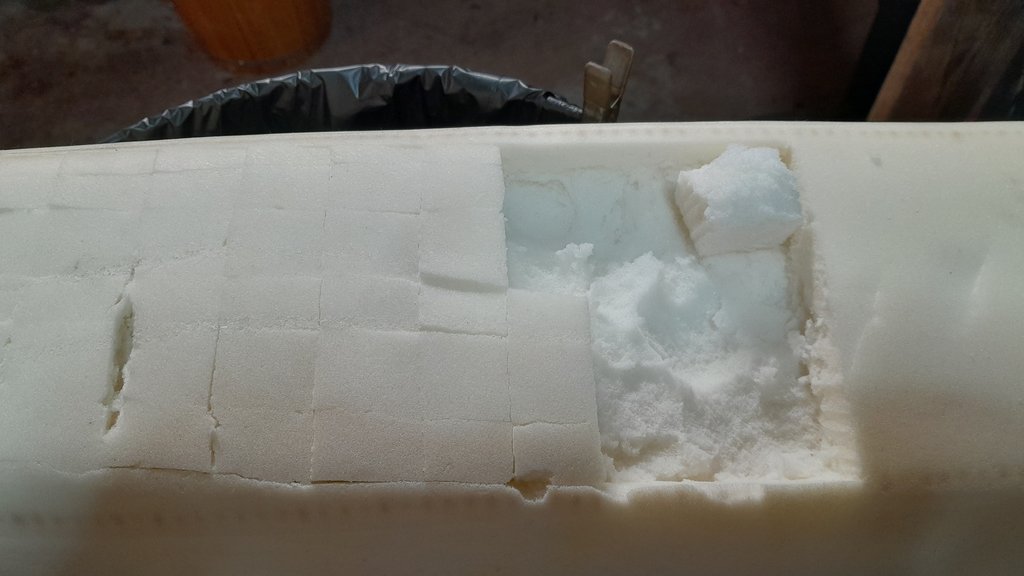
 I had ordered a slab of gel 3/4"x 12"x 12" and divided it into (3) 4"x 12" sections. I then placed one of the sections right in saddle area of the seat foam. I cut to specific depth in a grid pattern the size of one of my gel slabs. This grid allowed me to evacuate the unneeded foam and inset the first gel layer into the seat foam itself.   My remaining 2 slabs of gel were secured with some contact adhesive to the top of the seat.  Cover with a new seat cover. Pull everything tight and staple down with a t50 stapler or the like. 5/16 staples worked well.  Now, if you're short, consider that this mod raised the seat height 3/4" but your butt sinks into the gel...so I haven't noticed a difference in ability to put my feet down. The extra comfort made this a worthwhile mod in my book. Ymmv.  
Last edited by K'hermiit; 12-31-2023 at 02:45 PM. Reason: grammer & pic size |

|
|
|
#24 |
|
Join Date: Nov 2023
Location: Central Arizona
Posts: 60
|
Well, the gel helps...but the seat is still a 2x4 wedged up your ass. Broke down and ordered a Seat Concepts foam and cover kit. Hopefully the extra width will equate to extra comfort.
I've bitched about the stock tires before. The tread was squirrely in the desert and that front produced some random direction changes that were unnerving at speed. I mounted up some Kenda Parker Deserts, and wow! What a difference. Huge positive impact on stability and traction. The stockers may be fine for loam type soil, but they sucked out here. I am very happy w/ the Parkers right now. We will see if that holds true in a few months. I increased the jetting again, and have come to the conclusion that many people are leaving power on the table by running lean jetting. For instance: My pilot is currently at a 50! Starts and runs fantastic. I went up two sizes on the main to a 140. I ride in the 2000-3000ft range. Plug looks good, no soot, but keep in mind I also de-catted mine. I'm sure the extra flow helps.  Went riding yesterday, even did some single track. It was awesome. Really starting to enjoy my Templar now that I am getting it all set up. 
|

|
|
|
#25 |
|
Join Date: Jan 2024
Posts: 105
|
Quote:
|

|
|
|
#26 |
|
Join Date: Nov 2023
Location: Central Arizona
Posts: 60
|
No problem! Be careful out there and go through your bike with a fine toothed comb for issues before attempting a BDR, but awesome! Mine did fine on the short motocamping trip I did. You can't pack too much on it without overwhelming the suspension, but I had maybe 30 lbs on mine...and it it handled it fine.

|

|
|
|
#27 |
|
Join Date: Feb 2022
Location: Nevada, USA
Posts: 114
|
Good to hear you've found a big difference with the Kenda DTs! I am about to mount those for my Templar X and it seems like they live up to the Desert Terrain promise.
__________________
Templar X 250 (model X7-CB250F), current config: 13t/45t, X-ring, PE30, K772 DT |

|
|
|
#28 | |
|
Join Date: Nov 2023
Location: Central Arizona
Posts: 60
|
Quote:
So far so good. They are directional & I mounted mine in the Hard direction. |
|

|
|
|
#29 | |
|
Join Date: Jan 2024
Posts: 105
|
Quote:
|
|

|
|
|
#30 |
|
Join Date: Nov 2023
Location: Central Arizona
Posts: 60
|
My fellow Templar owners rejoice, for the cure for 2x4 ass is at hand.
I've mentioned several times that my backside disapproves of the Templar X seat. Well, I took notes and compared pics and gambled away $246 in hopes of a solution. Gentlemen...I present.     Get your own here for a 2008-2017 Suzuki RMZ 450: https://seatconcepts.com/products/suzuki-2008-16-rmz450?rq=yr_2009~mk_suzuki~md_rmz-450 Slight nipping of a little foam as seen in the first pic with the sharpie marks sits this foam perfectly on a Templar seat base. The cover was literally a perfect fit. I am happy with this mod. Last edited by K'hermiit; 02-13-2024 at 03:46 AM. |

|
|
|

|
 |
|
|