 11-26-2021, 11:18 AM
|
#31 |
|
Join Date: Dec 2018
Location: PNW
Posts: 982
|
Hawk Saddlebag Rack
A saddlebag rack has been on my mind for some time and tried some things but just could not get to a workable idea. Eventually the CR27 team came up with this idea. I want to recognize and give credit to the following posts which provided an inspiration for this work.
http://www.chinariders.net/showthread.php?t=25613 http://www.chinariders.net/showthrea...t=26951&page=2 I don’t know if it will really work yet. I put this together over several days last October so I have not had a chance to really try it and the weather has been south ever since. The idea is to build something that will give under the pressure of a fall so as not to damage the bike. The piece going over the frame, as well as the mounting front mount, should act like a torsion spring taking up some of the shock. Whether it will fall and return to its shape or whether it is strong enough to withstand saddle bags with weight under load and over terrain is yet to be tested. It was built entirely of steel purchased at Home Depot ¾ inch by 1/8 and ½ inch by 1/8 with some aluminum slates, 6mm bolts and nuts, and a Sawzall to cut. The steel was heated and bent with a plumbing torch, vise, and a hammer. Before it gets anymore work it must pass testing.     
|

|
|
11-28-2021, 10:56 AM
|
#32 |
|
Join Date: Jan 2020
Posts: 251
|
That's an interesting idea for the rack but I think you're going to find it to be unacceptably flexible. Flat stock is extremely easy to bend and I don't think that's going to have the rigidity you need. Even completely ignoring a crash (which will totally push all of this right into your bodywork), this is going to flex and bow and vibrate like an aspen leaf all on its own as you're riding along.
If I were you I would recycle the same design but make it out of square tube rather than flat stock. Even small cross section cheap stuff (like 1/2") should be sufficient. I even managed to make a perfectly serviceable, quite rigid little saddlebag support for my Enforcer out of some of the square tube odds and ends that were part of the crate it came in. |
|
|
|
11-28-2021, 11:57 AM
|
#33 |
|
Join Date: Dec 2018
Location: PNW
Posts: 982
|
I can't disagree with your assessment and it will for sure hit the body work in a freestanding fall especially on the muffler side, the question is how bad will it be? You also will have bags on the side taking up some of that shock. I need to just take it out and lay it over on its side to see, and also load it up and ride it.
It is a work in development. What it has already achieved for me is getting the dimensions and the spacing correct, sort of a template, built in the lightest weight possible. It also helped greatly in developing the attachment points. It is now a good pattern for strengthening as you suggest with square box metal. This bike the HAWK does not have good strong, readily available subframe attachment points that I am confident will most always survive a full fall in a rigid format, part of the reason for entertaining a "flexing system." The attachment to the grab bar is weak in my opinion (aluminum alloy of some sort) Building a strong outer tube system is the easy part. Getting an attachment point that can take the punishment is what I believe is the big issue. Even machine fabricated metal tubing pannier racks take a beating and fail so it is a tough challenge. I appreciate your comments and suggestions. |
|
|
|
04-16-2022, 12:50 PM
|
#34 |
|
Join Date: Dec 2018
Location: PNW
Posts: 982
|
OKO PE28 Backroad carburetor
The team started thinking about a new carburetor for the HAWK last year when the PZ30B was operated at altitude and demonstrated some richness in the tune. No doubt the PZ30B is a great carburetor but has some disadvantages. The backroad performance goals on this team do not include top speed or acceleration. The goals are overall performance on the road, adjustability, consistency, and reliability. Traits that make up a good back road carburetor for the team while considering altitude a factor follow:
1) Performance on the backroad 2) Ease of adjustment with engine running (maintaining performance) 3) Ease of removal for jet changes (maintaining performance) 4) Simplicity 5) Quality of parts (read more expensive) 6) Fitment with existing air filtration The logical choice is the PE28 and the team prefers the OKO PE28 (genuine Taiwanese manufacture). Whether this carburetor can be consistent and reliable on the backroad for this team remains to be proved. Tuning story: The PE 28 was put on last October but another bike project and the weather has hampered getting the tune on. I mean there was barely a few hours of riding window each month to test since October. The PE28 came with a 38 pilot and 115 main. Upon disassembly the surprise…….installed was a non-adjustable Jet Needle stamped with J6ZG. Research indicates the NIBBI PE 30 and now the PE 28FL come with a Jet needle designated J6ZG. Interesting, considering one is made in Taiwan and the other I believe in China. Whether the needles are actually the same size and taper is not known. I have worked on a smaller genuine OKO PE carburetor that has an adjustable needle and I know the OKO PWK 30 has an adjustable needle. Why would OKO use a nonadjustable jet needle? Not because of cost because the OKO PE28 goes for $80 to $90 same as a NIBBI. They must think it works well in this application, but given the issues I have seen tuning the PE style it does unsettle the nerve. The team is working toward standardizing jets based on one manufacture so better comparisons can be made between carburetors. We have purchased many jet kits from amazon, ebay, aliexpress, jets that have a number on them but do they really compare to each other? We started purchasing Jets R US OEM Keihin style jets instead of genuine Keihin jets because they are a little cheaper to use for tuning standardization. This bike is stock except for CAT removal. A 128 main jet was installed, richer than what we believed this bike would eventually use. The 38 pilot was adjusted for best idle at 1 turn out. The 128 had a sharp miss at 3/4 throttle. We assumed it was rich and put in a 125 with the same result, and then a 122, and a 120, and finally a 115, all with the same miss. Ever have a carburetor do what you did not expect? Naaaaaah!! We put in a 130 and the miss was a little better and power better. A 132 got a little better but that was the biggest jet we had on hand. The 135 main arrived last week and in short order we had full pulls in five gears no miss. The carb idles excellent, no hesitations now, and makes good power on top once we got a chance to see it. Ironically, the main jet at 135 is the same size albeit generic jet we installed in the PE30 we tuned. It needs some further testing to confirm but I think we just might be able to get over missing the PZ30B!   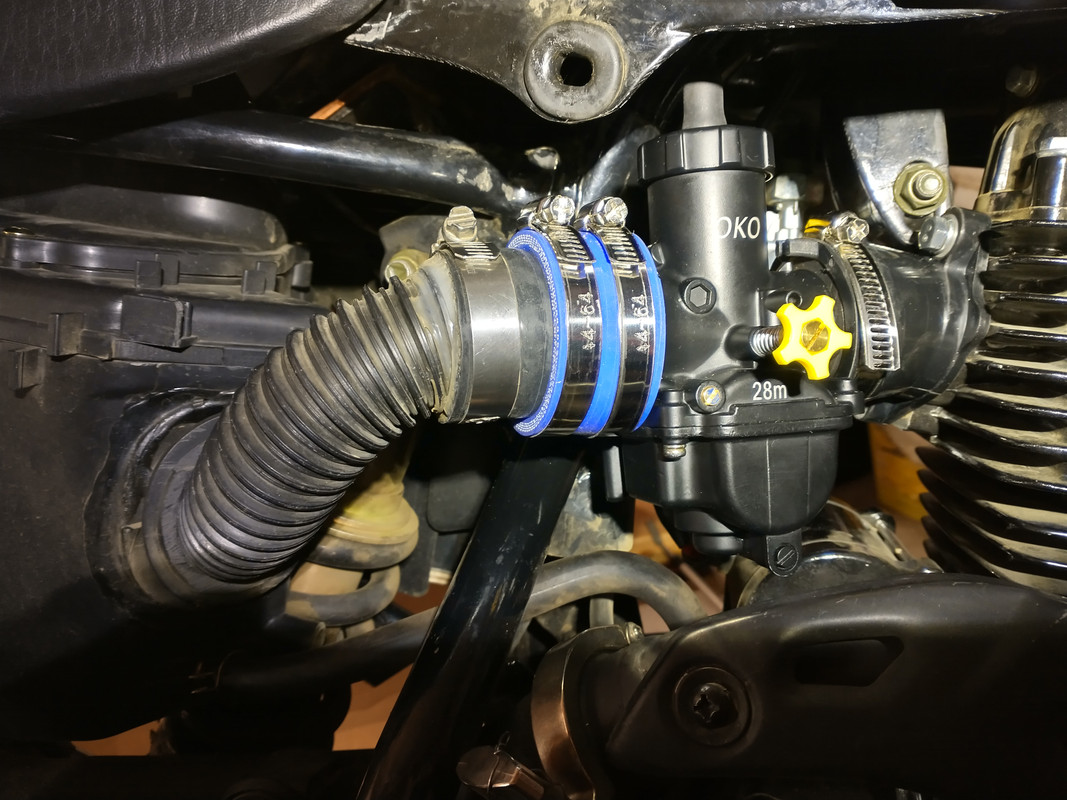
|
|
|
|
04-16-2022, 01:12 PM
|
#35 |

Join Date: Apr 2017
Location: Omaha, NE
Posts: 8,008
|
Do you need an adjustable needle to try? I can send you the needle from my Nibbi PE30 so you can compare them.
__________________
Hawk Information and Resource guide: http://www.chinariders.net/showthread.php?t=20331 2018 Hawk 250 - Full Mod list here. http://www.chinariders.net/showpost....62&postcount=1 2024 Royal Enfield Shotgun 650 https://chinariders.net/showthread.php?t=34124 |
|
|
|
04-16-2022, 01:57 PM
|
#36 |
|
Join Date: Dec 2018
Location: PNW
Posts: 982
|
The needle seems to be working fine there is no hesitation off idle or any hiccups up through to 3/4 throttle since I put in months ago and I have been riding it around checking the main. The issue has been right at 3/4 throttle clearly a main but I just have that one WOT run, it surged a little bit when I rolled off but I think it was loaded up so we'll see. Thanks for the offer! If I need it I will let know. Be nice to compare them to see if they are the same out of curiosity.
|
|
|
|
05-15-2022, 12:58 PM
|
#37 |
|
Join Date: Dec 2018
Location: PNW
Posts: 982
|
hawk battery terminal upgrade
Couple of weeks ago the electric start would not work and just clicked. Battery tested at 12.9 volts. Tried to jump it no go. Thought it was the starter solenoid and I got a new one with the same result. I knew then it must be the two-year-old battery had died despite having been religiously connected to a trickle charger. Two-year warranty, two years to the last day of the month of purchase. Put the new battery in and it fired right up.
As is often the case with these bikes, that replacement and the fact I wanted to add another powered device started the minds working. Connecting the power source wiring to the battery terminal was getting unmanageable. I had purchased some copper 8 gauge (.189 inch) 5/16-inch connectors for some other wiring and had made a ground strap for another bike with it. The CR27 Team they pointed out how you can bend these connectors to get other angles for fitment and they came up with the idea to use them to create a wiring connector by soldering a cut off brass bolt with plumbing solder and a propane torch. Then the ground did not fit right. I had put a big 6-gauge automotive ground wire I got from an auto parts store which worked but did not fit well on the small motorcycle battery terminal. I decided to make my own ground cable for the HAWK using some commercial building stranded wire (copper core diameter 4.64 mm or .173 inch) you can purchase by the foot at Home Depot. The 5/16 connectors fit well on the wire and soldered they provide the best possible electrical connection. To protect the thin plastic sheathing from sunlight, I slid a piece of vacuum hose over it before I shaped it to fit, marked the fitting and attached the opposite end. The battery bolts that come with the battery are too short to work well (but they do work) with these connectors so I purchased some 16mm X 6mm (larger than the previous bolts) longer bolts with lock washers. The battery bolt holes need to be slightly enlarged with a 15/64 drill bit and the positive terminal bolt needed to be shortened so as to not hit the back of the battery terminal when tightened. So it is, one thing leads to another, as the team instills “heavy duty” in the back road bike. Cable end  Battery bolts  Battery connections  Engine connection 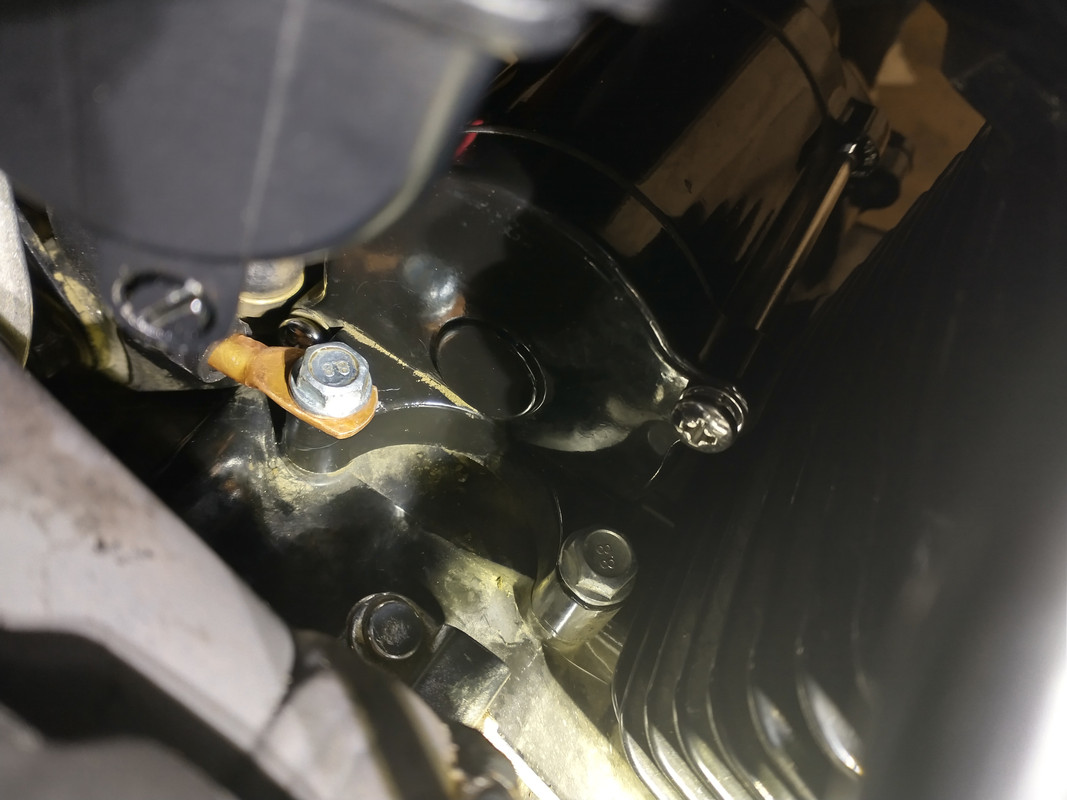
Last edited by China Rider 27; 05-15-2022 at 08:23 PM. |
|
|
|
07-26-2022, 05:18 PM
|
#38 |
|
Join Date: Dec 2018
Location: PNW
Posts: 982
|
Pannier saddlebag rack
The CR27 got after improving the pannier rack a few weeks ago. Group consensus was to create some rails that extended up to the point where the saddlebag makes a 90 degree turn from the seat height. “Round bar bought at Home Depot and some welding fabrication.” It should give it a natural resting place and put the weight squarely on the rack support. A flat piece of metal was welded into the forward middle support to stiffen that support point while strengthening the spring action. A heat shield was fabricated and installed. Initial testing out on some easy riding gravel roads with about 20 lbs on each side showed no issues other than a bolt loosening due to no thread locker.
Rails heat shield  Rack in painting  Finished rack 
|
|
|
|
07-26-2022, 07:09 PM
|
#39 |
|
Join Date: Apr 2017
Location: Omaha, NE
Posts: 8,008
|
I love how those racks turned out, and it looks well thought out if you want to remove it, just a couple bolts in certain spots and it would come off in no time.
__________________
Hawk Information and Resource guide: http://www.chinariders.net/showthread.php?t=20331 2018 Hawk 250 - Full Mod list here. http://www.chinariders.net/showpost....62&postcount=1 2024 Royal Enfield Shotgun 650 https://chinariders.net/showthread.php?t=34124 |
|
|
|
07-26-2022, 07:36 PM
|
#40 |
|
Join Date: Dec 2018
Location: PNW
Posts: 982
|
Originally, I thought I would hold it together with bolts and then weld it but as I worked with it, I realized that there was not that much to be gained by welding and as it is all put together with bolts and lock washers it can be taken apart and fixed if need be. The Team is on the right track with a thumbs up from you and Jerry! Ha, Hah.
|
|
|
|
07-27-2022, 10:56 AM
|
#42 |
|
Join Date: Dec 2018
Location: PNW
Posts: 982
|
Backroad development
Other posts on this bike with backroad development.
520 chain install http://www.chinariders.net/showthread.php?t=23857 Oil cooler install http://www.chinariders.net/showthread.php?t=27901 Fork valves http://www.chinariders.net/showpost....5&postcount=50 |
|
|
|
07-27-2022, 11:15 AM
|
#43 |
|
Join Date: Dec 2018
Location: PNW
Posts: 982
|
HAWK tube replacement
The Team was preparing for an upcoming Back Road ride and decided to replace the stock tubes with heavy duty tubes and new rim strips. The tires still have some good tread and I have had no problem riding the stock HAWK knobby on or off pavement with good traction so they go back on til worn. Several places on both front and rear rims you could see some wear through of the rim strip and when changing tires on the X-Pect the other day there was a misaligned strip section where the nipples were riding on the tube for about 12 inches. The stock tubes looked to be in pretty good shape.
Food for thought when considering riding back deep in and we were glad we changed them out.  Credit for riding the HAWK stock knobby tires goes to………….. http://www.chinariders.net/showthread.php?t=23589 |
|
|
|
07-27-2022, 11:36 AM
|
#44 |
|
Moderator

Join Date: Oct 2016
Location: Houma, La.
Posts: 11,556
|
Ditch the rim tape and wrap with gorilla tape.
__________________
2023 Lifan Lycan 250 Chopper 2023 Venom Evader 2022 Lifan KPX250 2020 Kawasaki Vulcan S 2004 Honda ST 1300 2016 Black Hawk 250 (sold) Keihin PE30 carb,125 main,38 slow.Pod filter,ported & decked head 10:1 CR,Direct Ignition Coil,15/40Sprockets,NGK DPR8EIX-9,De-Cat,Dual Oil Cooler,Digital Cluster 2016 Cazador180 XL 2014 Coolster150 JerryHawk250.com My YouTube Channel |
|
|
|
07-27-2022, 12:11 PM
|
#45 |
|
Join Date: Dec 2018
Location: PNW
Posts: 982
|
Rim tape
I put a wrap of electrician tape on before the rim strips but I will try that next time. Hey, the team thought a good title for that Ride video with the HAWK Knobby, "Hang on Grandma, while I wring the HAWK out! Ha, Hah, hah

|
|
|
|
|

|
 |
|
|


 Linear Mode

