|
|
#211 |
|
Join Date: Jun 2012
Posts: 220
|
Still accumulating stuff, no time to work on it due to having some paying jobs i need to finish first. We are at 1 month wait on the cage/tubs, maybe i will get lucky and get it next week.
Quick recap, on the to-do list: 10 point chromoly cage with swingouts, rear wheel tubs, rear mount battery/box, 5 point harnesses, custom parachute mount. Also, I been looking at the RSM tubular front end kit. I like it, but i think I could make it and save $600. However, the wiring on the front of the car would need to be redone for it to look nice. Im considering moving the fuse boxes and all available wiring to under the dash. IF that happens, I may go straight from this into a tubular front end setup. If Im rewiring the heavy gauge wire for the battery, and the dash is out, its a perfect time to explore these options.. Wouldnt mind the PCM inside the car too for a cleaner look......Hmmm This is the initial buy, 25ft 2g black and 25ft 2g red, 20ft 4g red. 20 piece 2g terminals, local store battery. Will add stuff as needed as I lay the wire out in the car. 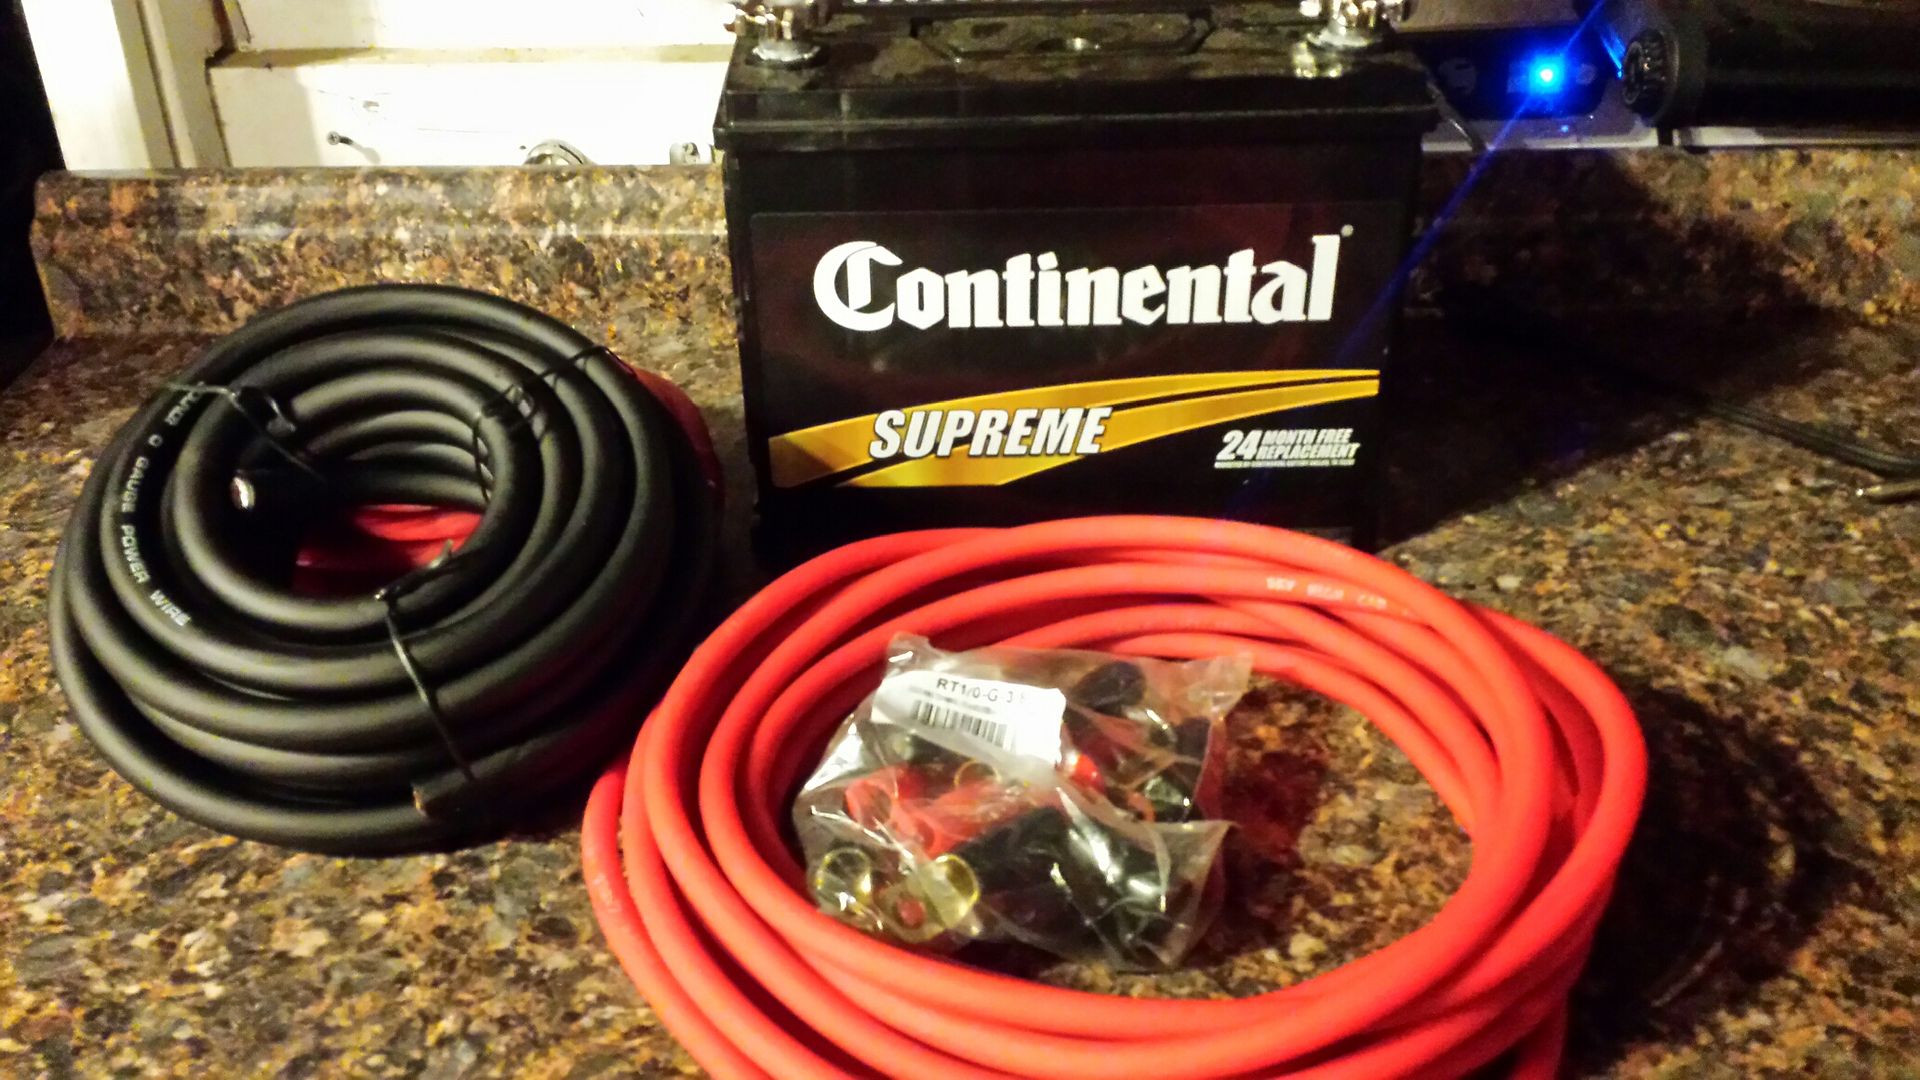 Battery size, fits the box like a glove. 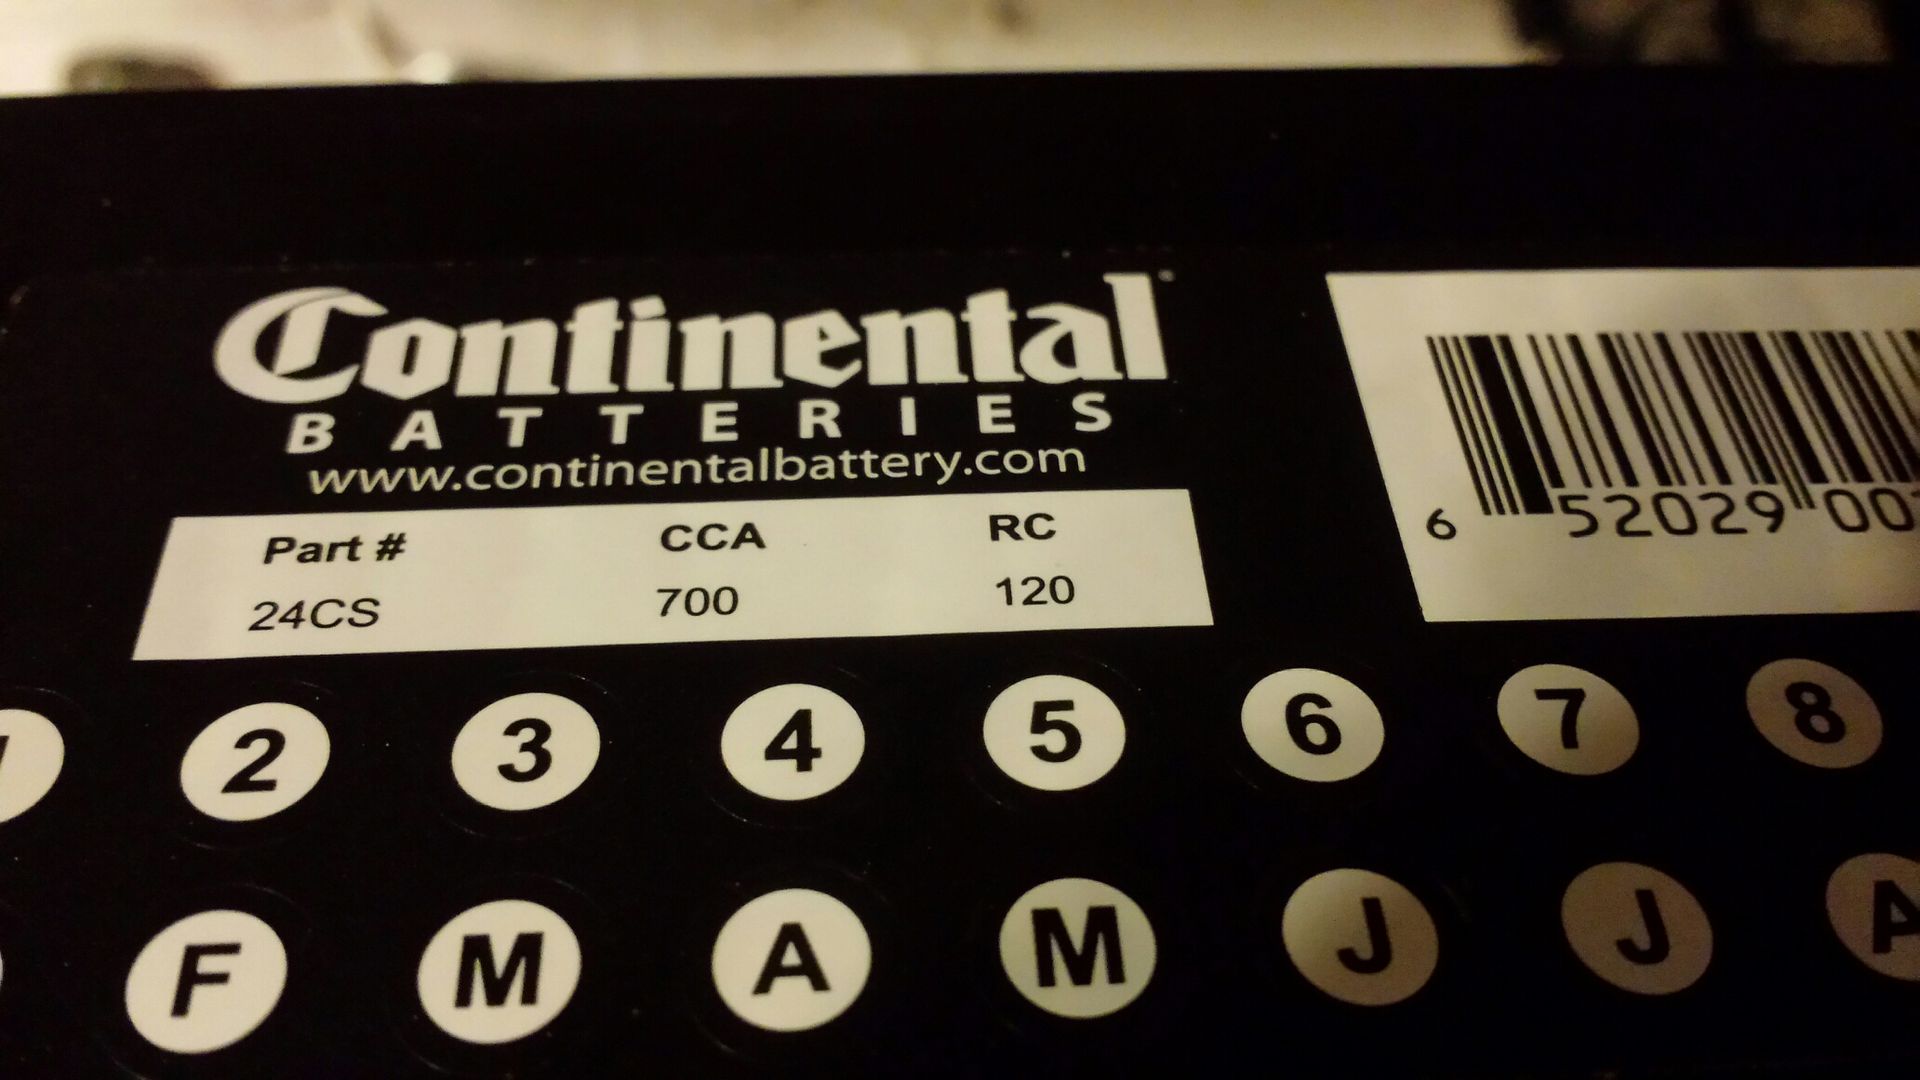 Some roll cage gussets. Not sure why i bought these, and dont know where I'm gonna put them, will figure it out once the cage is in. These measure 4"x4". 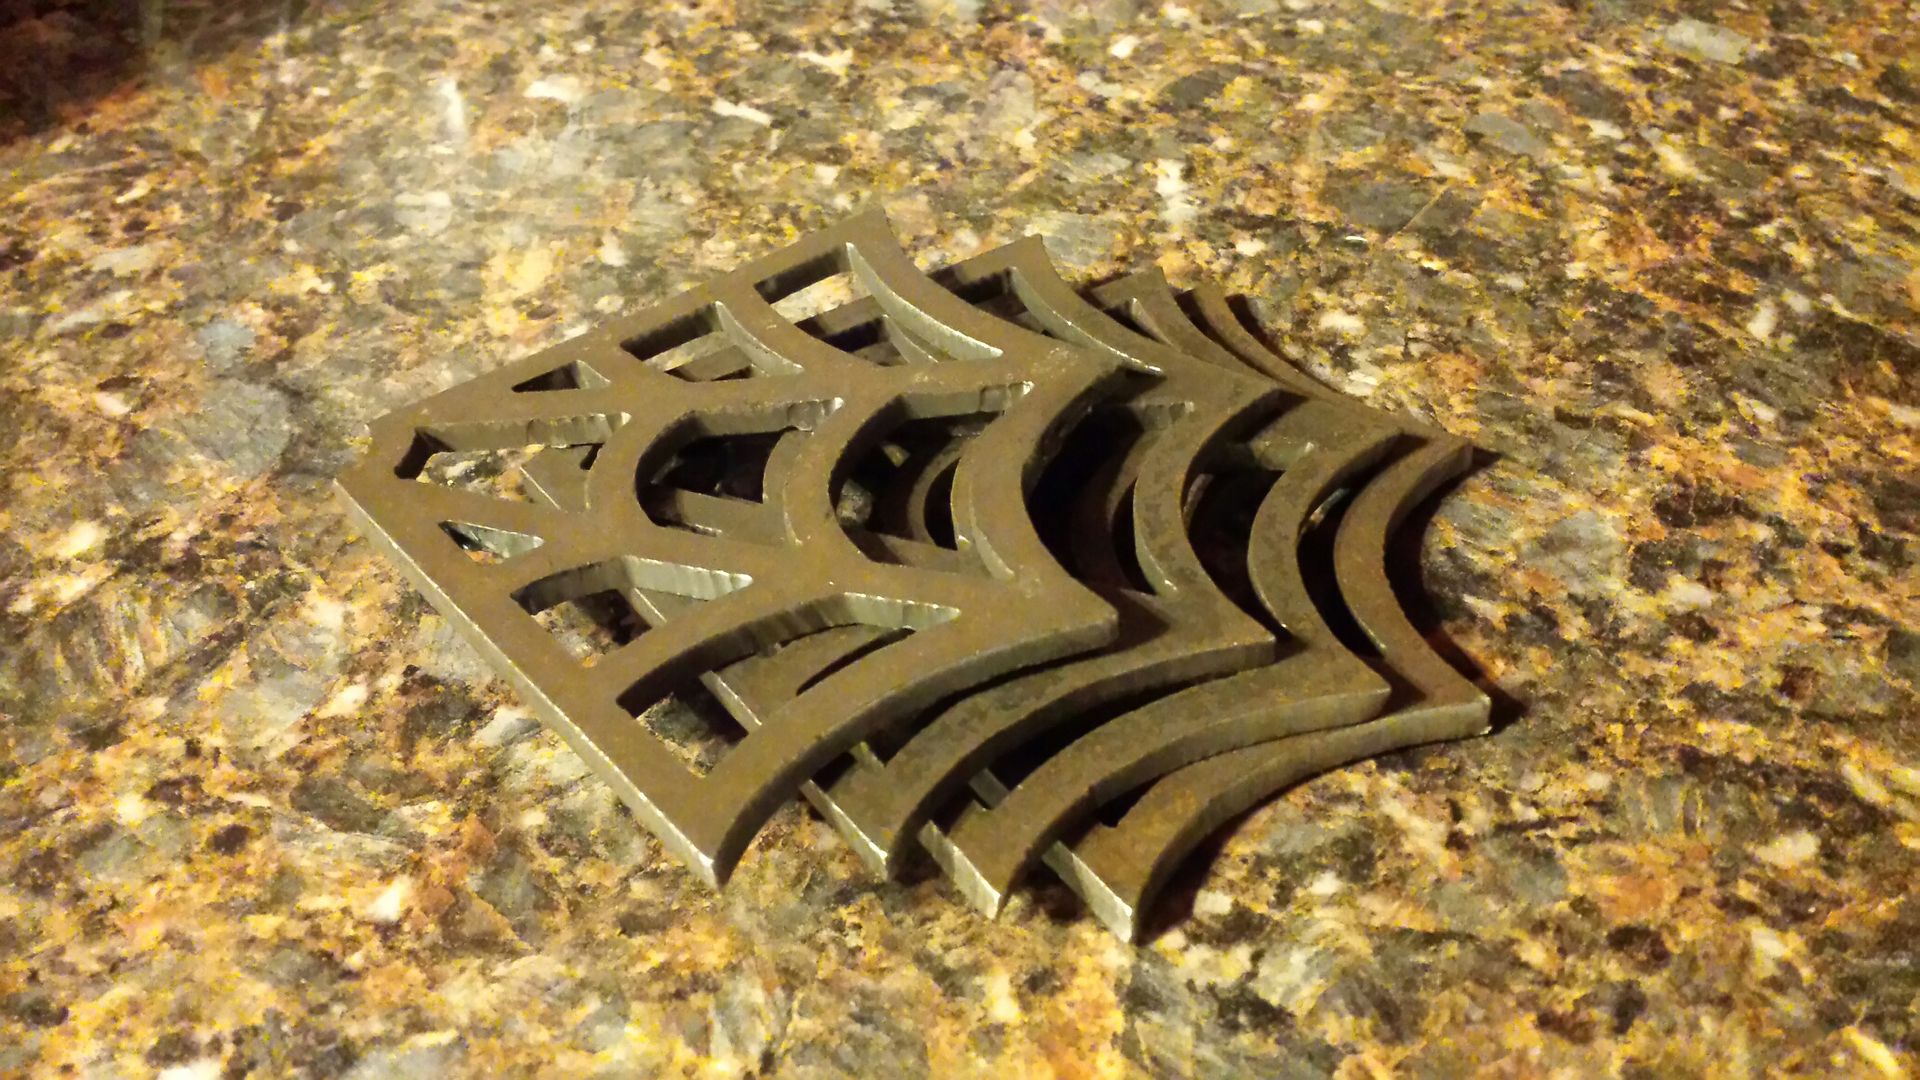 Figured I'd step up my wiring game some so I bought this. Biggest available bulkhead weather pack Ive found is 22 wires. My plan is to hook up the big battery, pull all fuses under the hood i dont "think" i need, then check to make sure everything works (lights, engine runs, door locks, hatch pops, etc). Once i get down to only the circuits i need, I can count how many wires need to be moved/extended and how many can be deleted to give me an idea of the difficulty level of this job. What I would really like is maybe to trim the rear side of the glovebox door off (basically make it a flat swingout panel), then make it when you open the door the fuse blocks are there to service. Will look more into that later. 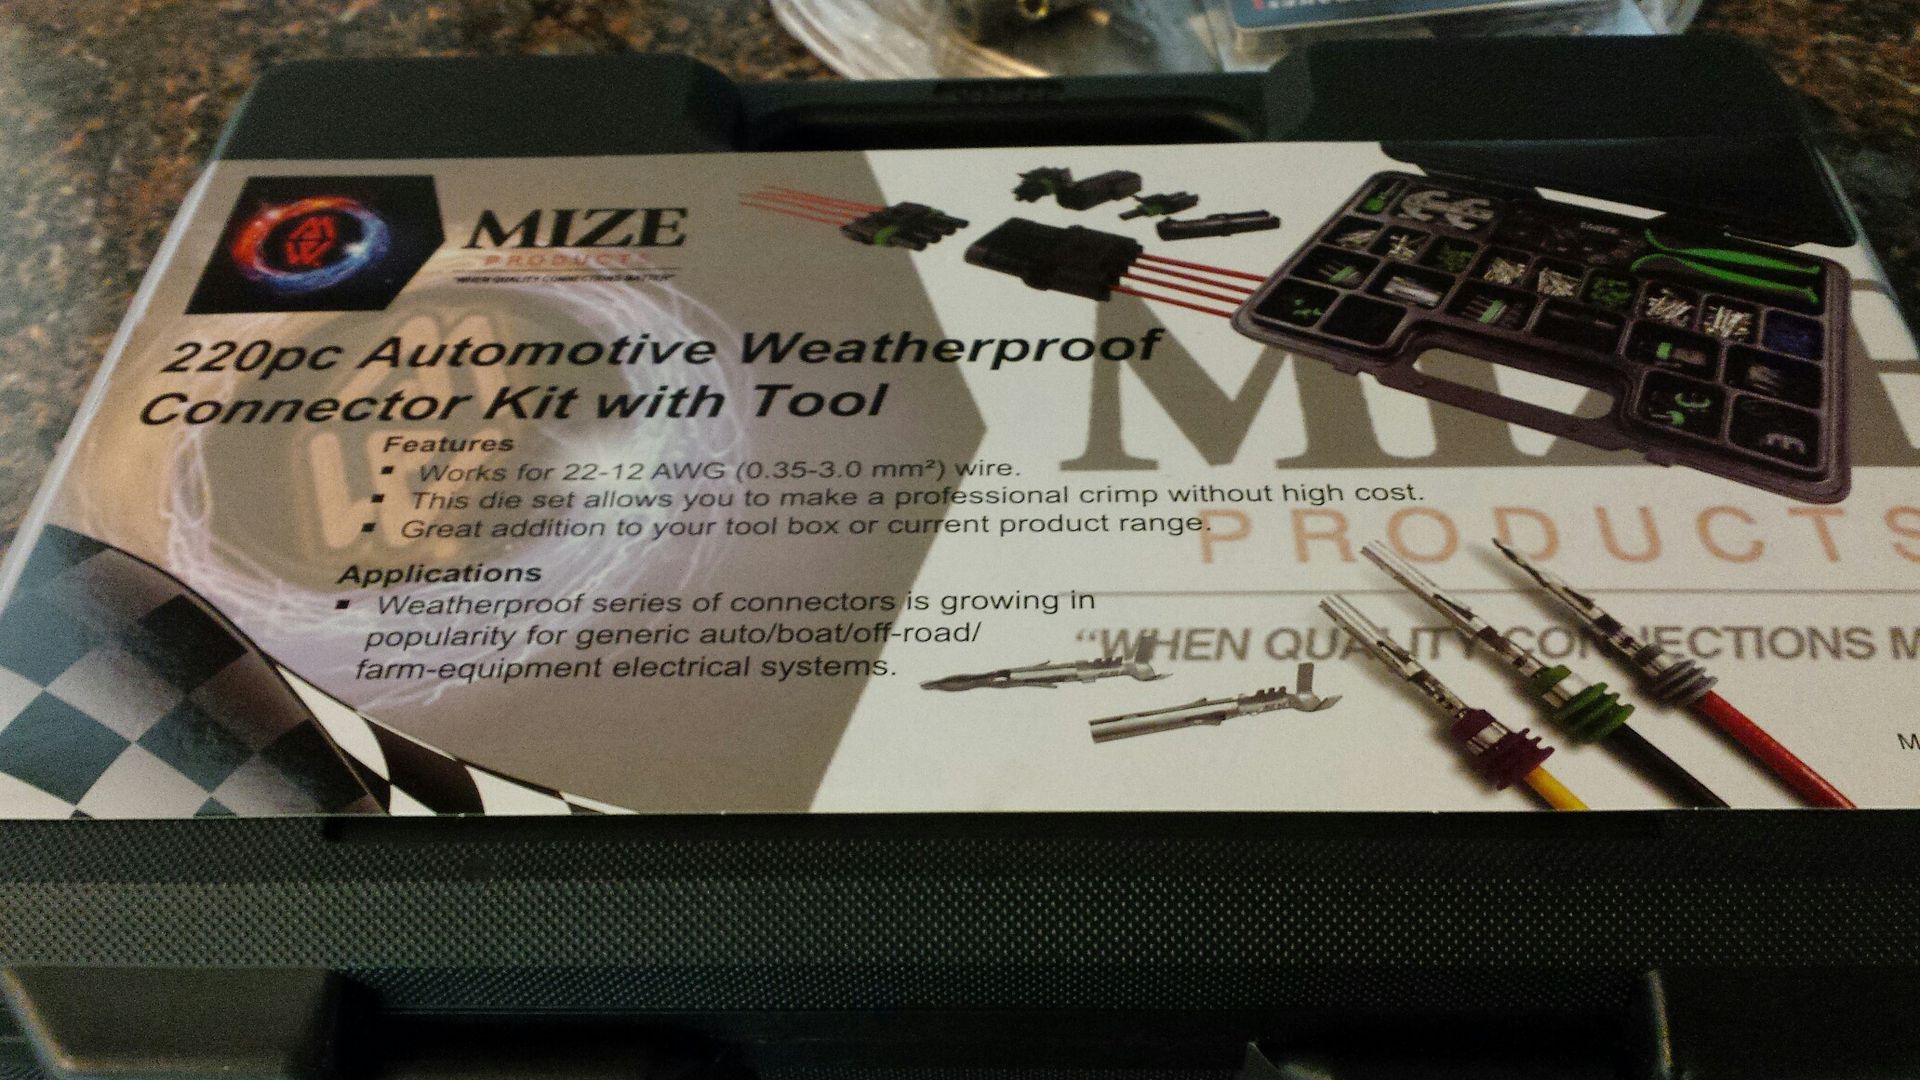 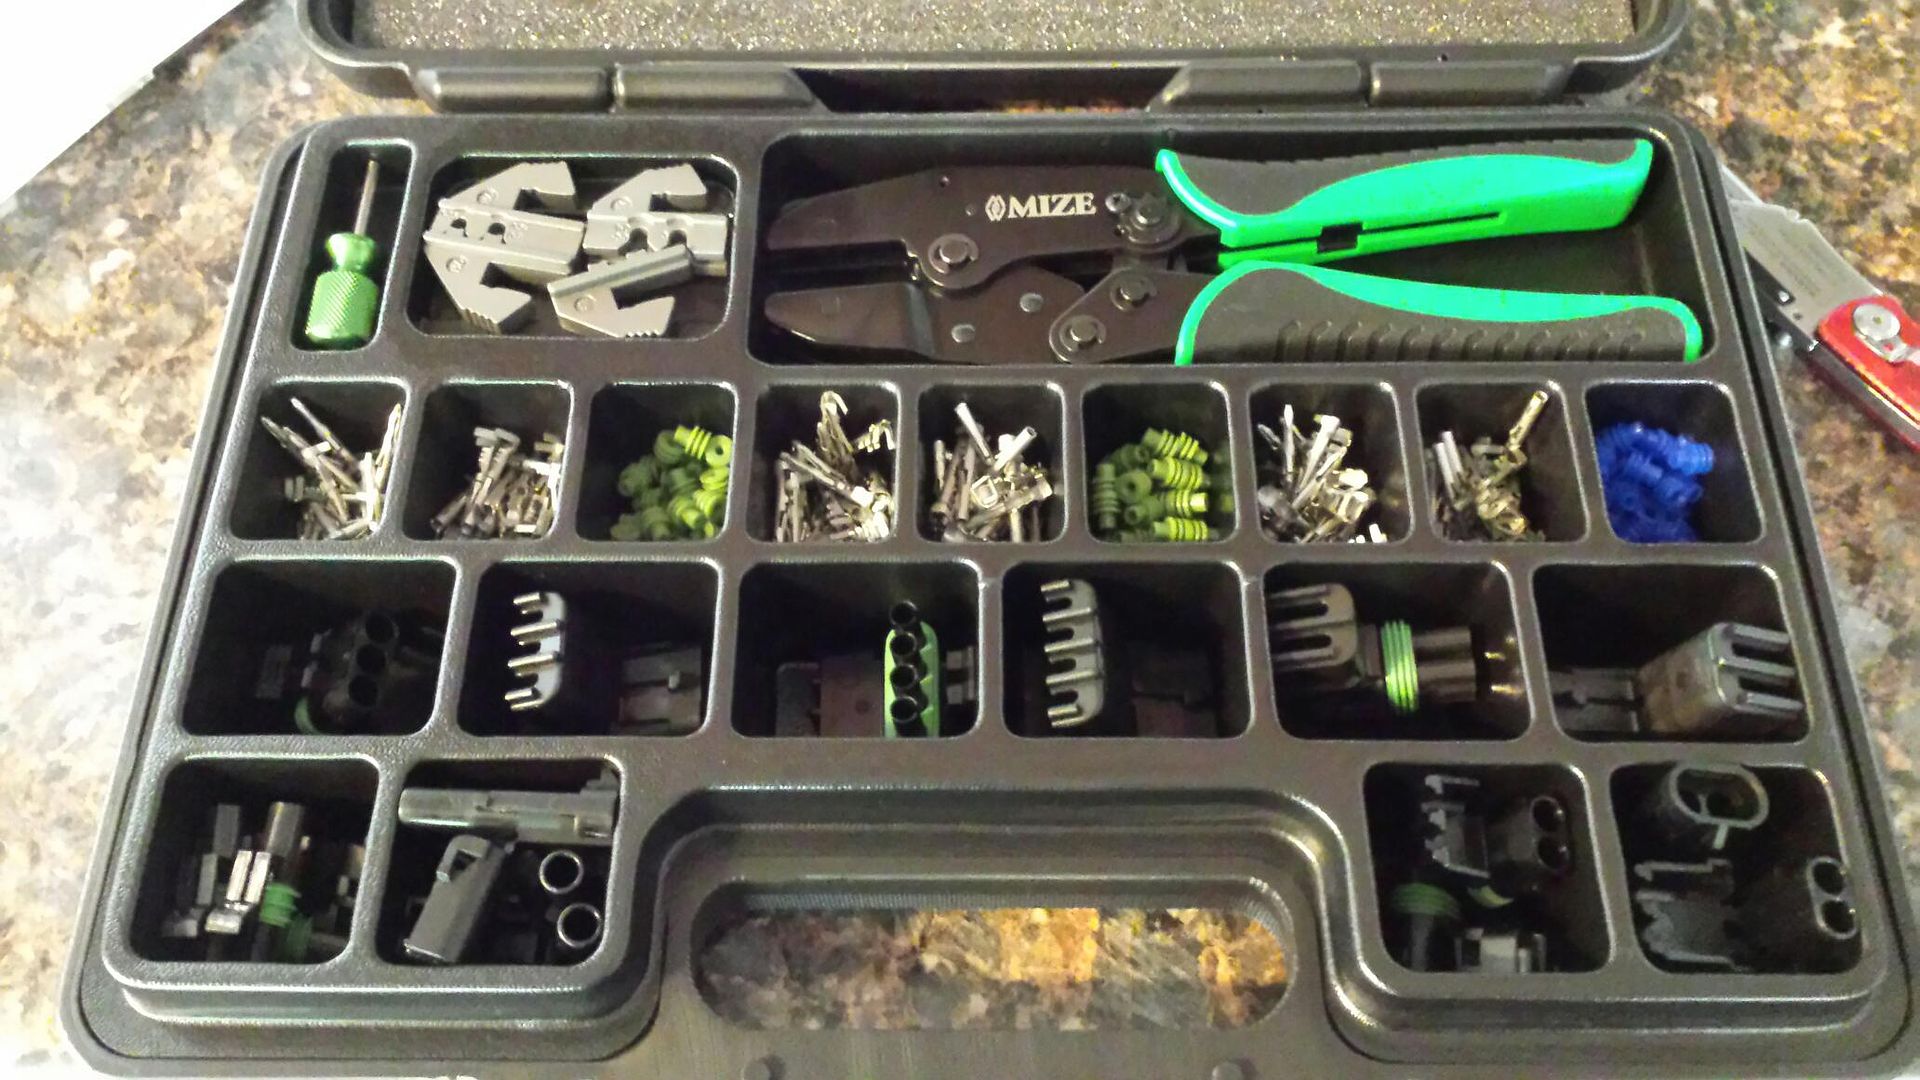 I think the very first thing Im gonna tackle is the chute mount and battery cutoff switch in the rear of the car. Its about the only part of this project thats not intertwined with some other part.
__________________
06 Foreman 500 - 29.5 OG Outlaws, 35%, Warn 2.5k, HL^2", <2.5">, EPI, HMF 95 Fourtrax 300 - 27" Zillas, SS212s , Viper 3k, HL^2" 04 XR80 - Stock 07 CRF50 - Stock |

|
|
|
#212 | |
|
Join Date: Jan 2015
Location: Lloydminster Saskatchewan
Posts: 995
|
Definitely watching this with interest as i may end up building my '69 C10 into a street/strip truck.So any of this tech stuff will def help me with ideas for that.
__________________
Past bikes: '10 Gio X33 '85 Honda VF750F Interceptor '80 Honda XL185S '76 Yamaha DT250C dual sport Baja Wilderness Trail 250 '07 Honda Shadow 750 Areo Trike '01 Harley Davidson Softail Deuce Polaris Magnum 425 4x4 Quote:
|
|

|
|
|
#213 |
|
Join Date: Feb 2016
Location: George West, Texas
Posts: 4,097
|
And now im worried about your bank account, sorry, just wired like that (nice connector kit).
__________________
***************************************** 2015 Bashan"Blaze" BS250GY-31 (DB-07K-250) GONE 2017 Suzuki V Strom 650 XT "We are all born ignorant, but one must work hard to remain stupid." ~Benjamin Franklin~
|

|
|
|
#214 |
|
Join Date: Jun 2012
Posts: 220
|
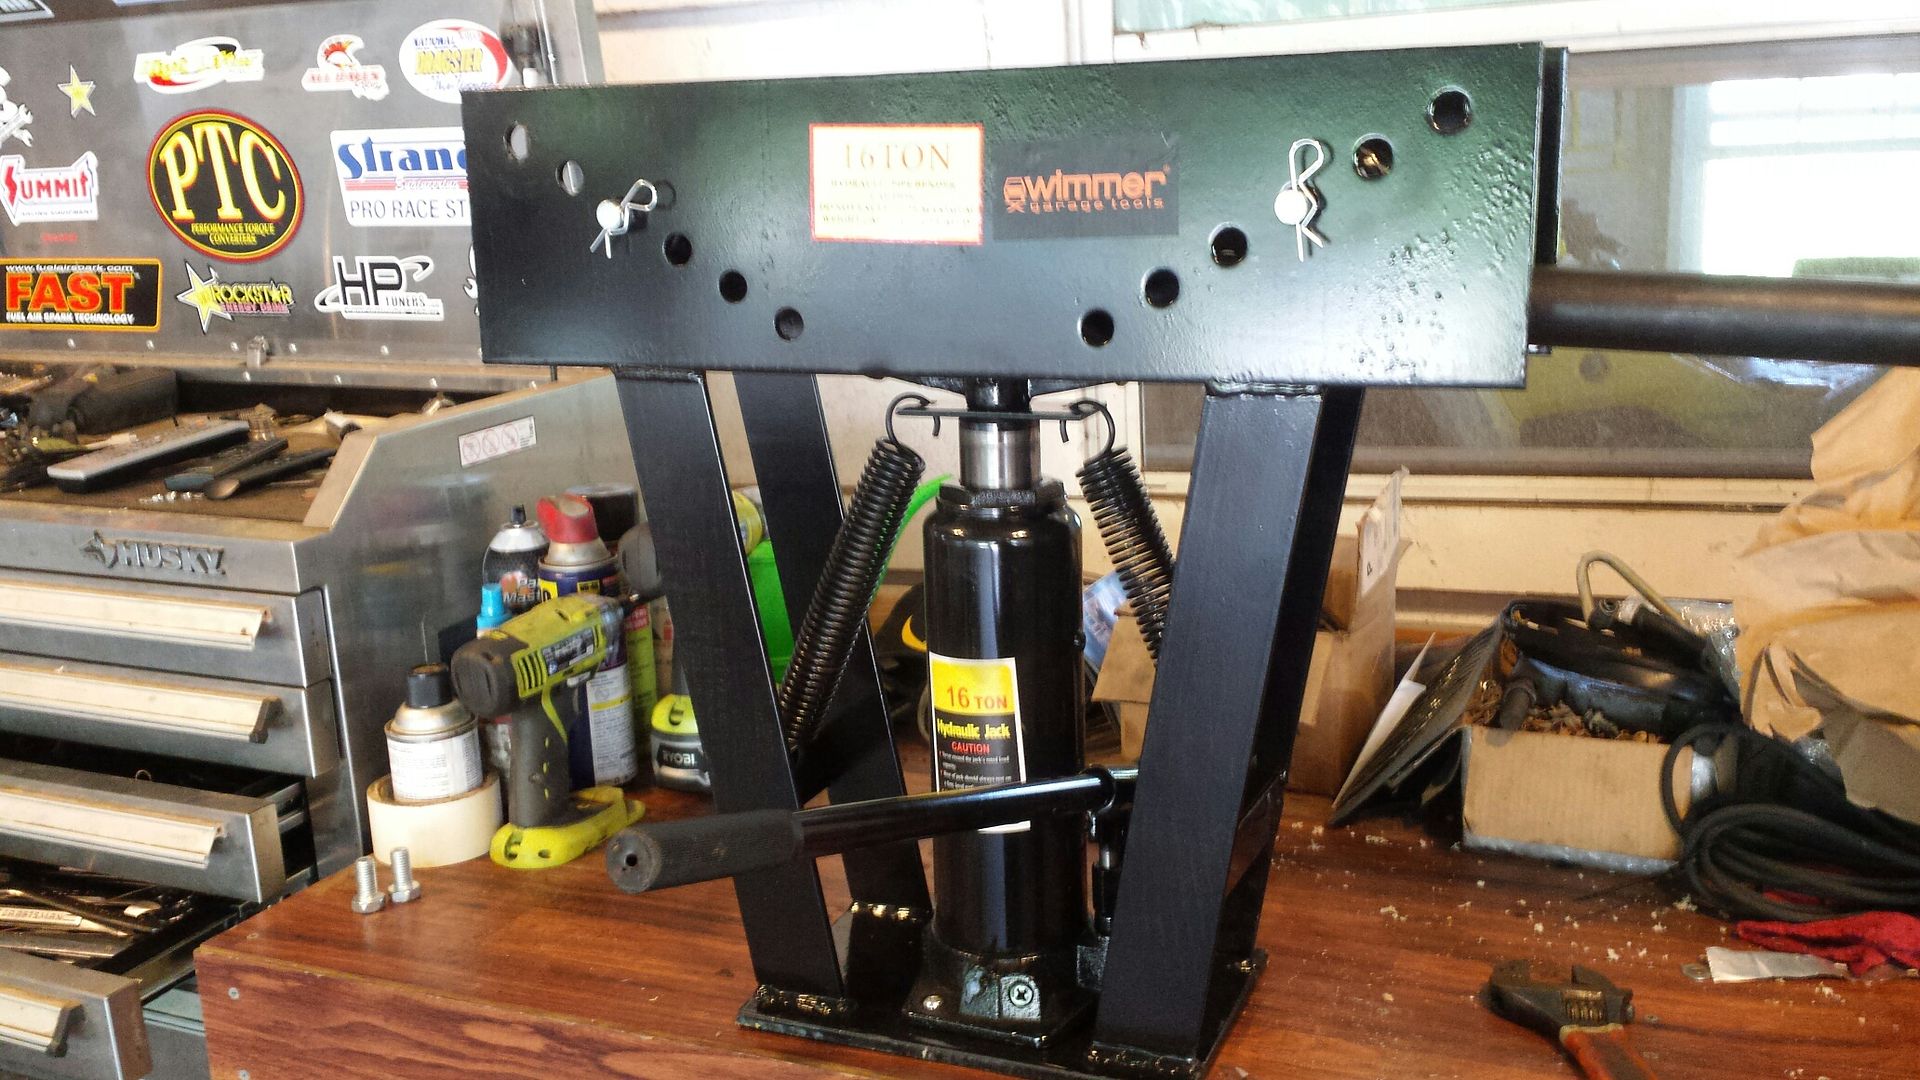
New toy:
 Took my 6x6 plates and drilled holes: 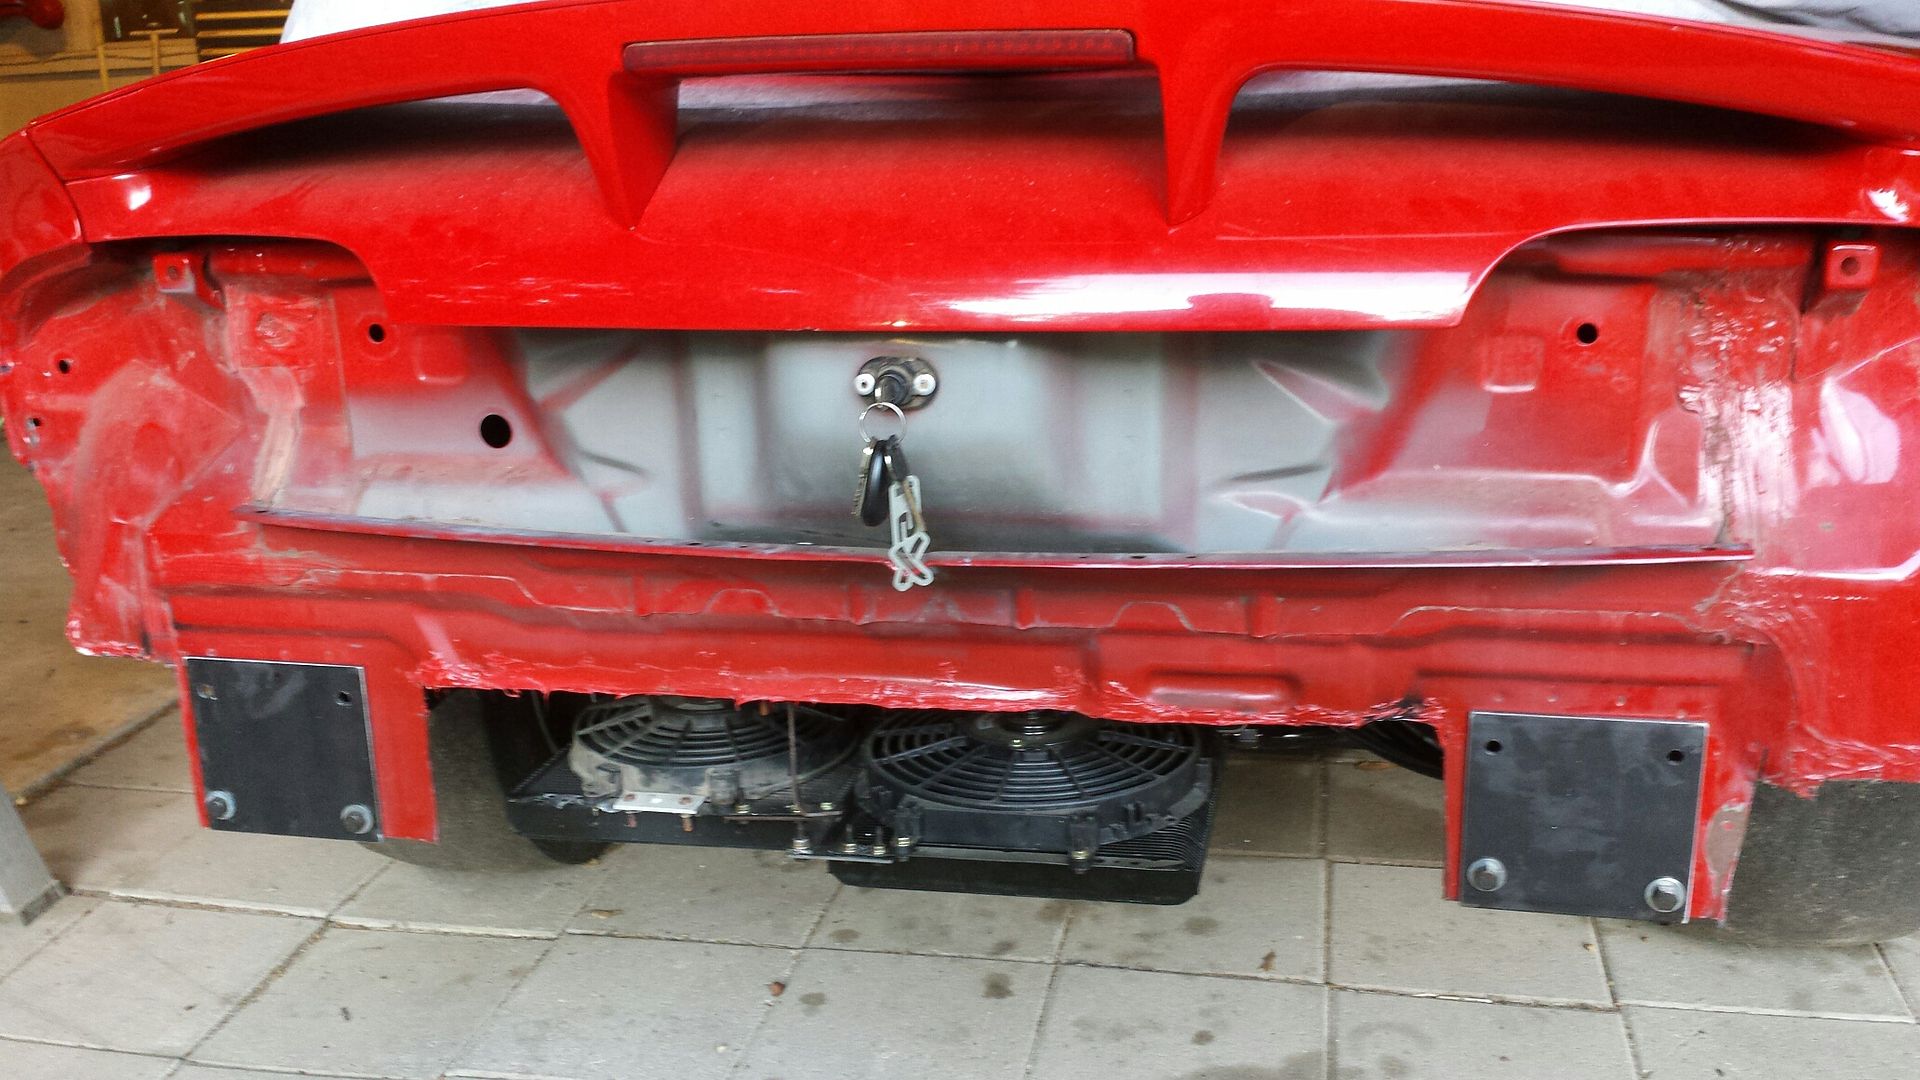 Needed about 45" of pipe. The old driver door bar needed just a little trimmed off. 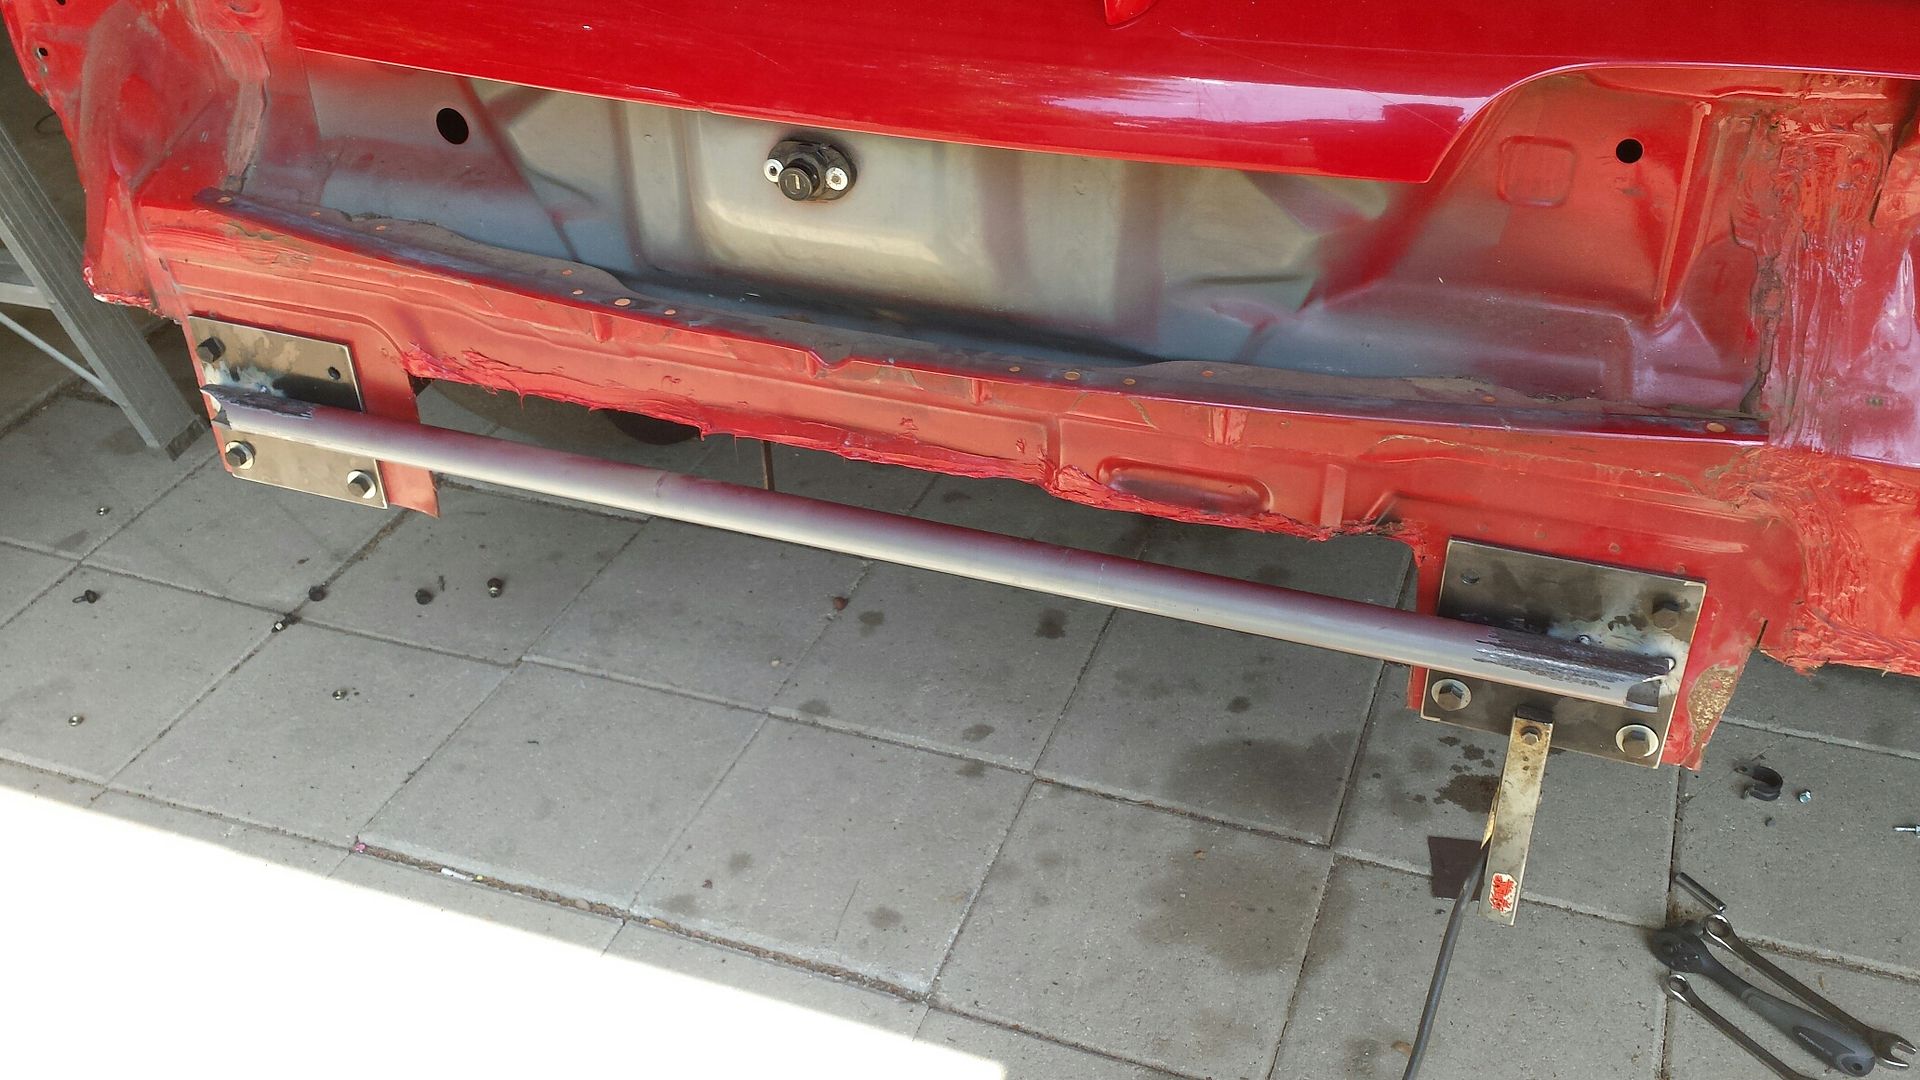 Plan to add some gussets and do powder coat this week coming up. 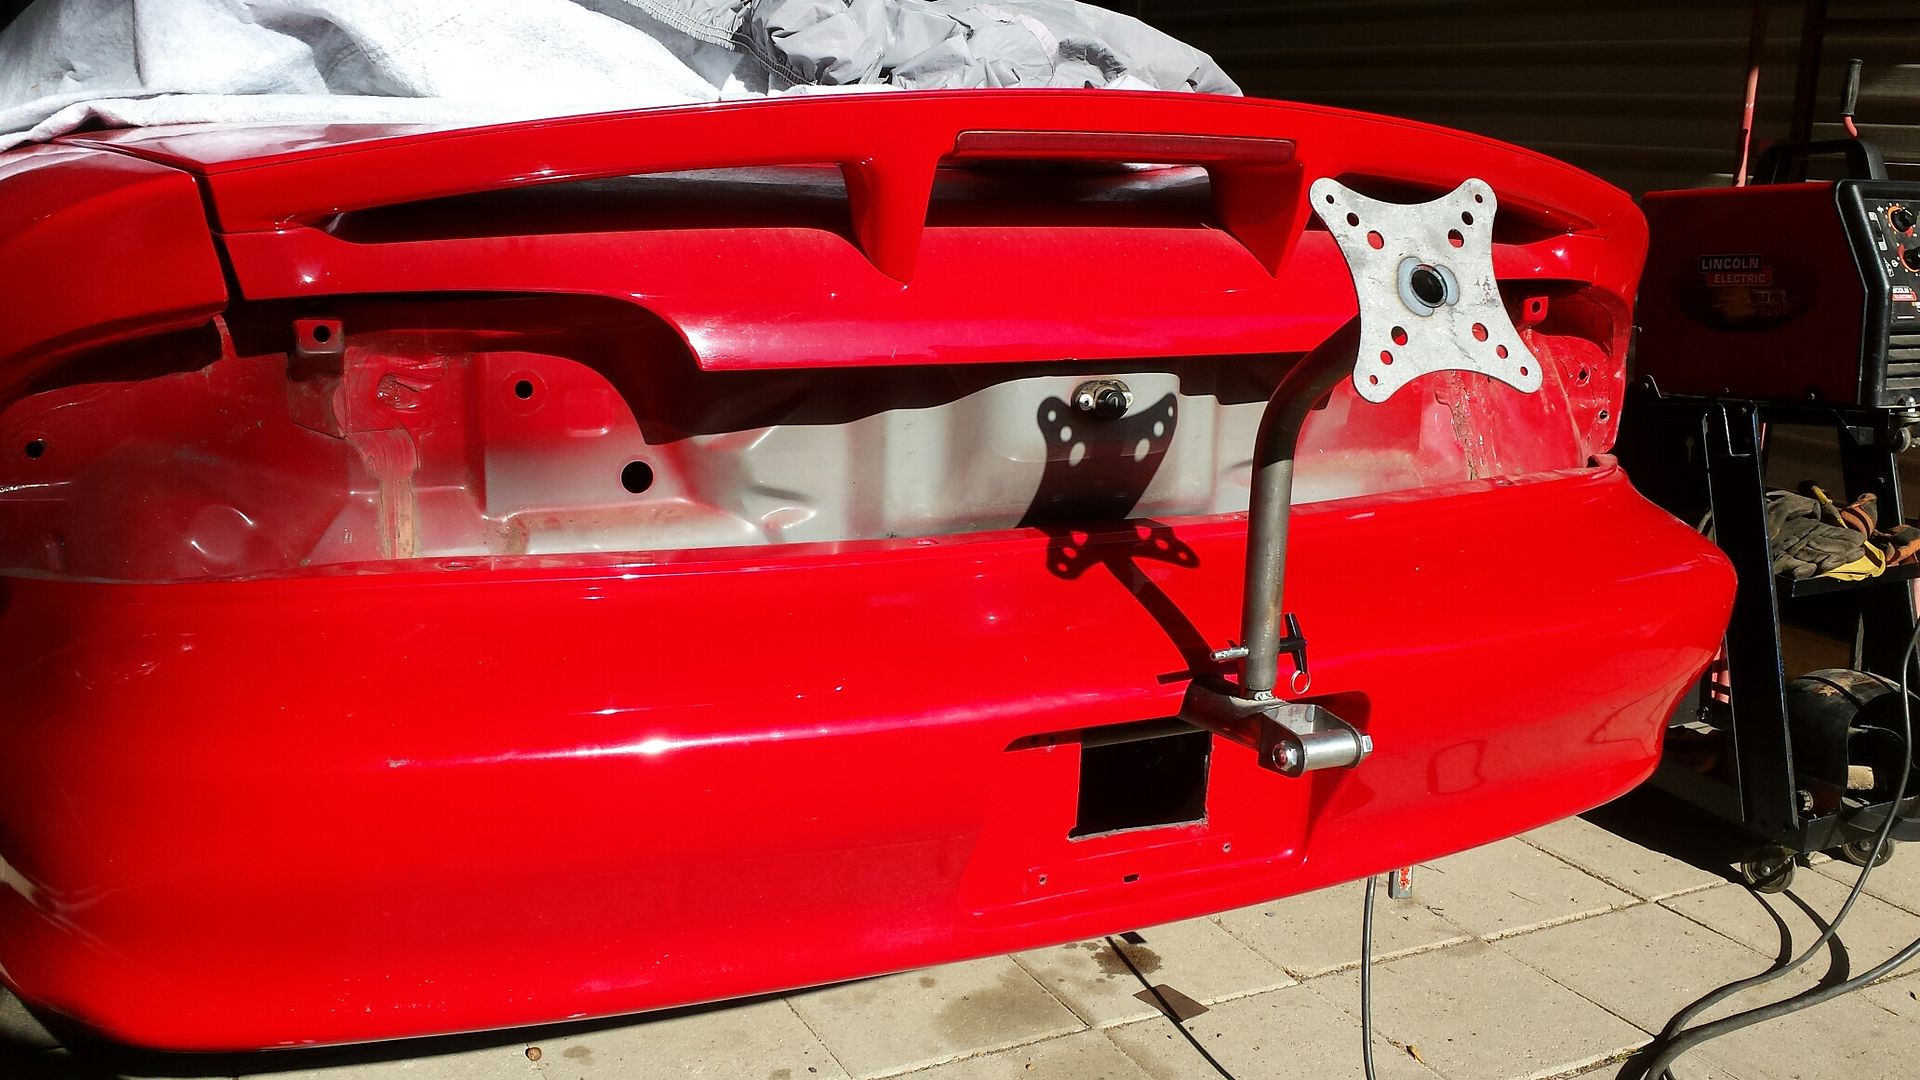 Test fit.... 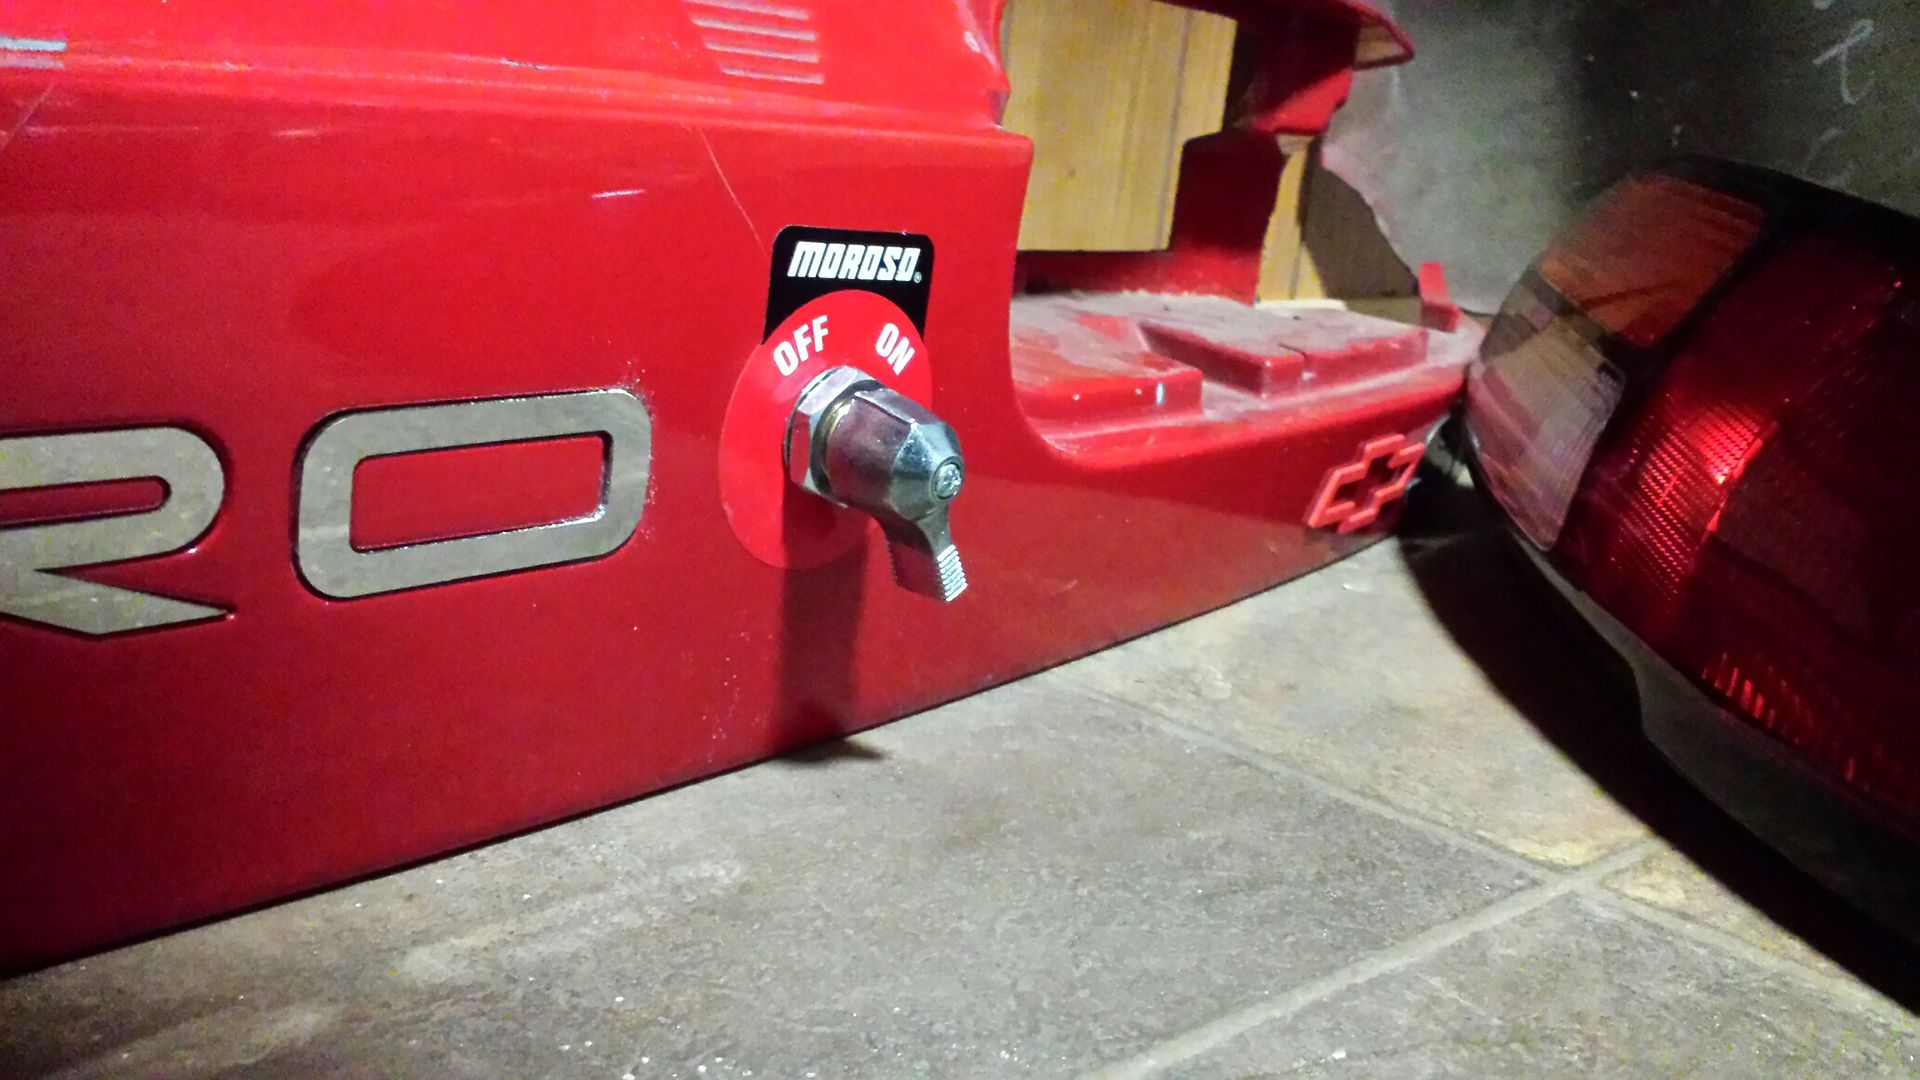
__________________
06 Foreman 500 - 29.5 OG Outlaws, 35%, Warn 2.5k, HL^2", <2.5">, EPI, HMF 95 Fourtrax 300 - 27" Zillas, SS212s , Viper 3k, HL^2" 04 XR80 - Stock 07 CRF50 - Stock |

|
|
|
#215 |
|
Join Date: Jun 2012
Posts: 220
|
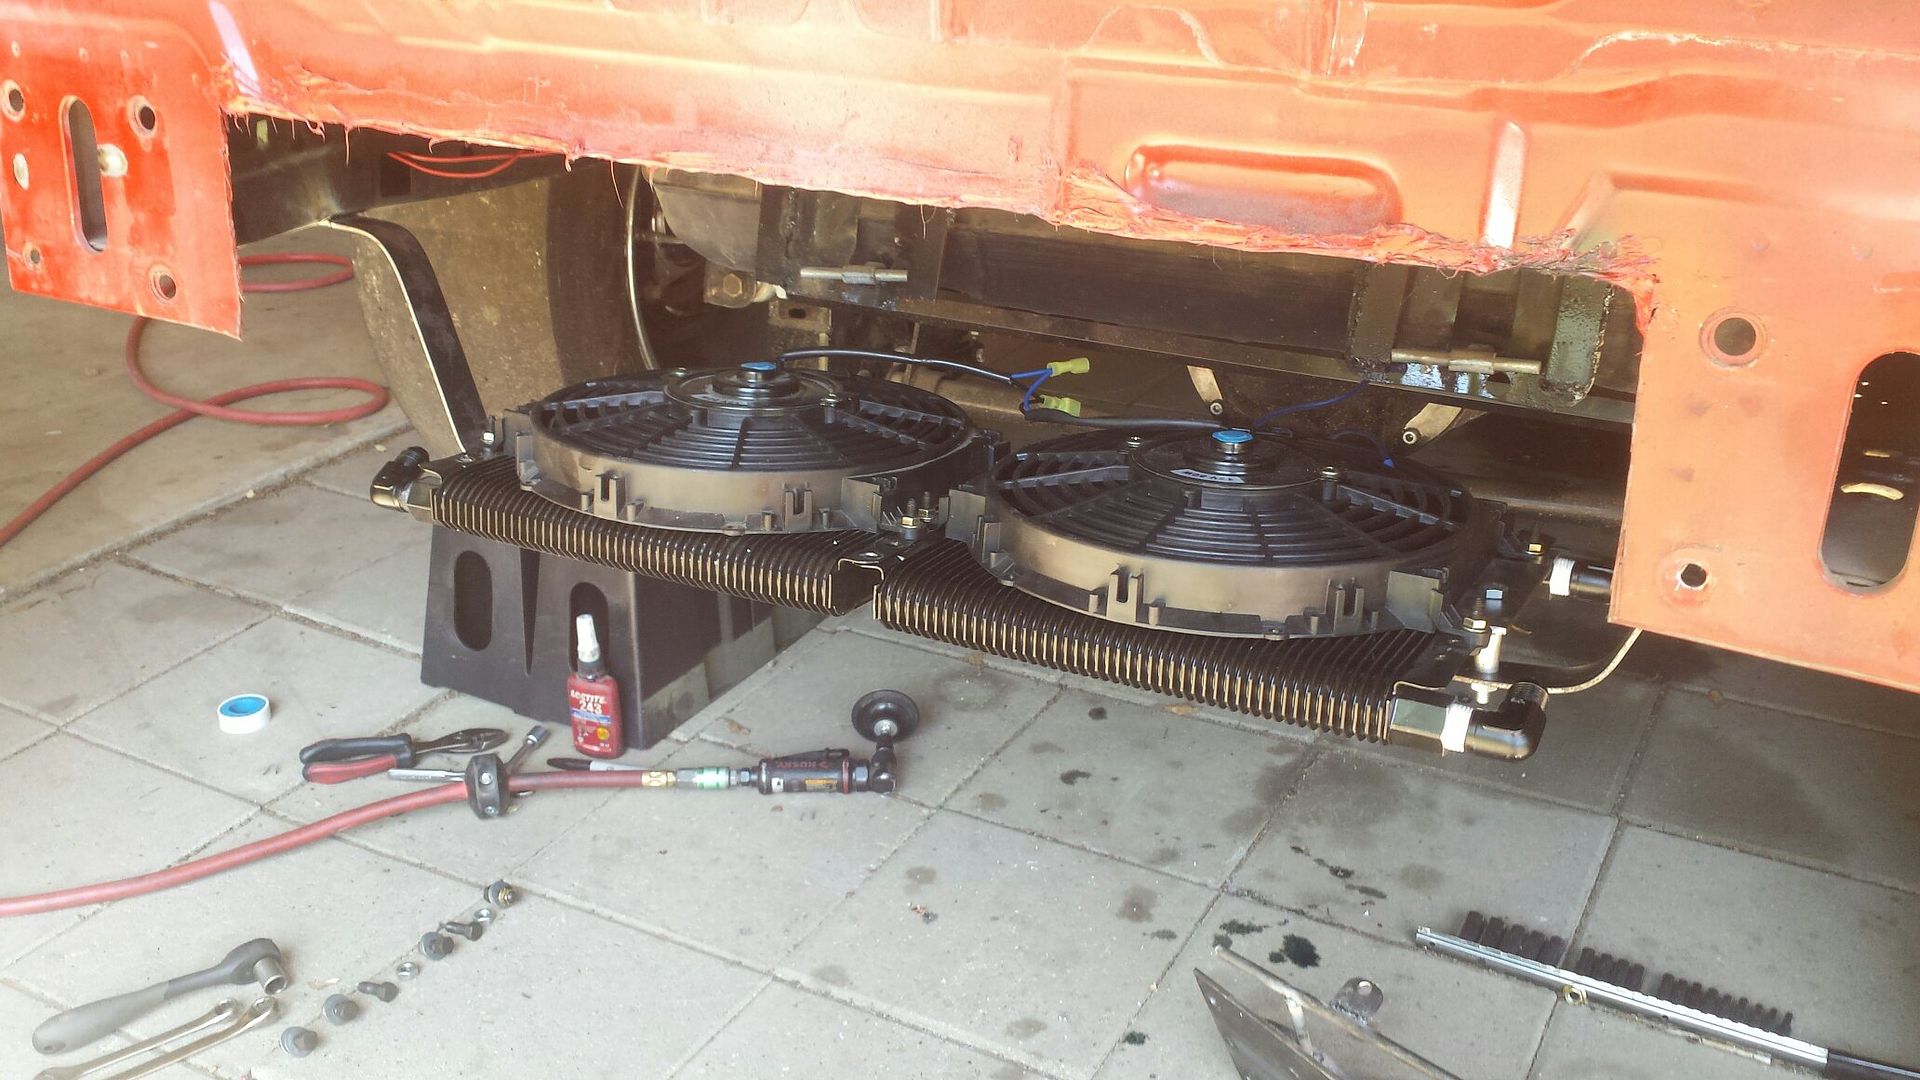
Removed the mismatched coolers and added a second matching cooler, all new brackets, and got lucky and only had to modify one AN line even though i changed their orientation.
 Getting closer. 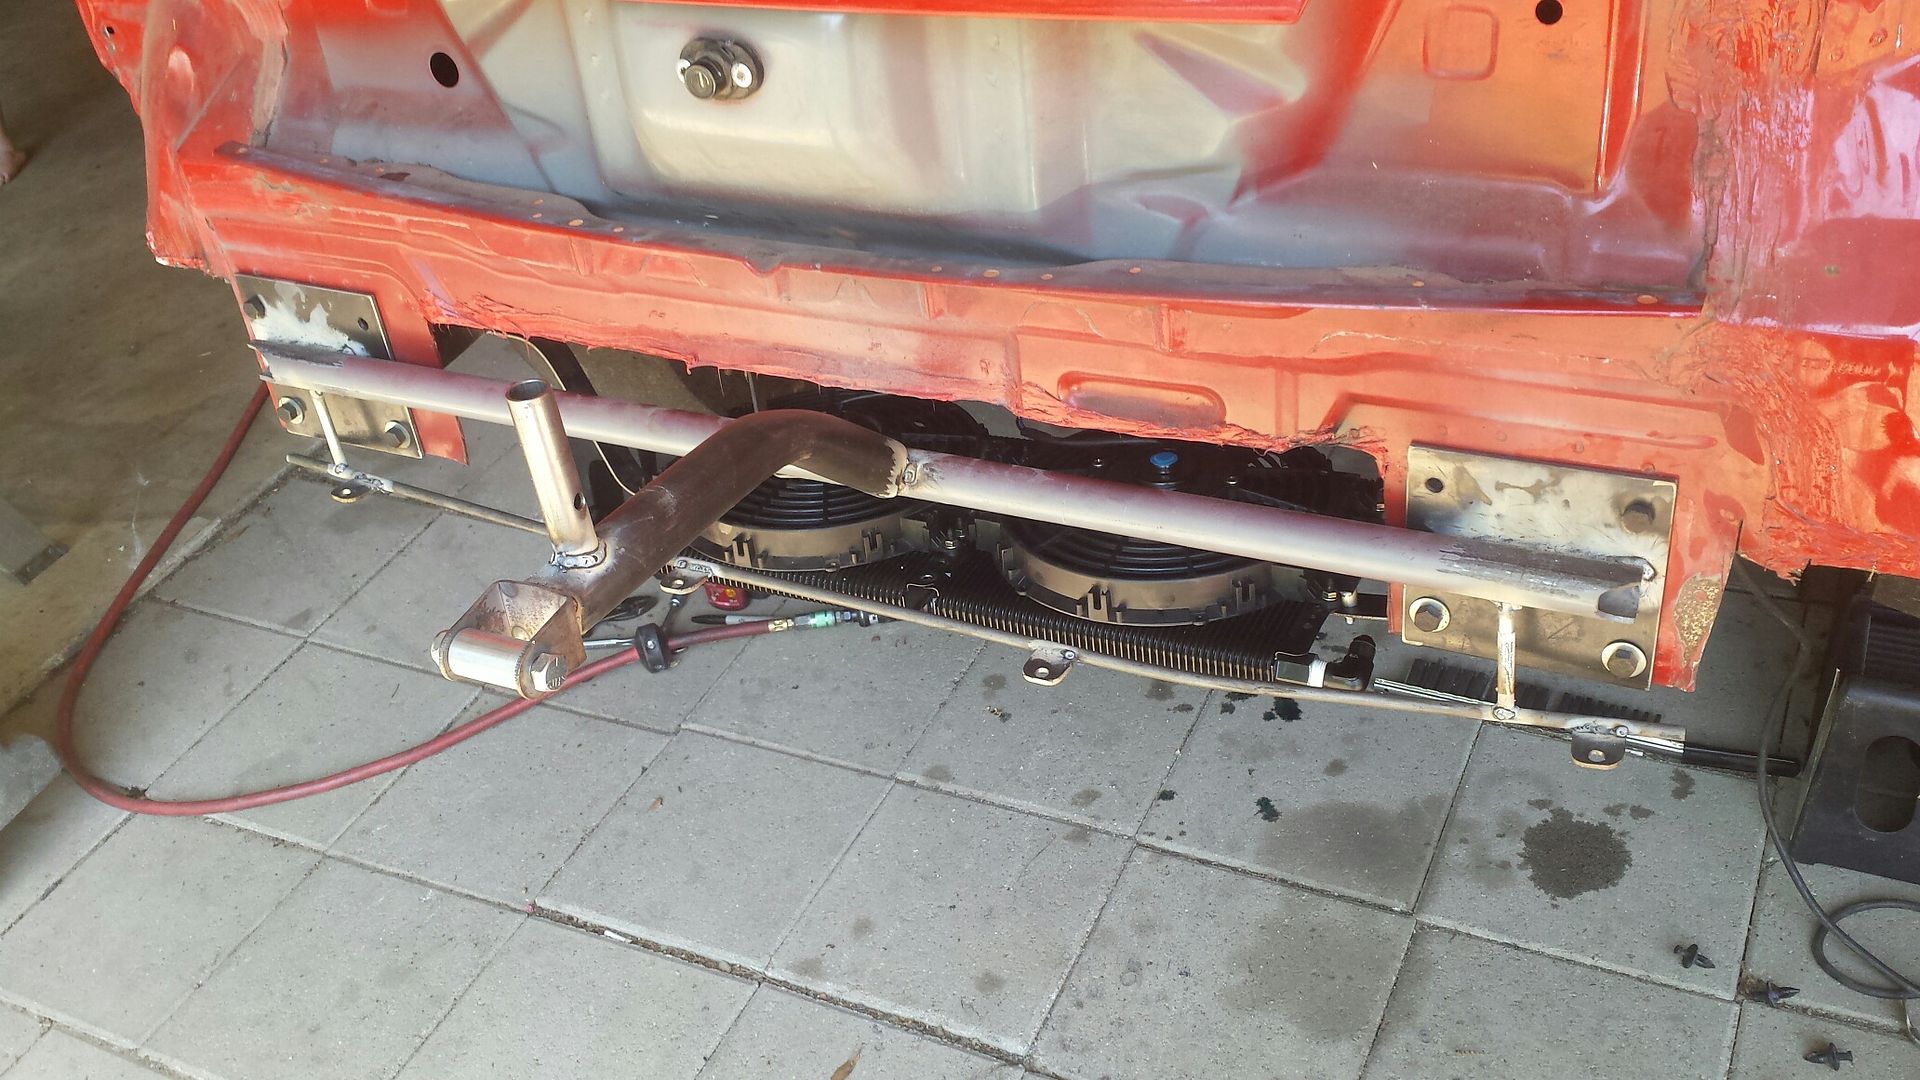 Added some cross bracing and its off to the powder coat shop. 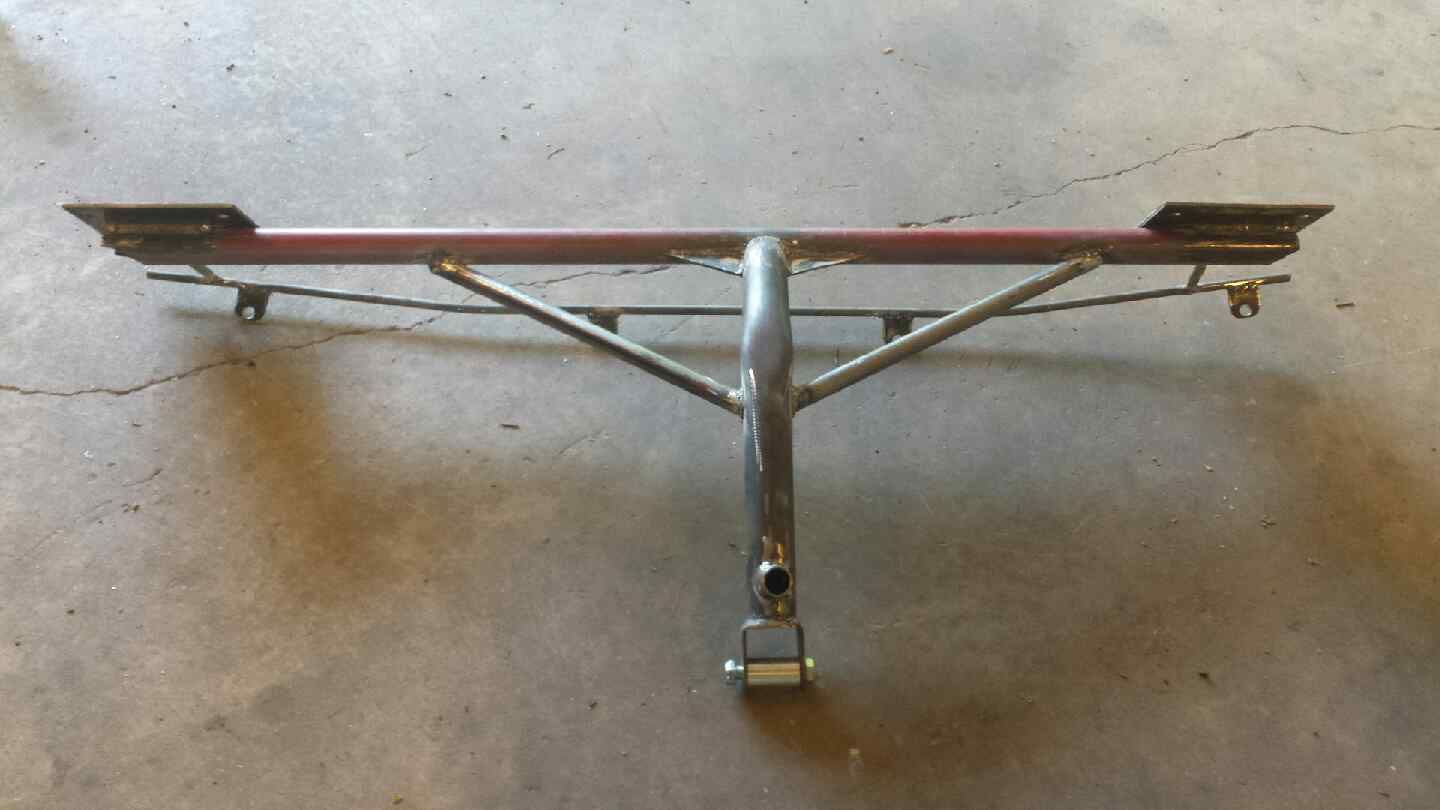
__________________
06 Foreman 500 - 29.5 OG Outlaws, 35%, Warn 2.5k, HL^2", <2.5">, EPI, HMF 95 Fourtrax 300 - 27" Zillas, SS212s , Viper 3k, HL^2" 04 XR80 - Stock 07 CRF50 - Stock |

|
|
|
#216 |
|
Join Date: Jun 2012
Posts: 220
|
Slow progress.
Bought this little dealie. Spot weld cutter. 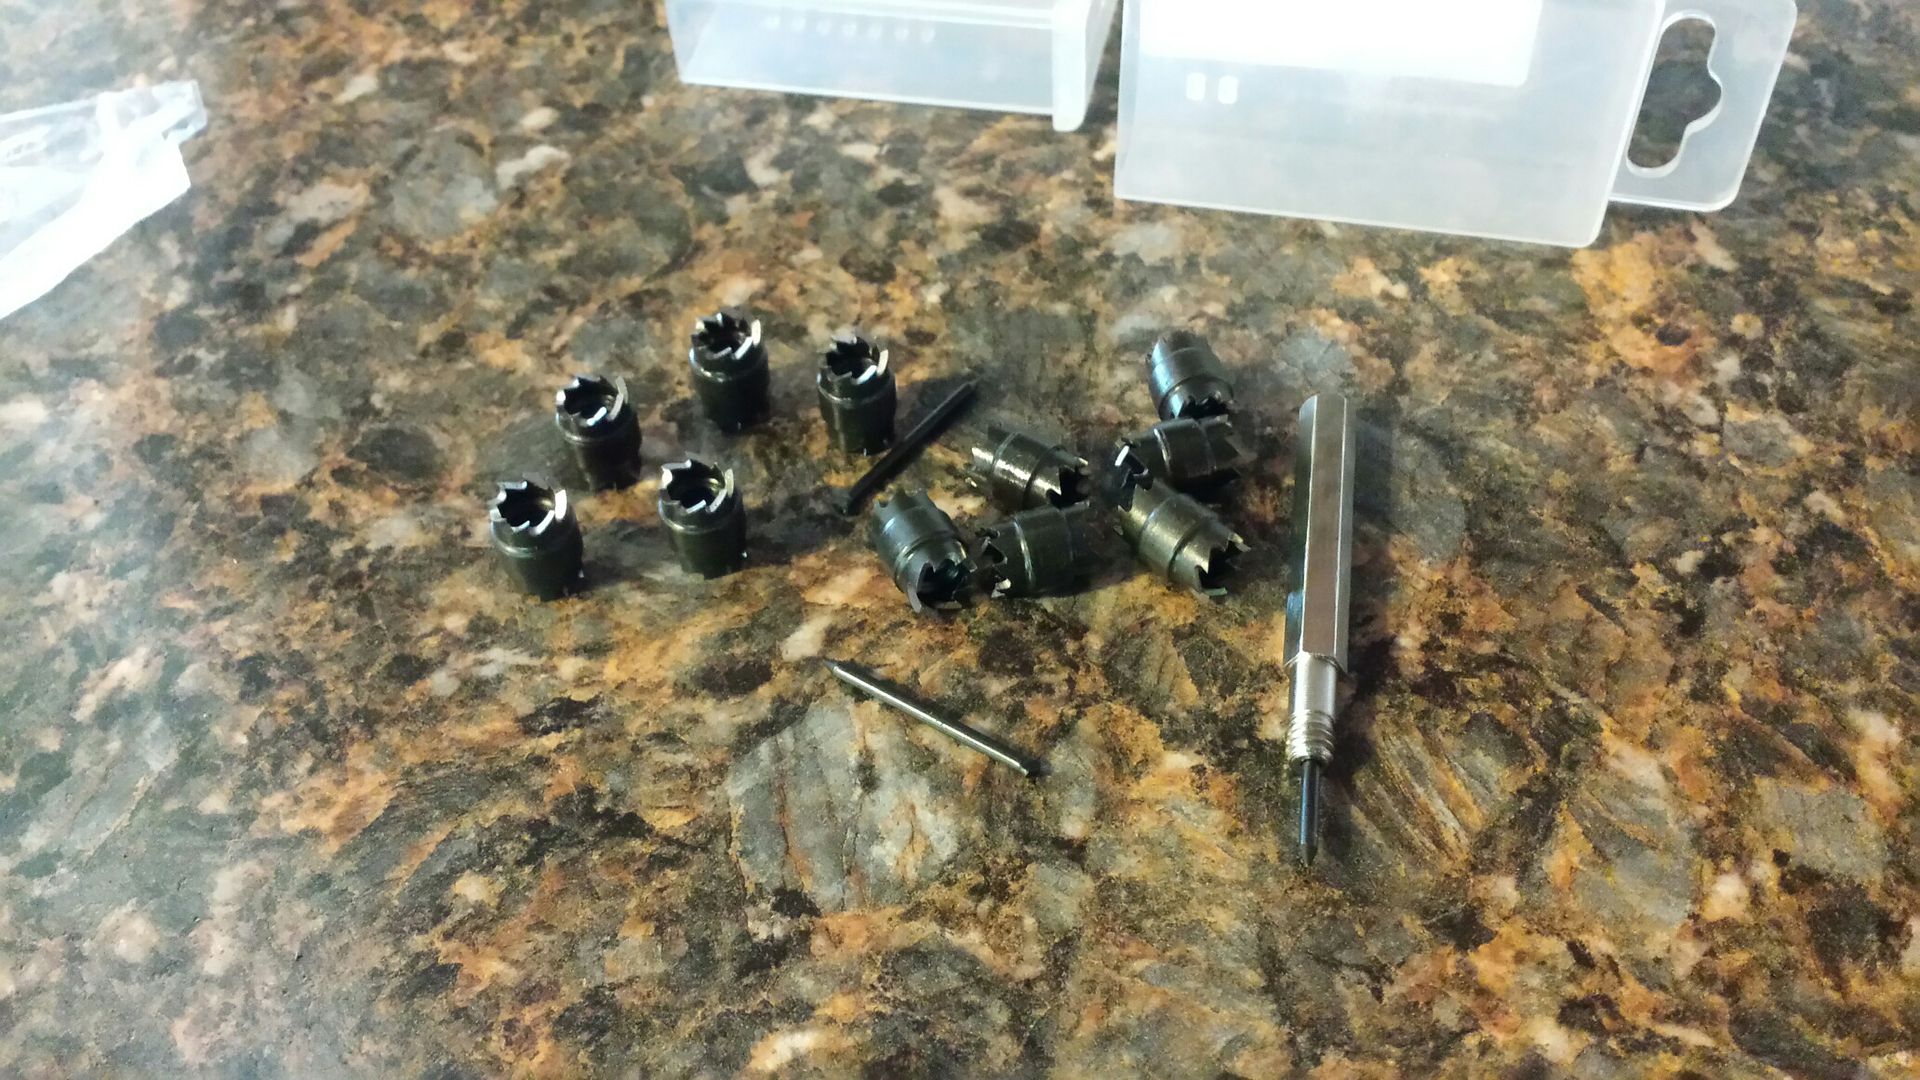 Works pretty good. Lets see what else I can F up. 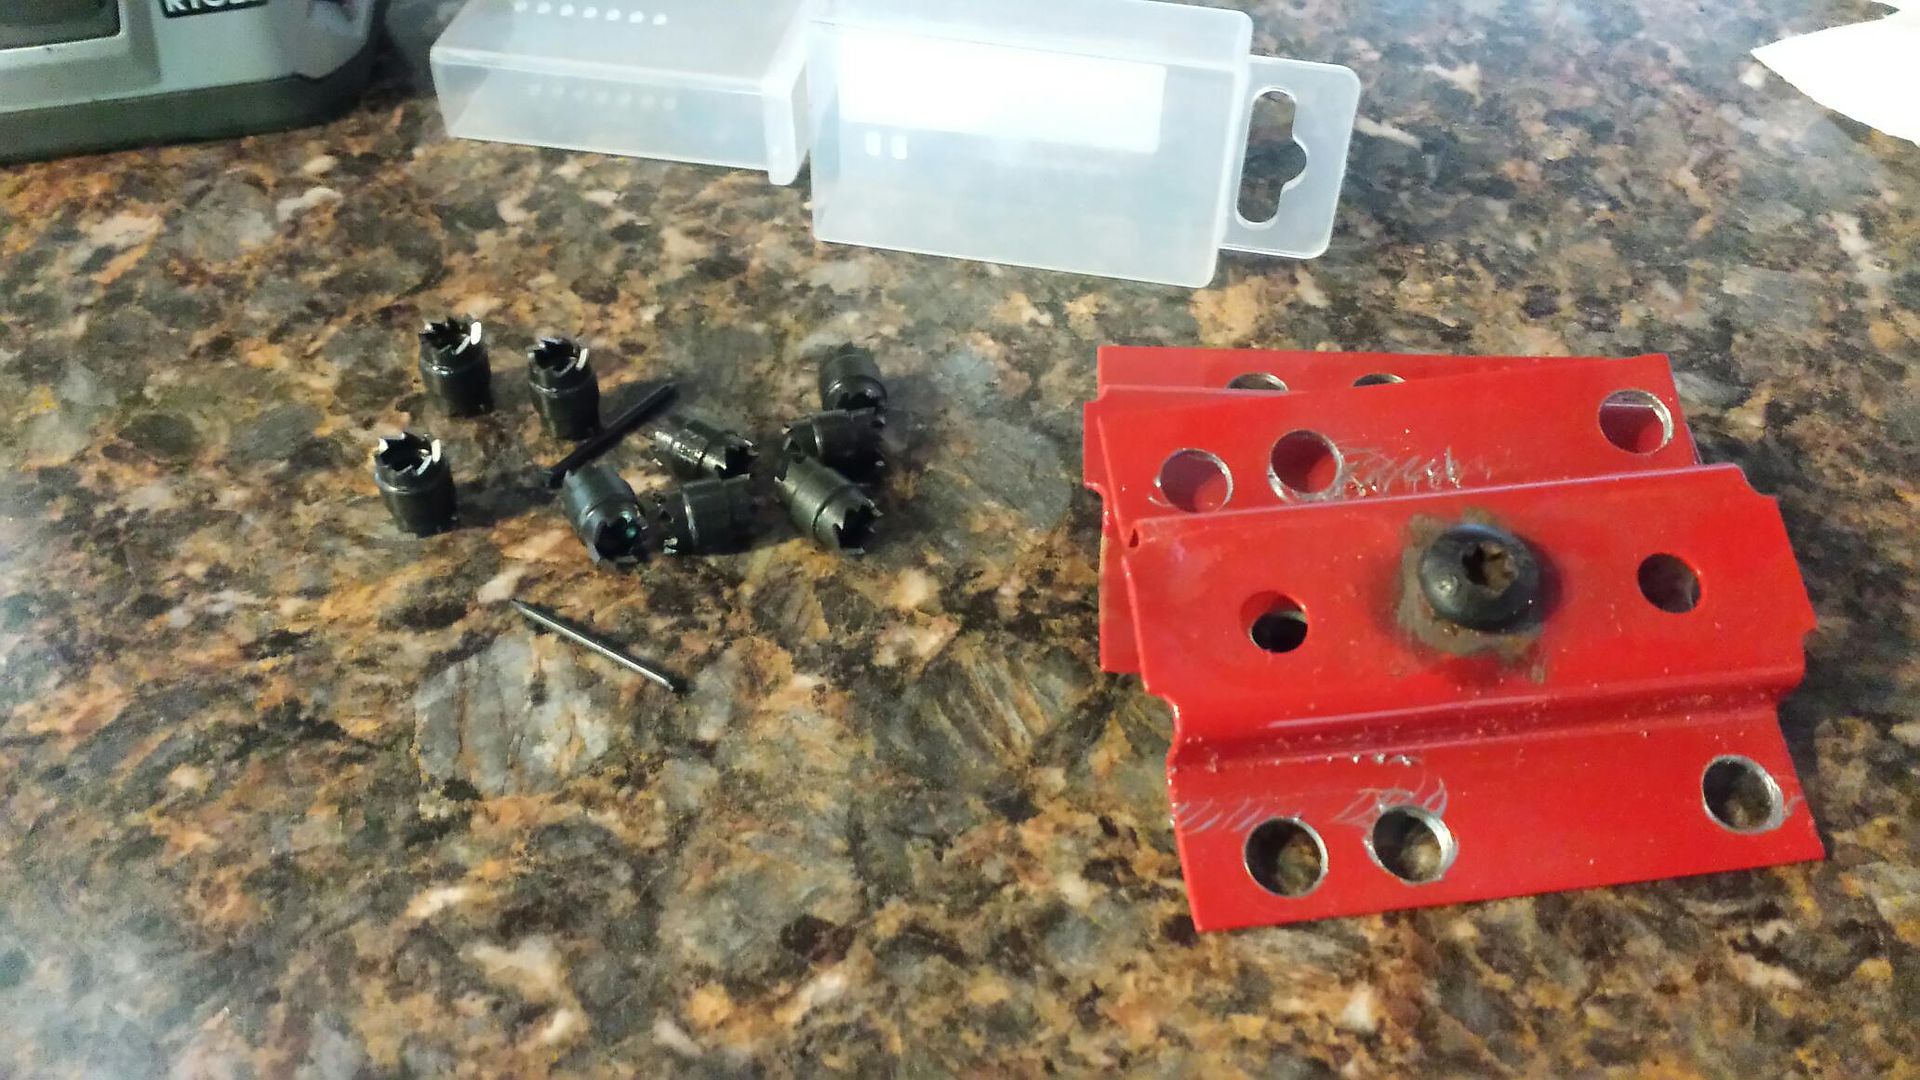 Back seat armrests kicked my butt. Not removing the rest of the brackets because they will get cut out with the tubs. 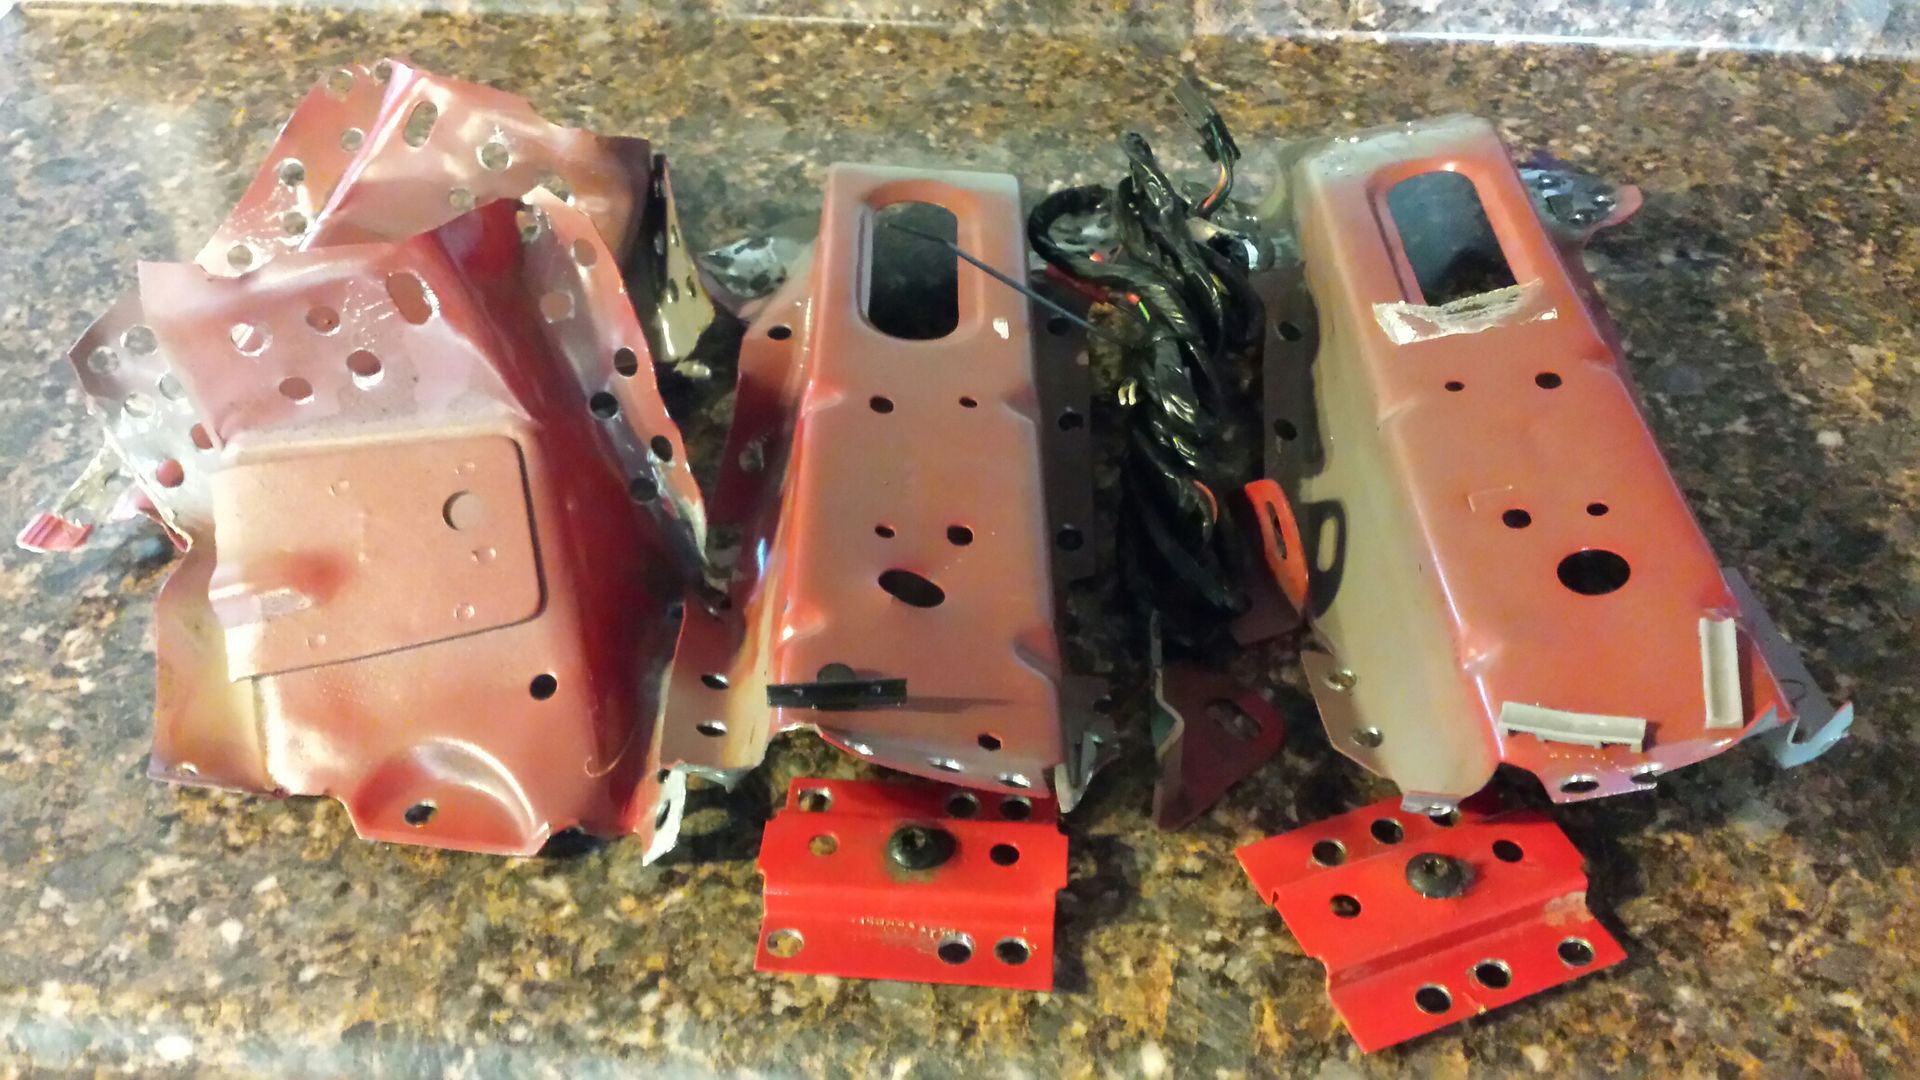 Mount back from powder coat. 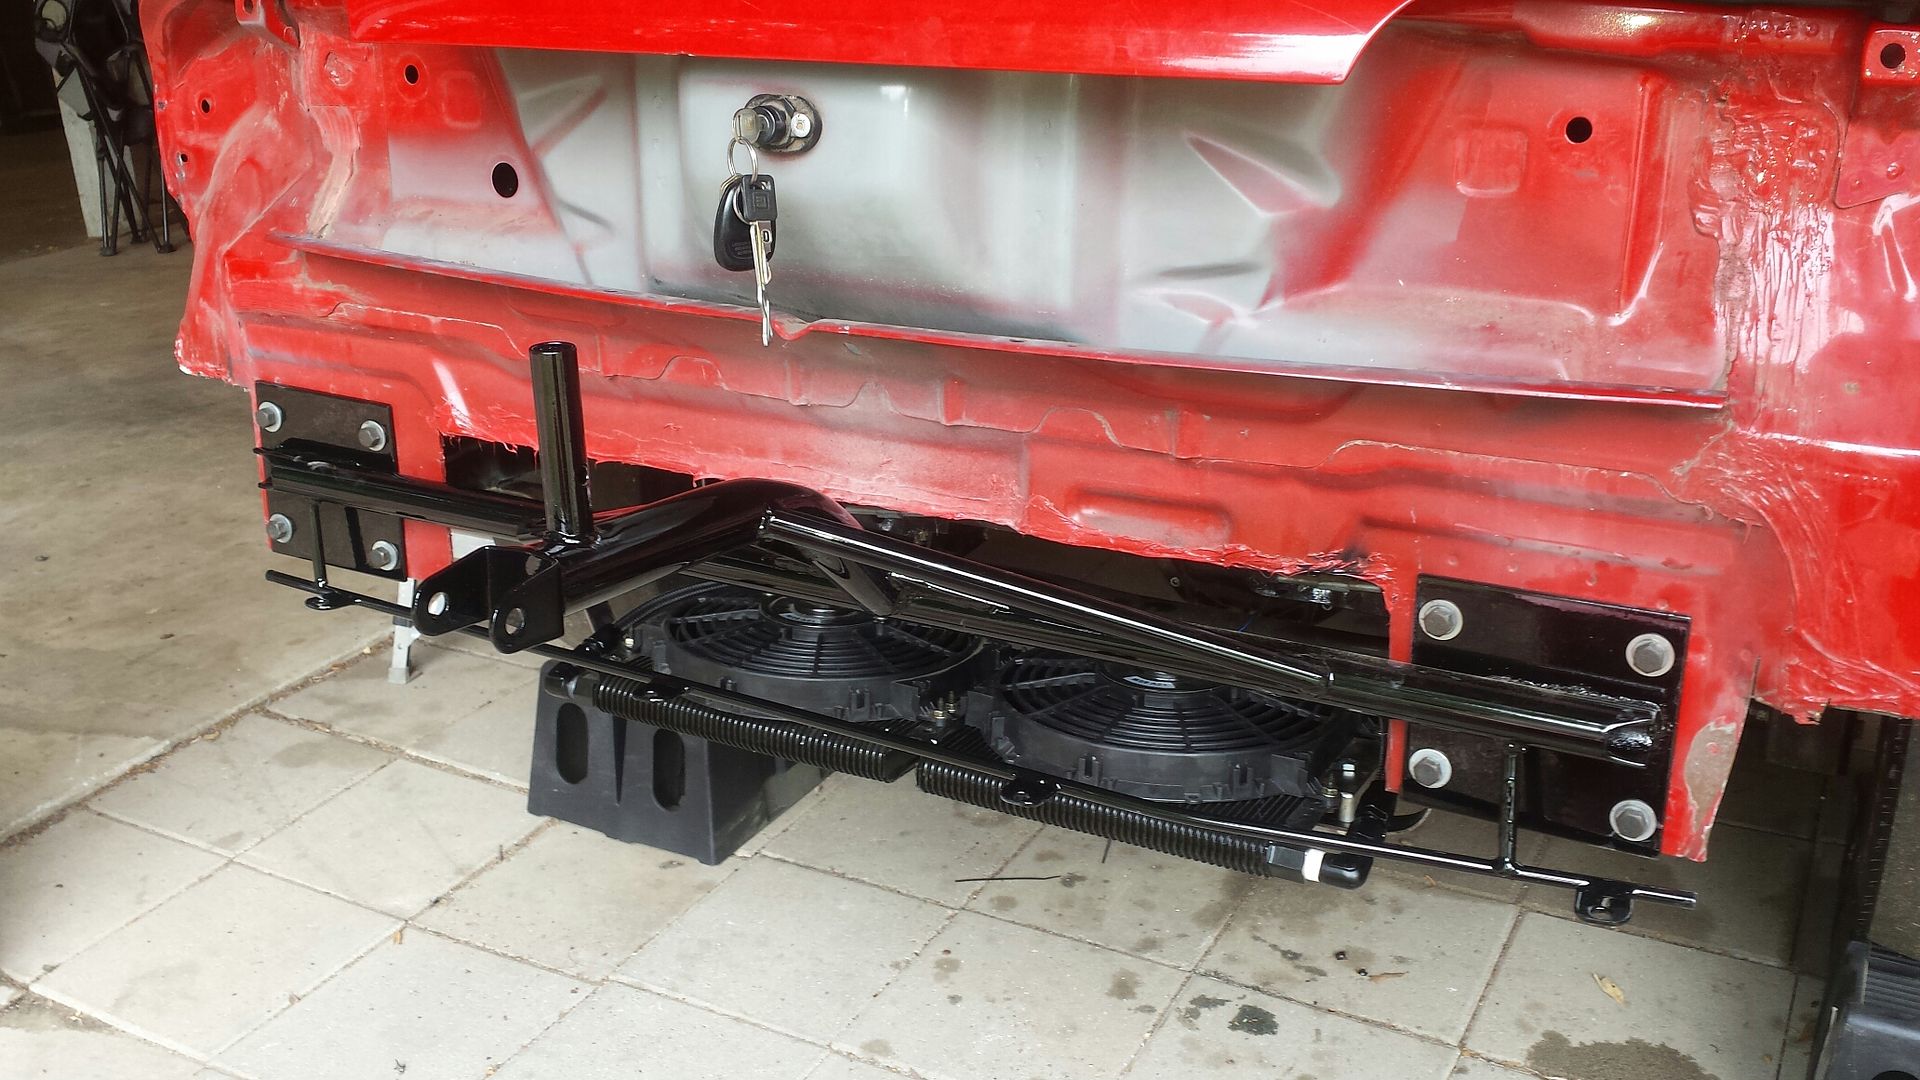 Quick mock-up, no bolts in the bumper. 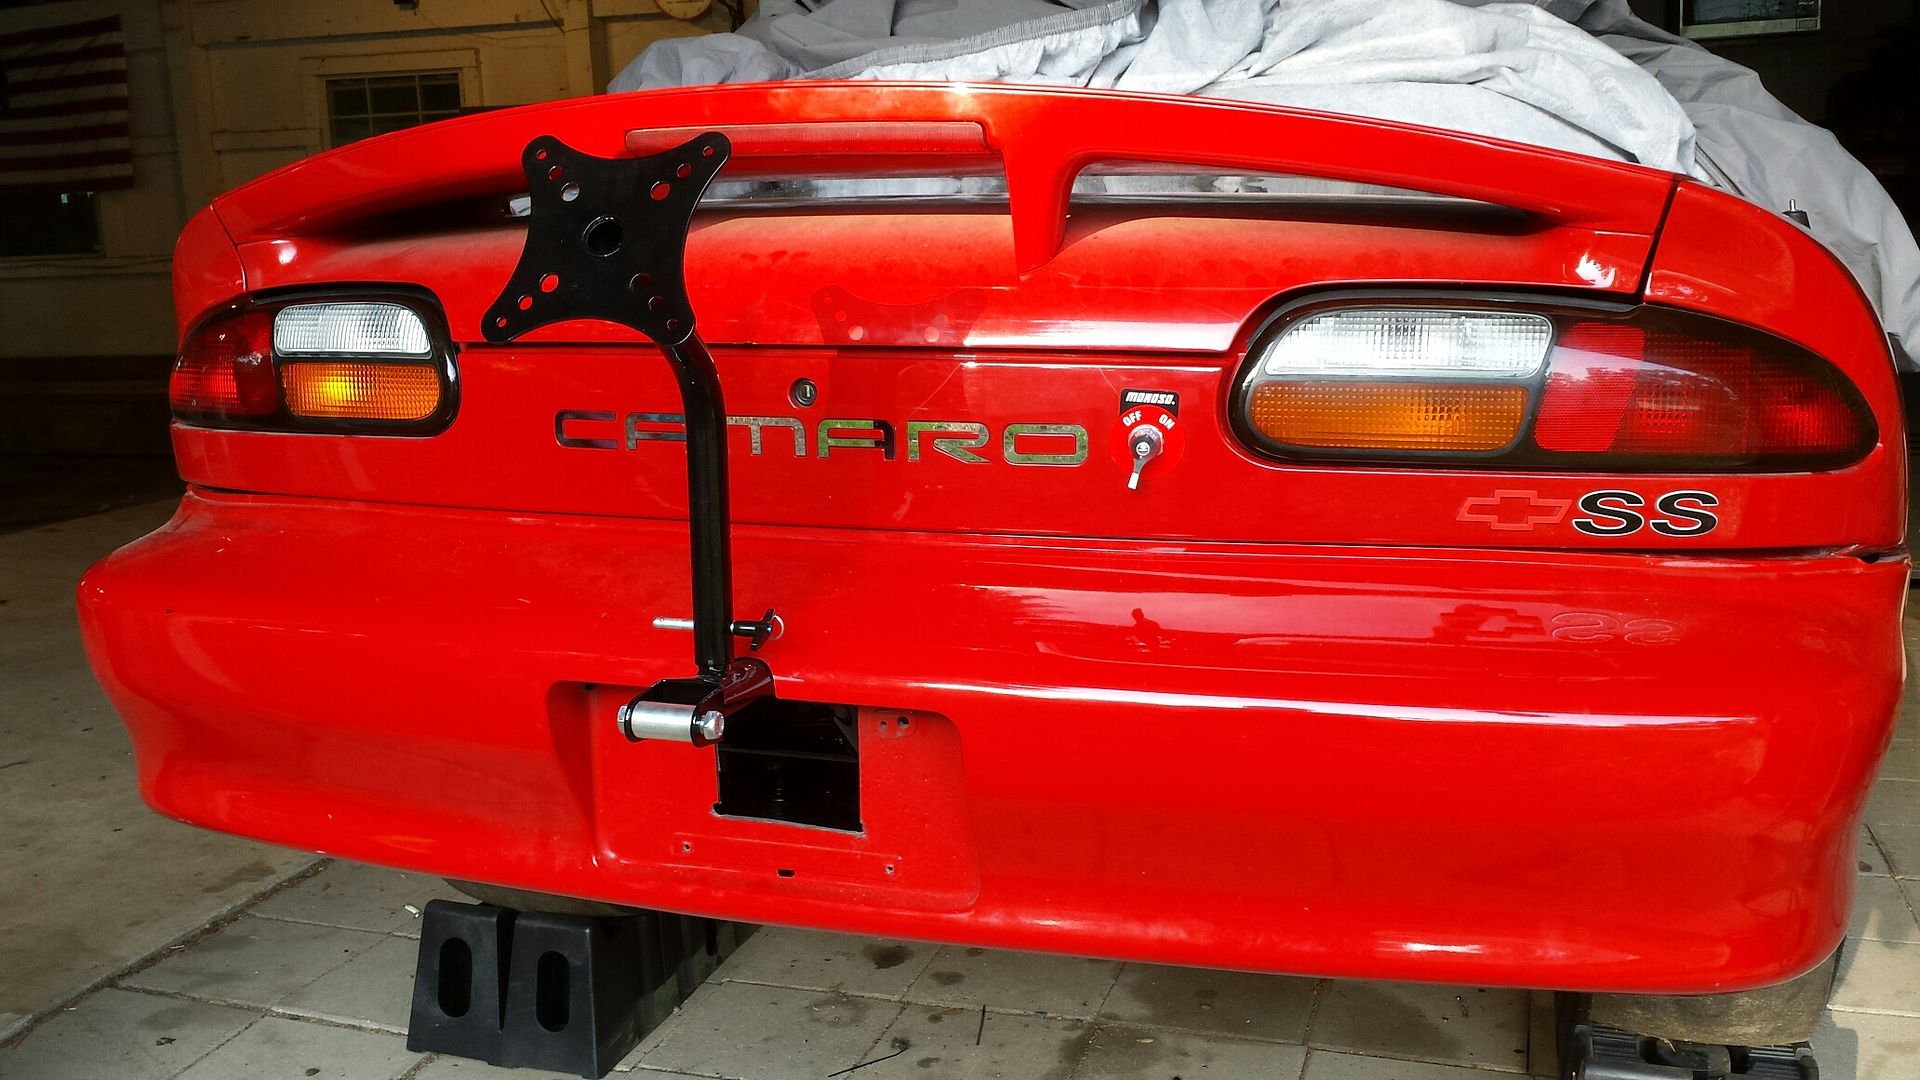 Got the battery box mounted to the floor. 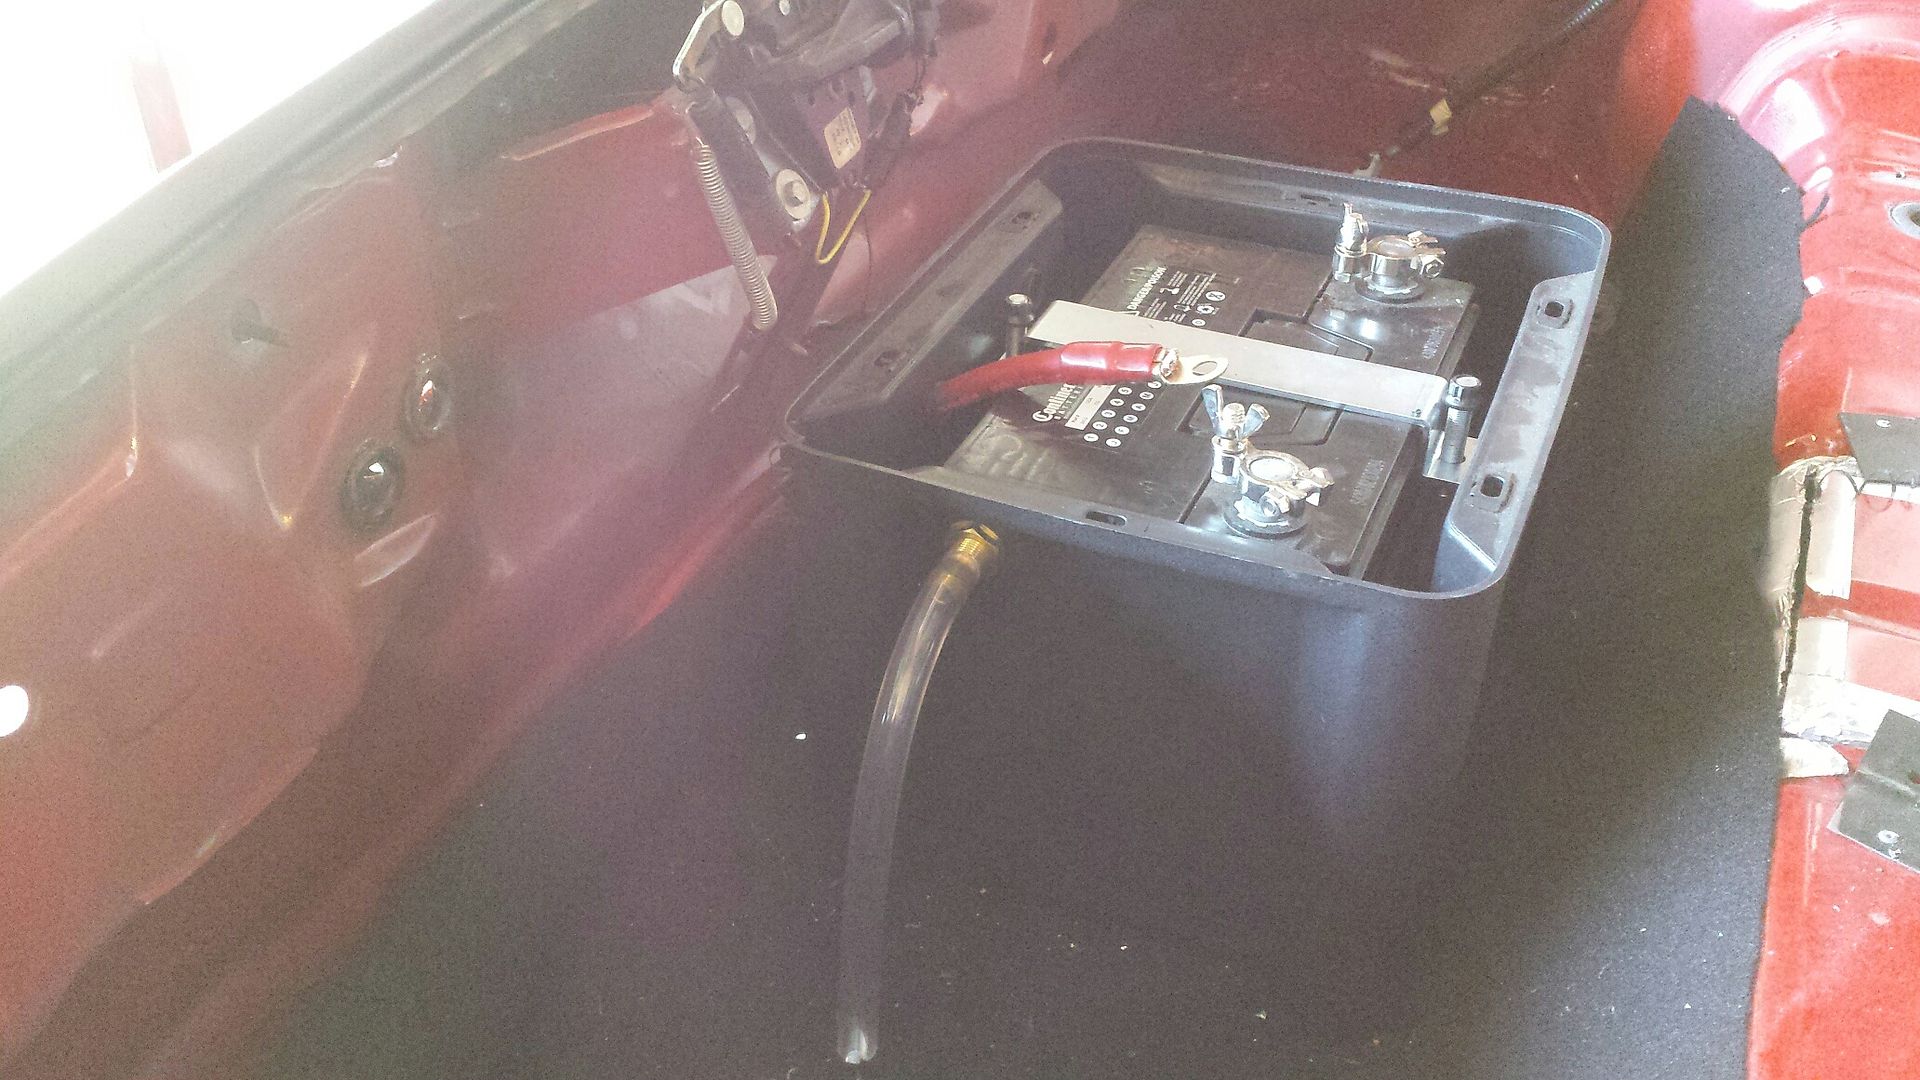 Bought a brass 3/8" bulkhead, trimmed the inner side off, and hooked the box's vent tube to it. 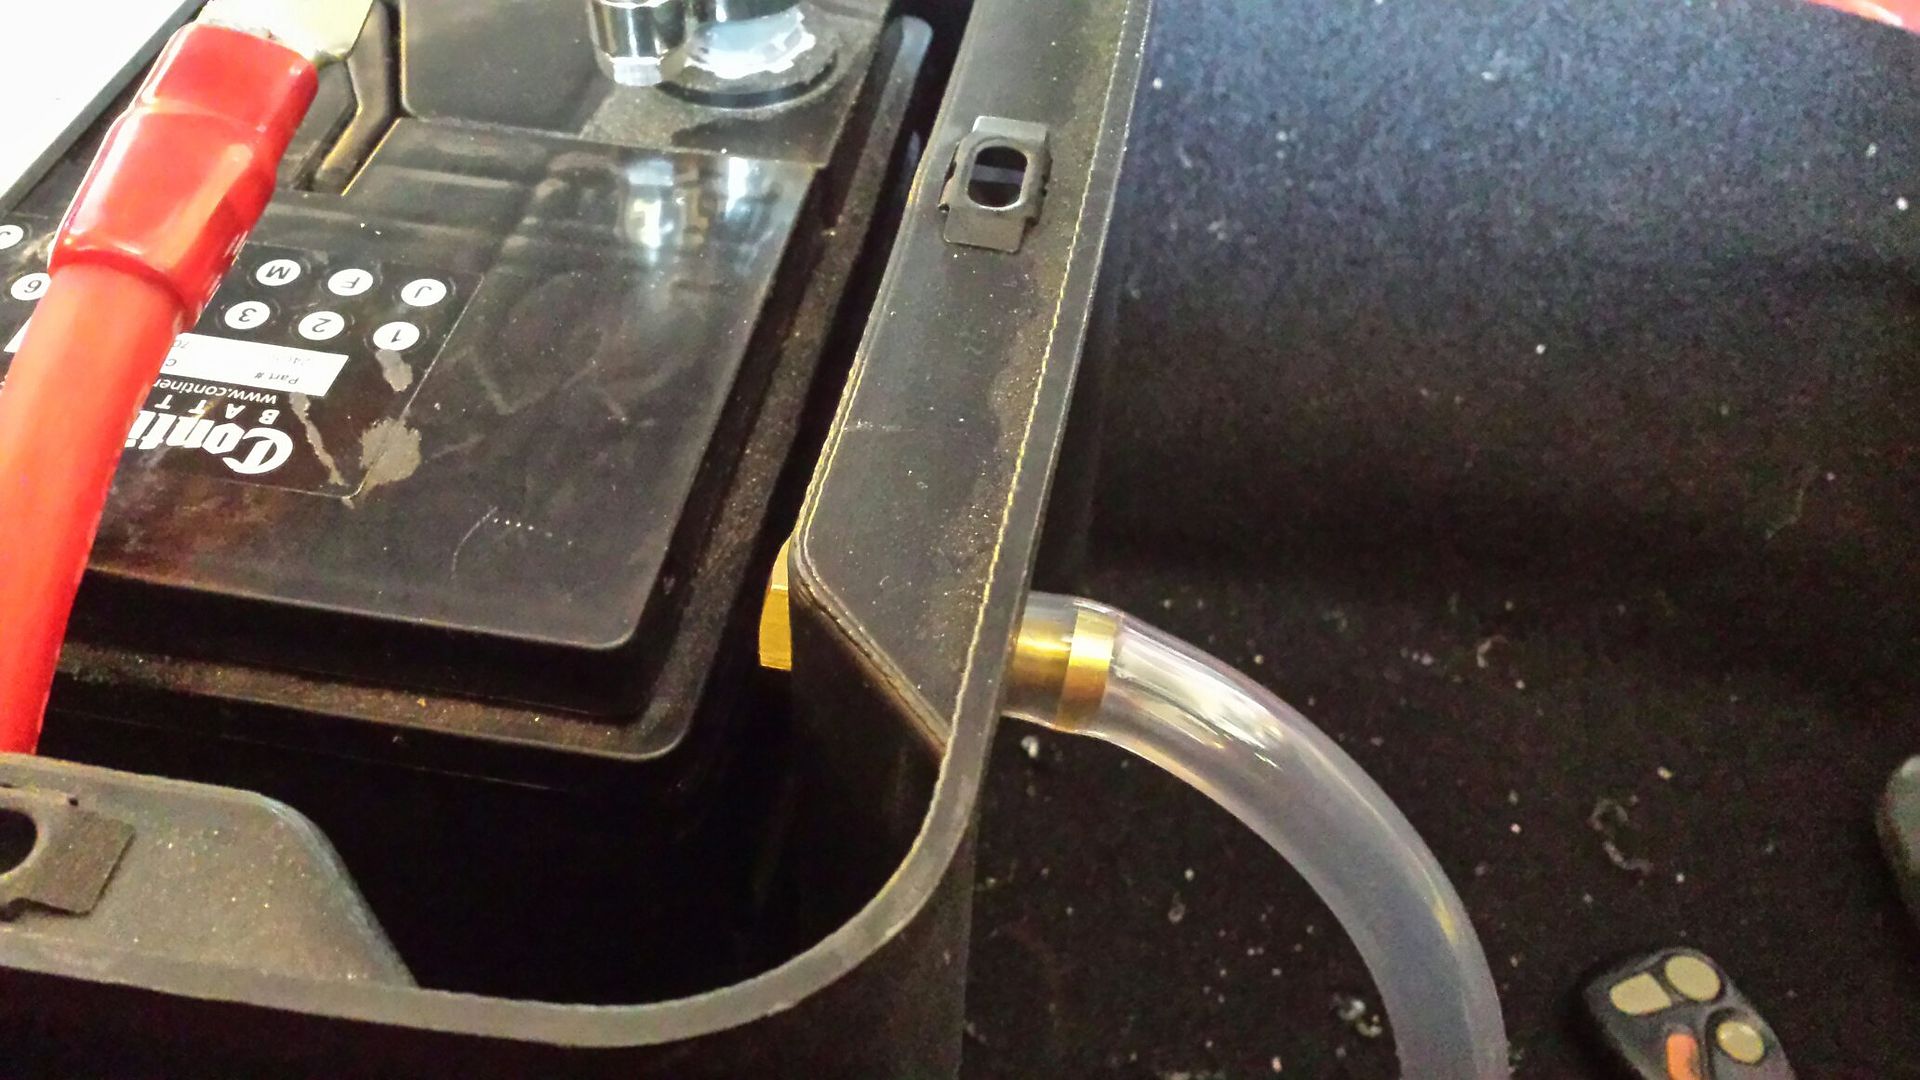 These are terminal bulkheads, and a shut off breaker. Shut off breaker will control the alt, so in the event of a wreck (short) the alt line is killed. The rest of the + power will go to the bulkhead on the firewall and be distributed from there. All that will get killed by the external switch of the back panel. The alt will stay live during a power down to save the diodes inside it. 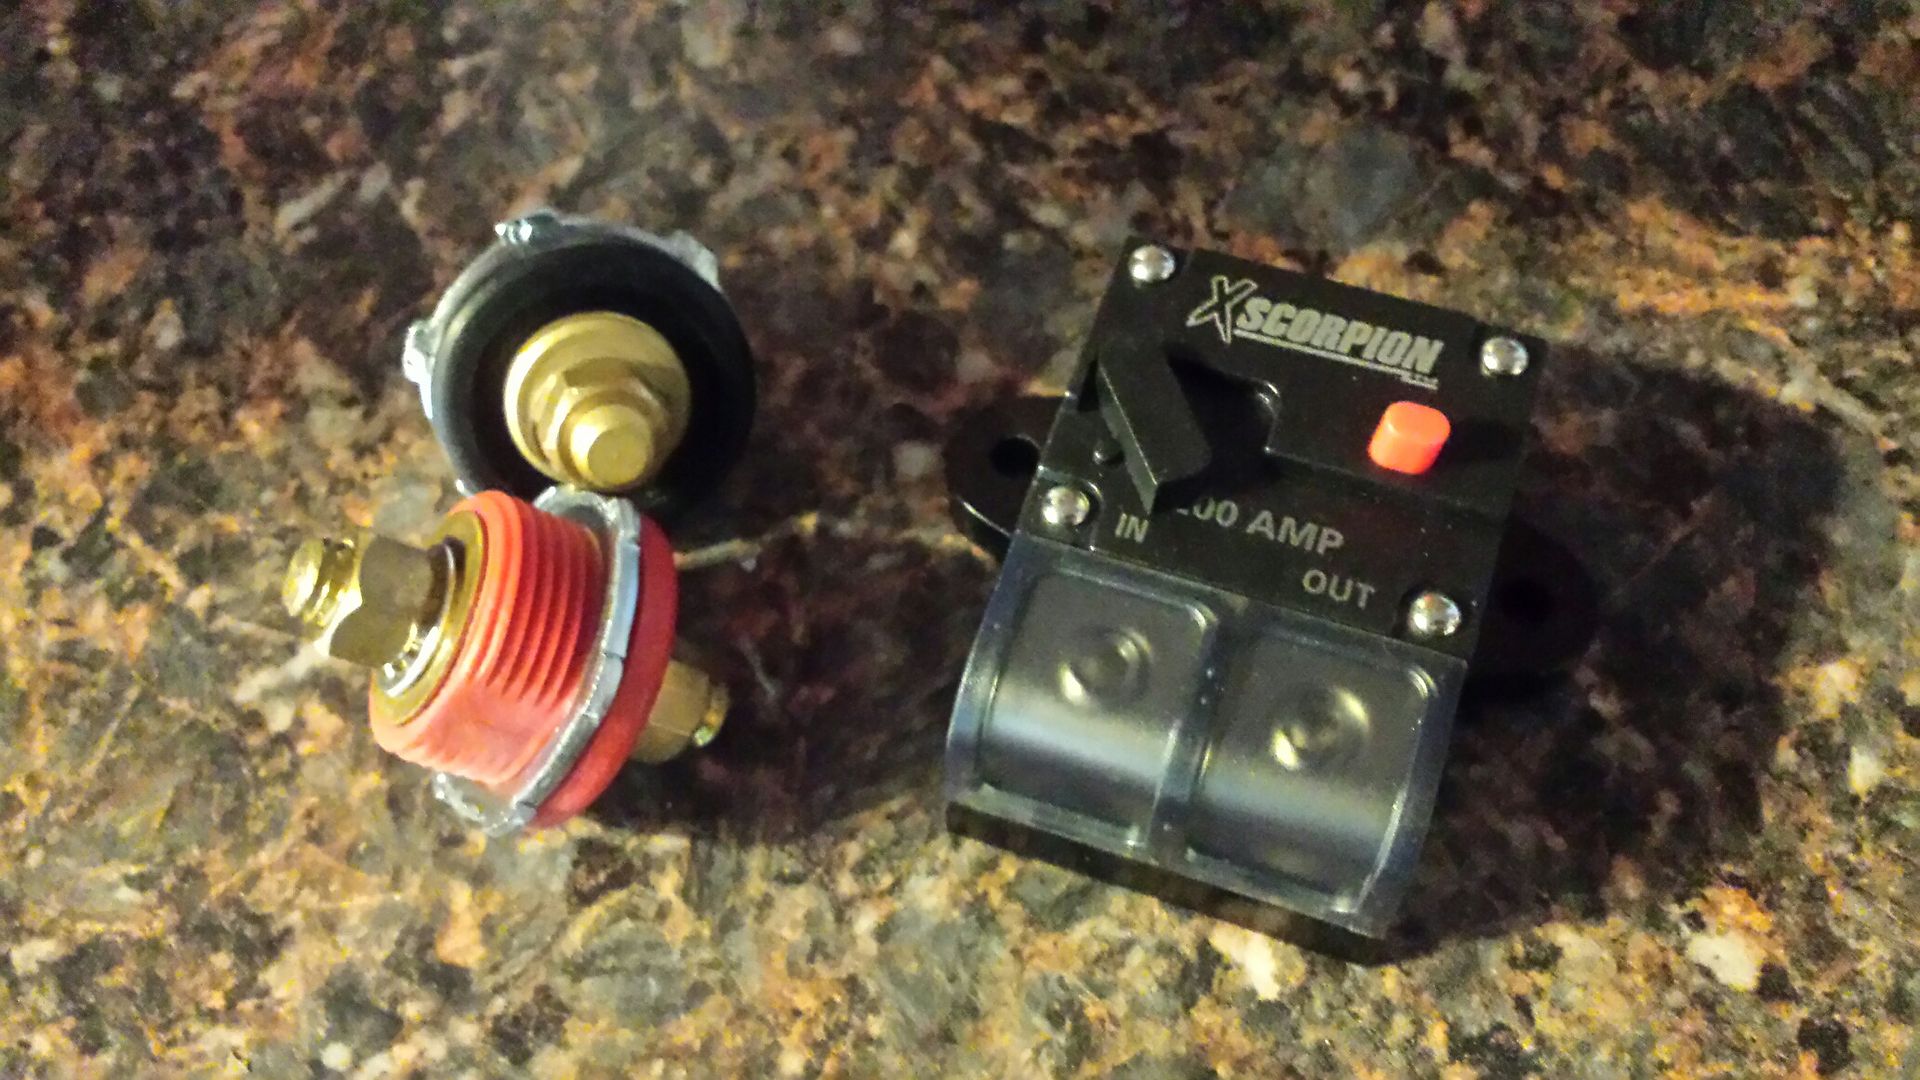 Car is gutted except the dash. This is trans tunnel padding and all the remaining wire thats not needed from the dash back. Including all audio, center console airbag, power driver seat, and power mirror. If it doesnt make the engine run, lights work, or gauges work, its gone. The exception will be electronic hatch release, and power windows and locks. 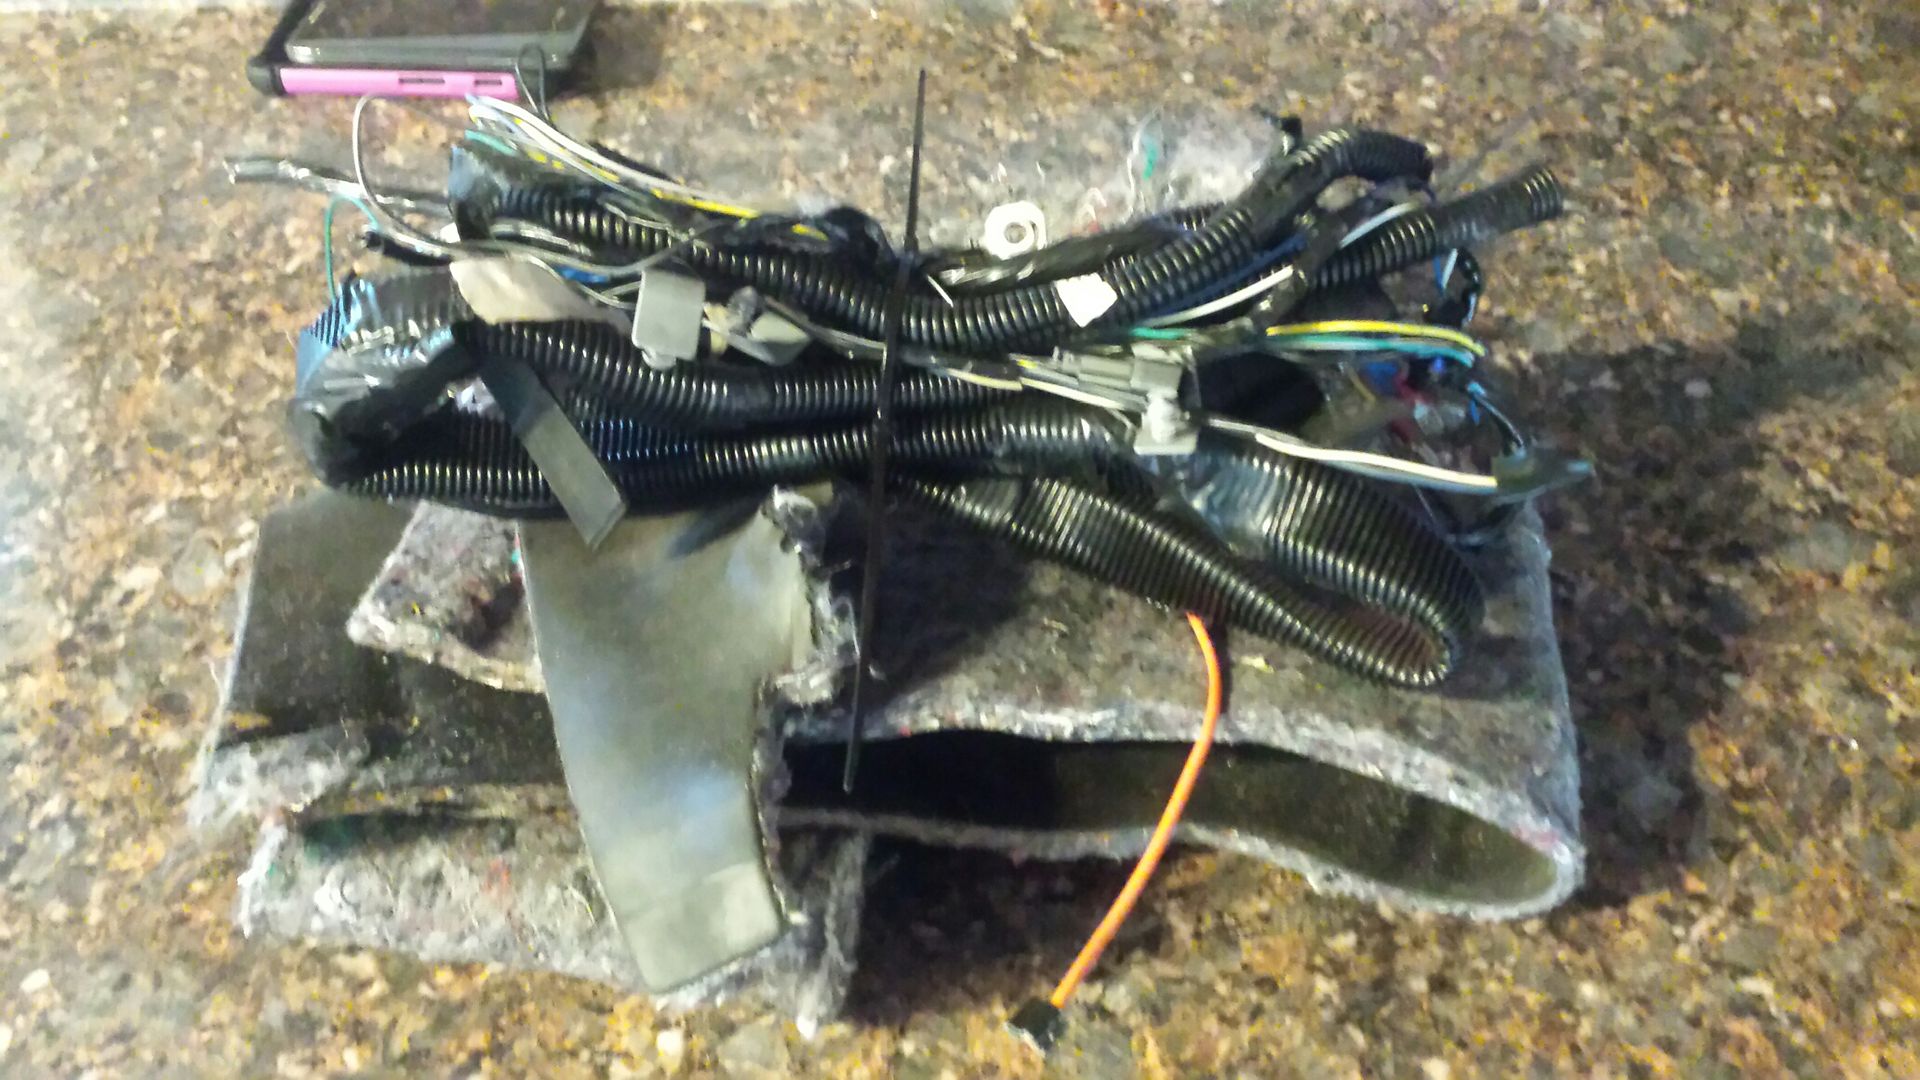 Next up is under dash wiring. Wish me luck!!!
__________________
06 Foreman 500 - 29.5 OG Outlaws, 35%, Warn 2.5k, HL^2", <2.5">, EPI, HMF 95 Fourtrax 300 - 27" Zillas, SS212s , Viper 3k, HL^2" 04 XR80 - Stock 07 CRF50 - Stock |

|
|
|
#217 |
|
Join Date: Jun 2012
Posts: 220
|
Fuse Box Relocate.
First let me say I have 3 afternoons tied up in this. It was not difficult but slow. You will strip every piece of loom and electrical tape off the car so be prepared for sticking fingers and a mess to clean up. Let me also add that I've already removed some audio wiring in the past. There are almost NO wires needing to be altered. You'll see by the end. First, strip the car, and cut off every plug of the things you do not want/need. I plan to keep all lights, power windows and locks, and electric hatch release. The plugs that were cut were, daytime running lights (module), power driver seat, wipers, washer fluid motor, fog lights, all AC, all audio, all airbags, power mirrors, ABS, traction control, defroster, horn, all emissions, basically if it doesnt run the car, its gone. Strip it. Mine needed to come out for a cage so it was perfect timing. 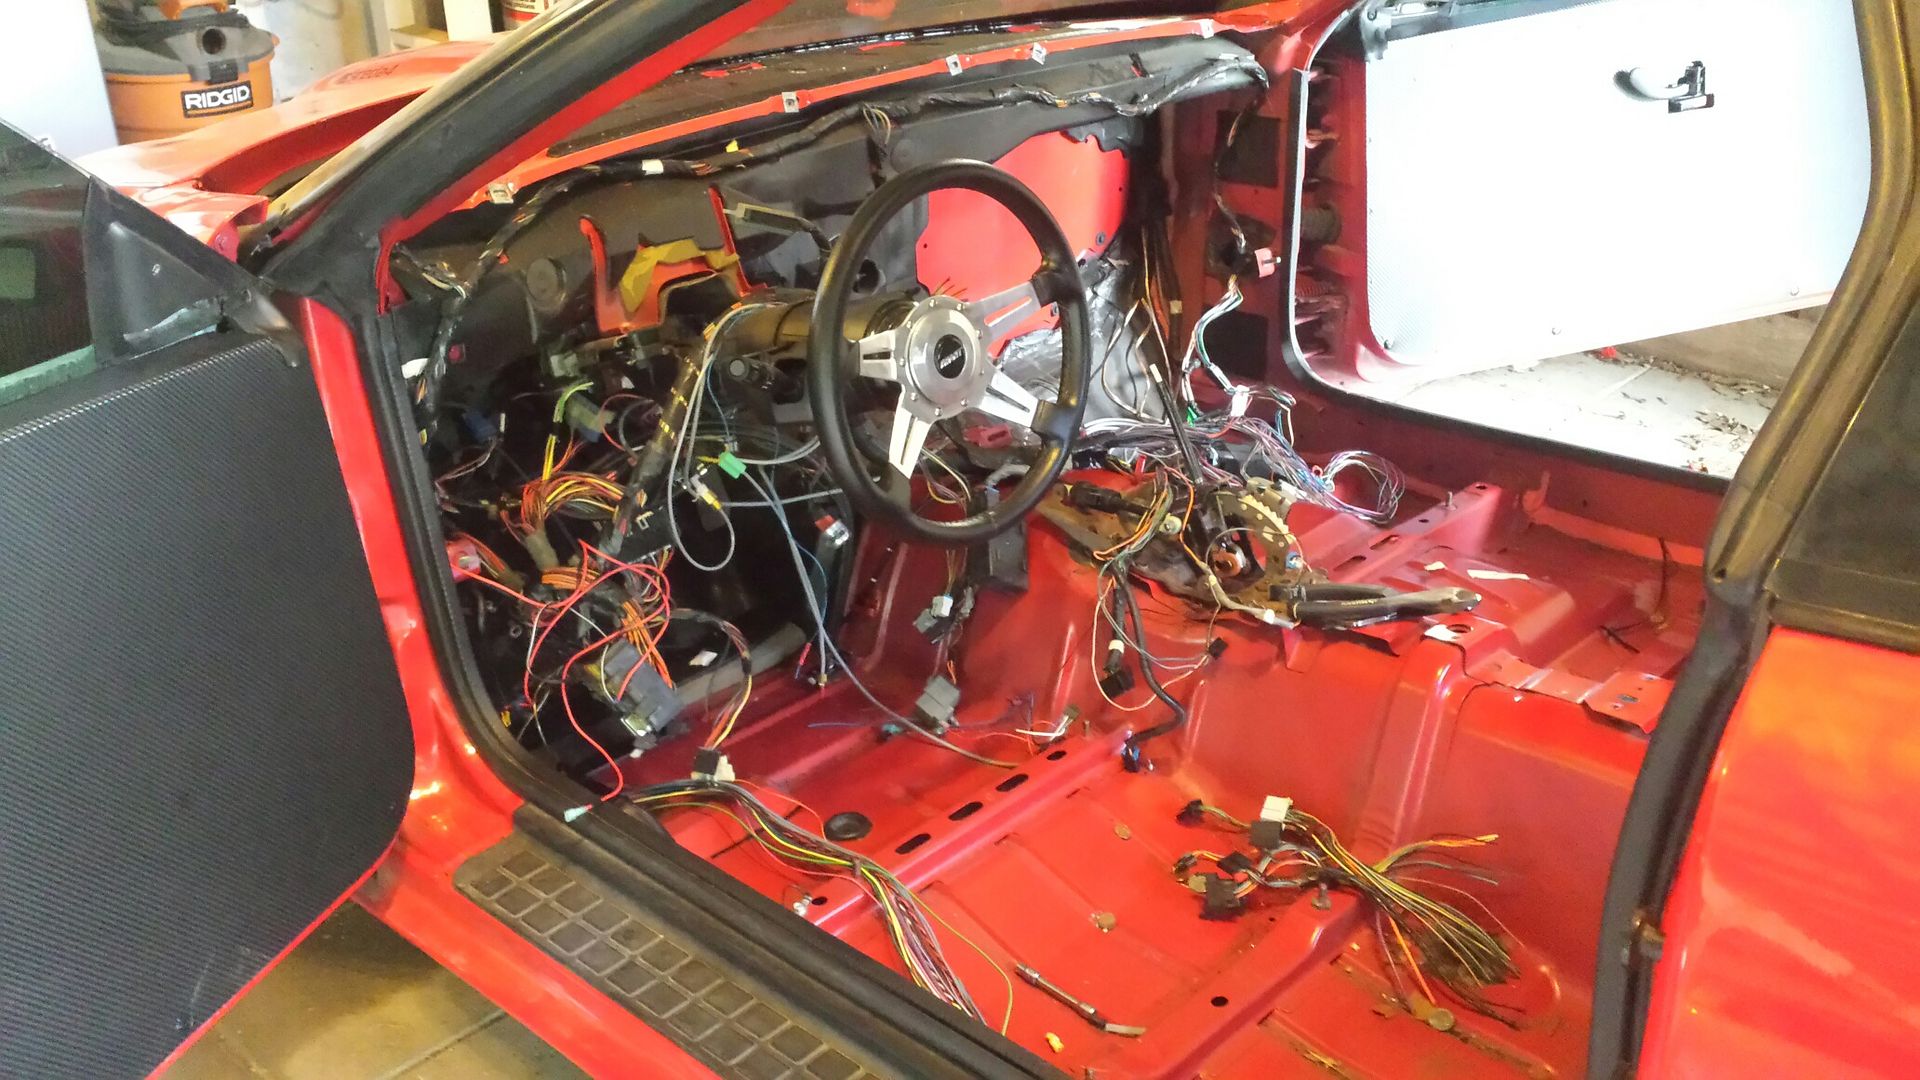 I made this really crappy drawing in MS Paint, but please reference it, the color codes tell you what harnesses do what and how we will move them. The green harness runs about from door to door INSIDE under the windshield, it contains mostly audio and door wiring. You can clearly see this harness in the pic above. The yellow is the BCM harness, its in the passenger kick panel and the harness runs mid-level in the dash. This harness gets basically unaltered except deleting wires out of it. The black goes through the driver firewall through a bulkhead fitting and contains all the power and signal for everything inside to work with everything outside the car. The blue is from the pcm to the car, all its power and interactions strictly dealing with engine functions, it runs along the top of the radiator. This is real easy, where the black meets the yellow, we will disconnect there, pull it through the firewall, back around the top of the radiator and shove it all back in the passenger side AC delete panel. 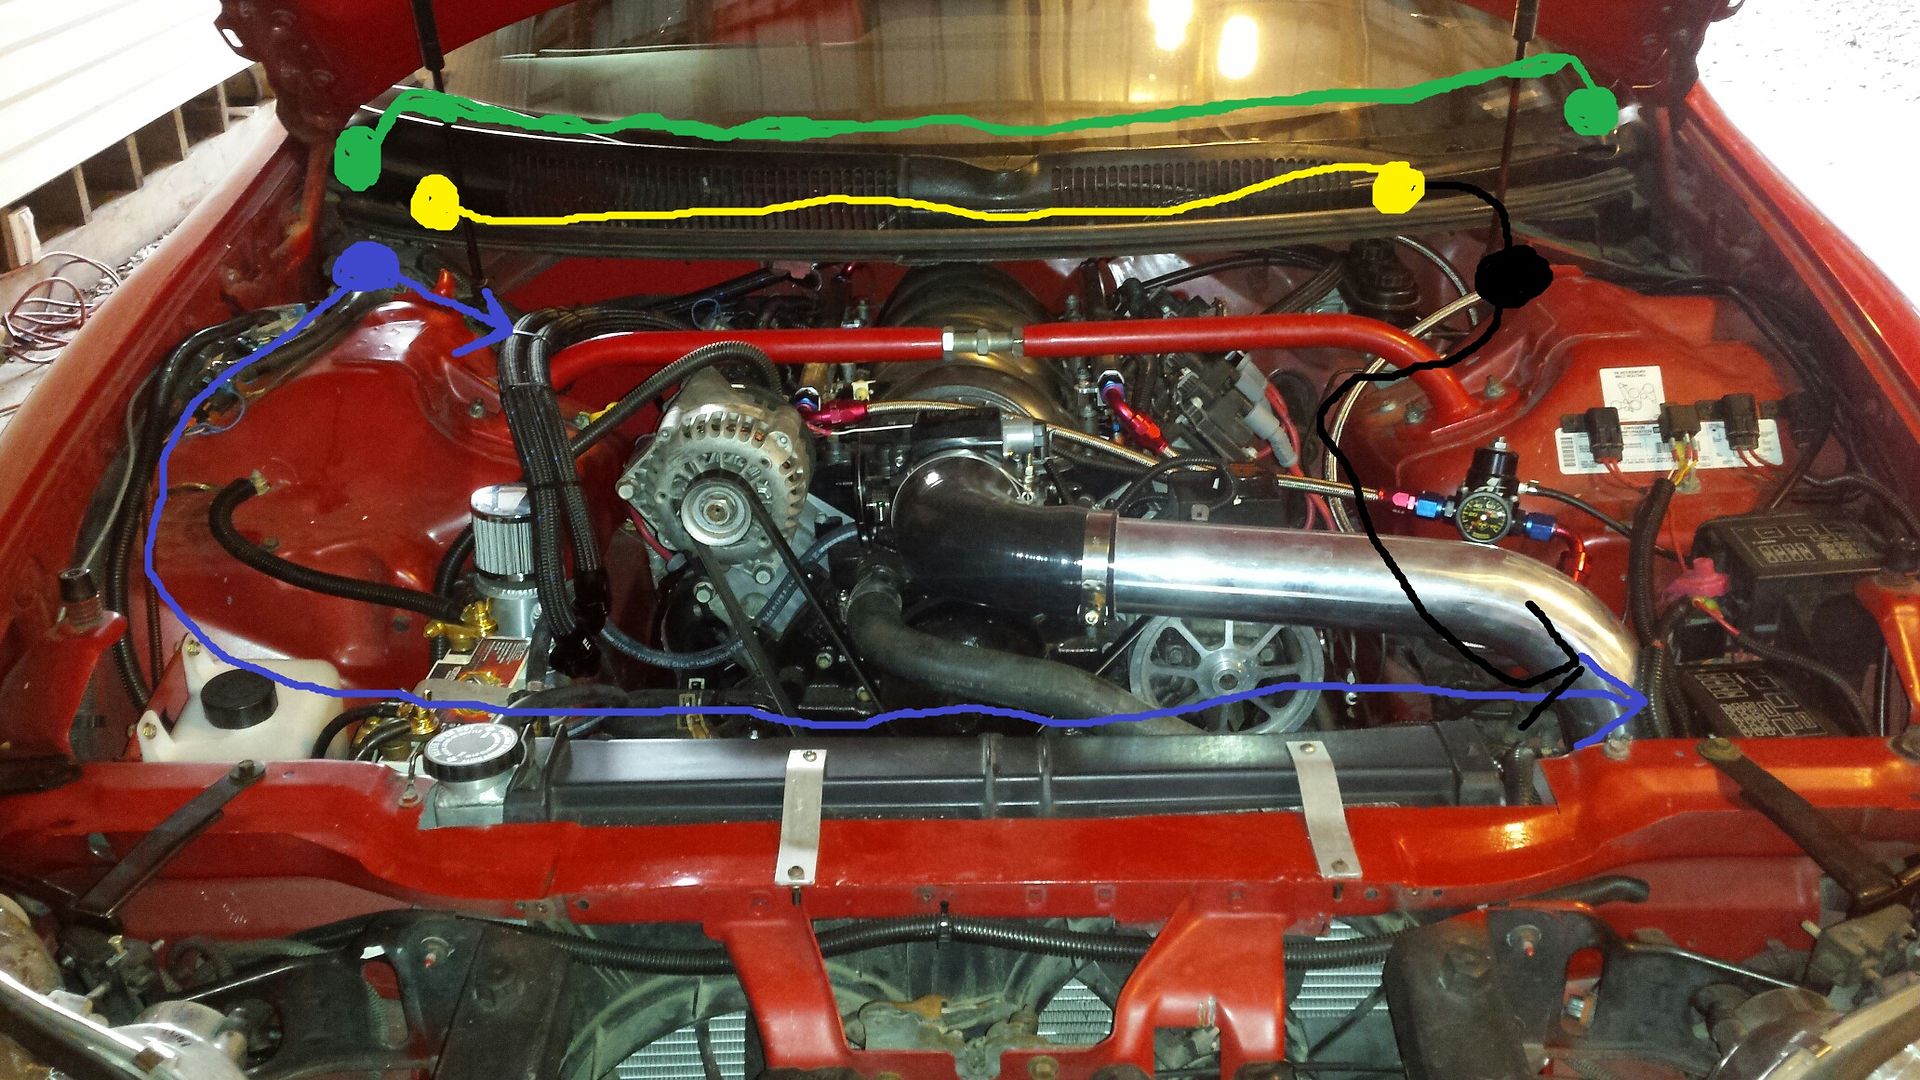 I first pulled every single unneeded wire from both door sills, and center console, that will give you a nice easy start. If you delete audio, there will be no more passenger door side wires. Driver side will still have tail-lights and hatch if you keep those. Just take your time and trace every wire. If you cut the end off, trace it through the harnesses till it terminates and clip it off. There were 4 total wires i had to cut (to get the black harness out of the car and into the engine bay), but the rest unplugged and the bulkhead under the booster is ready to be disassembled. 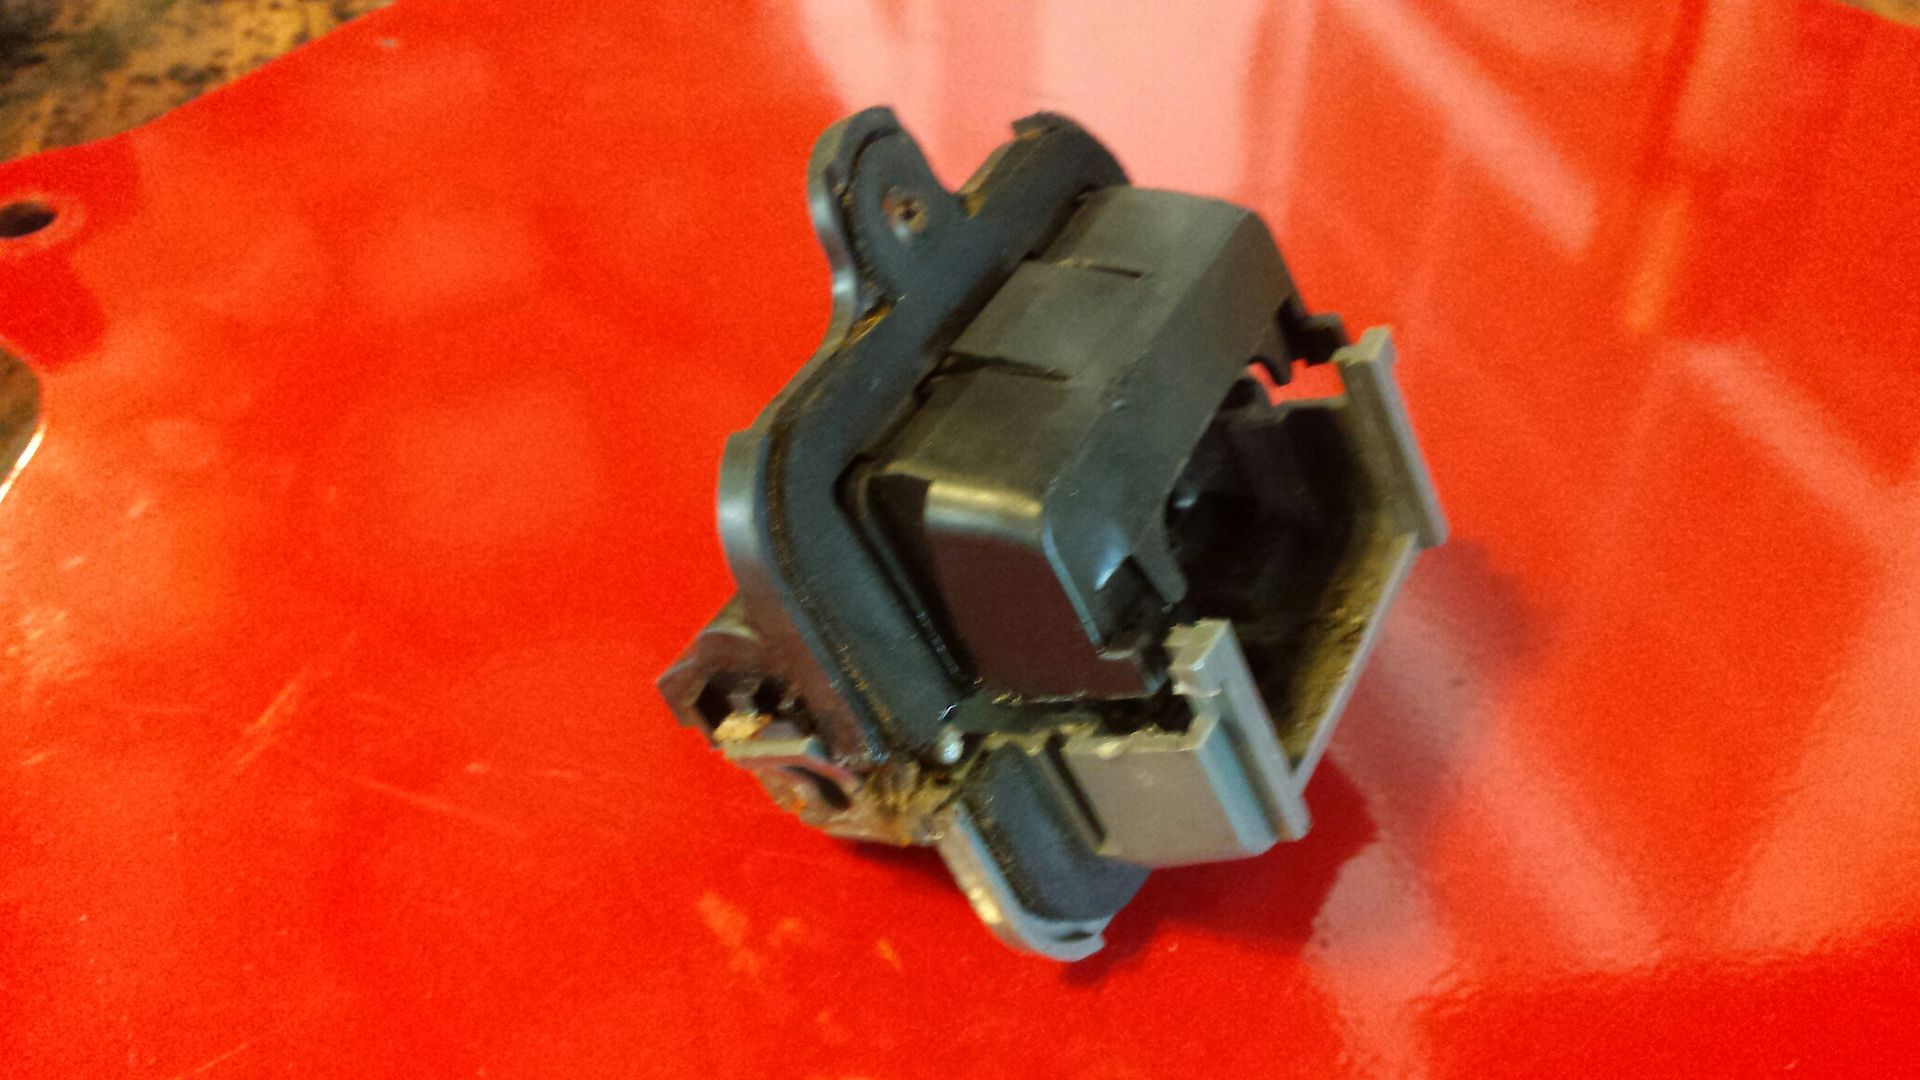 It has a bees wax type stuff injection molded into it. You'll need to melt that with a heat gun and pry it apart. 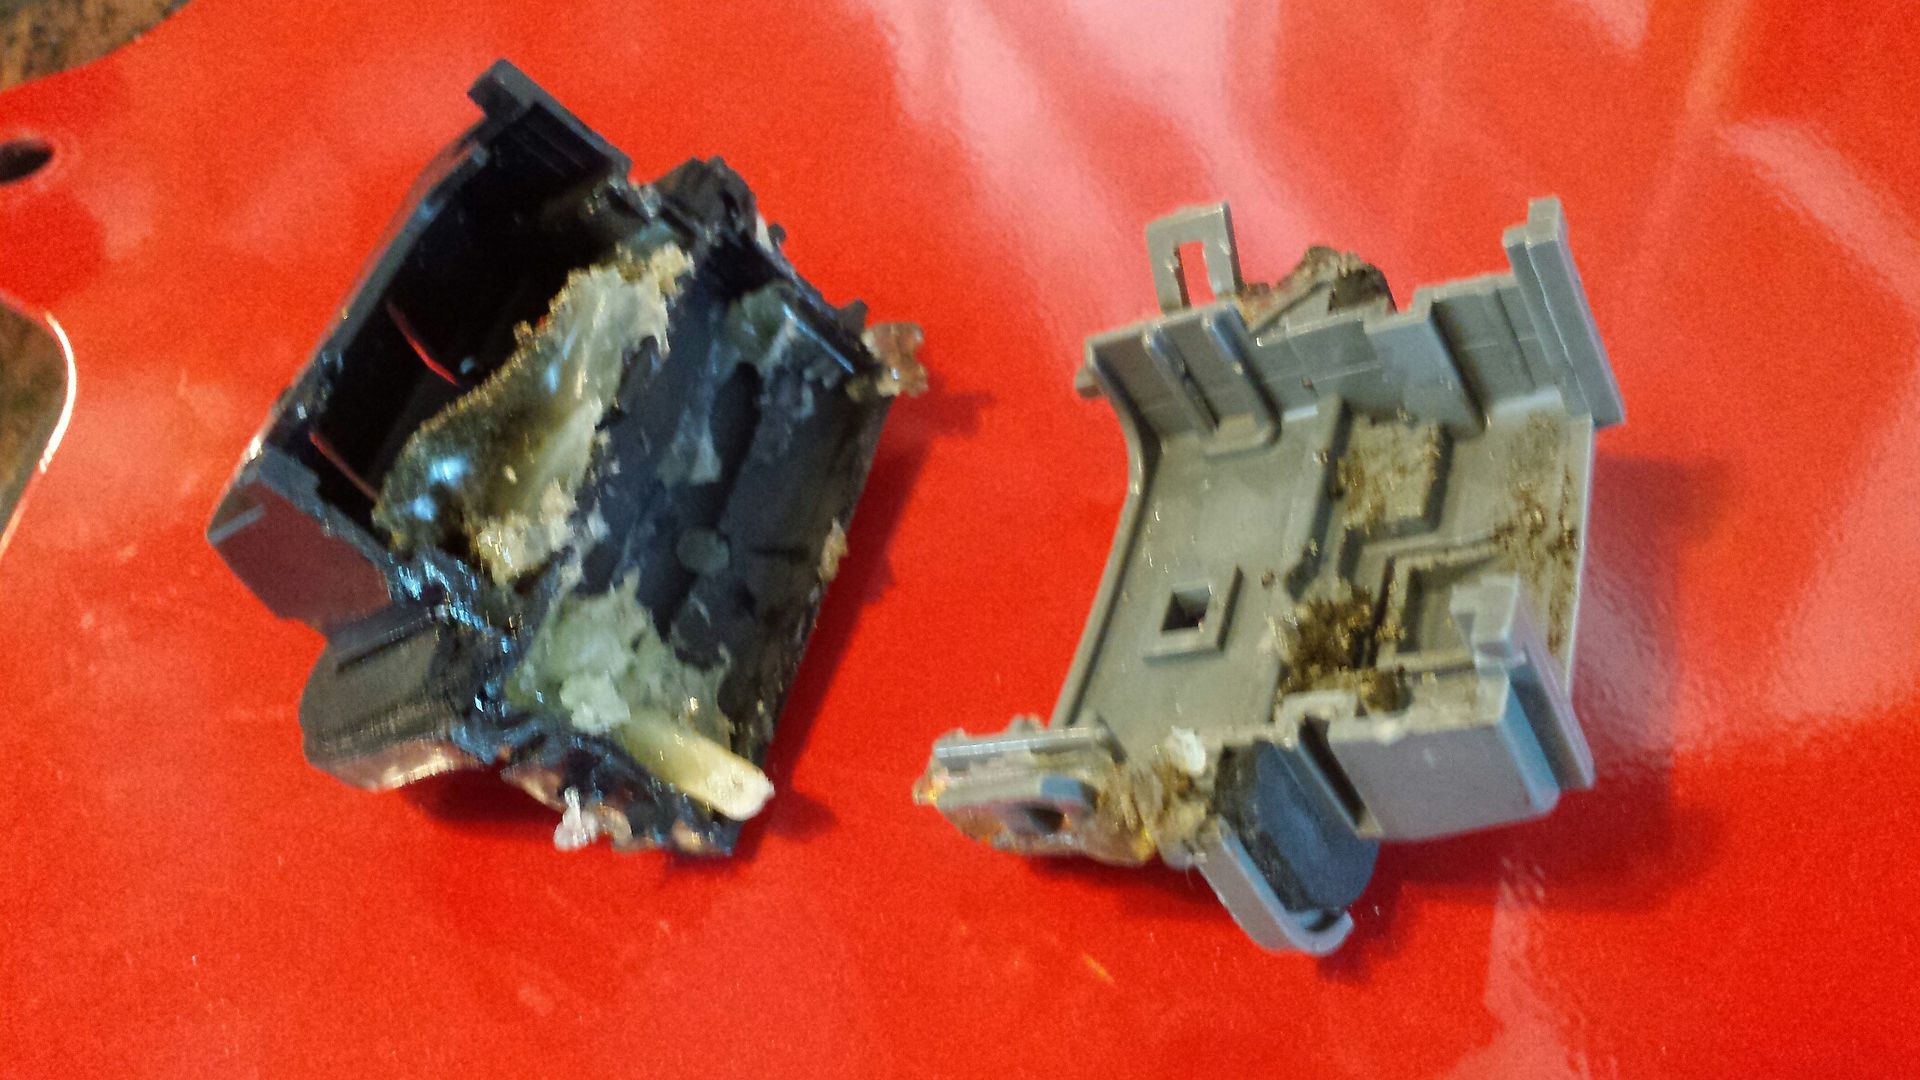 I did a full disassemble bc lots of wire colors are similar, and a lot that you deleted inside led you to here, so you'll need to continue the delete under the hood. And i didnt want to probe wires. 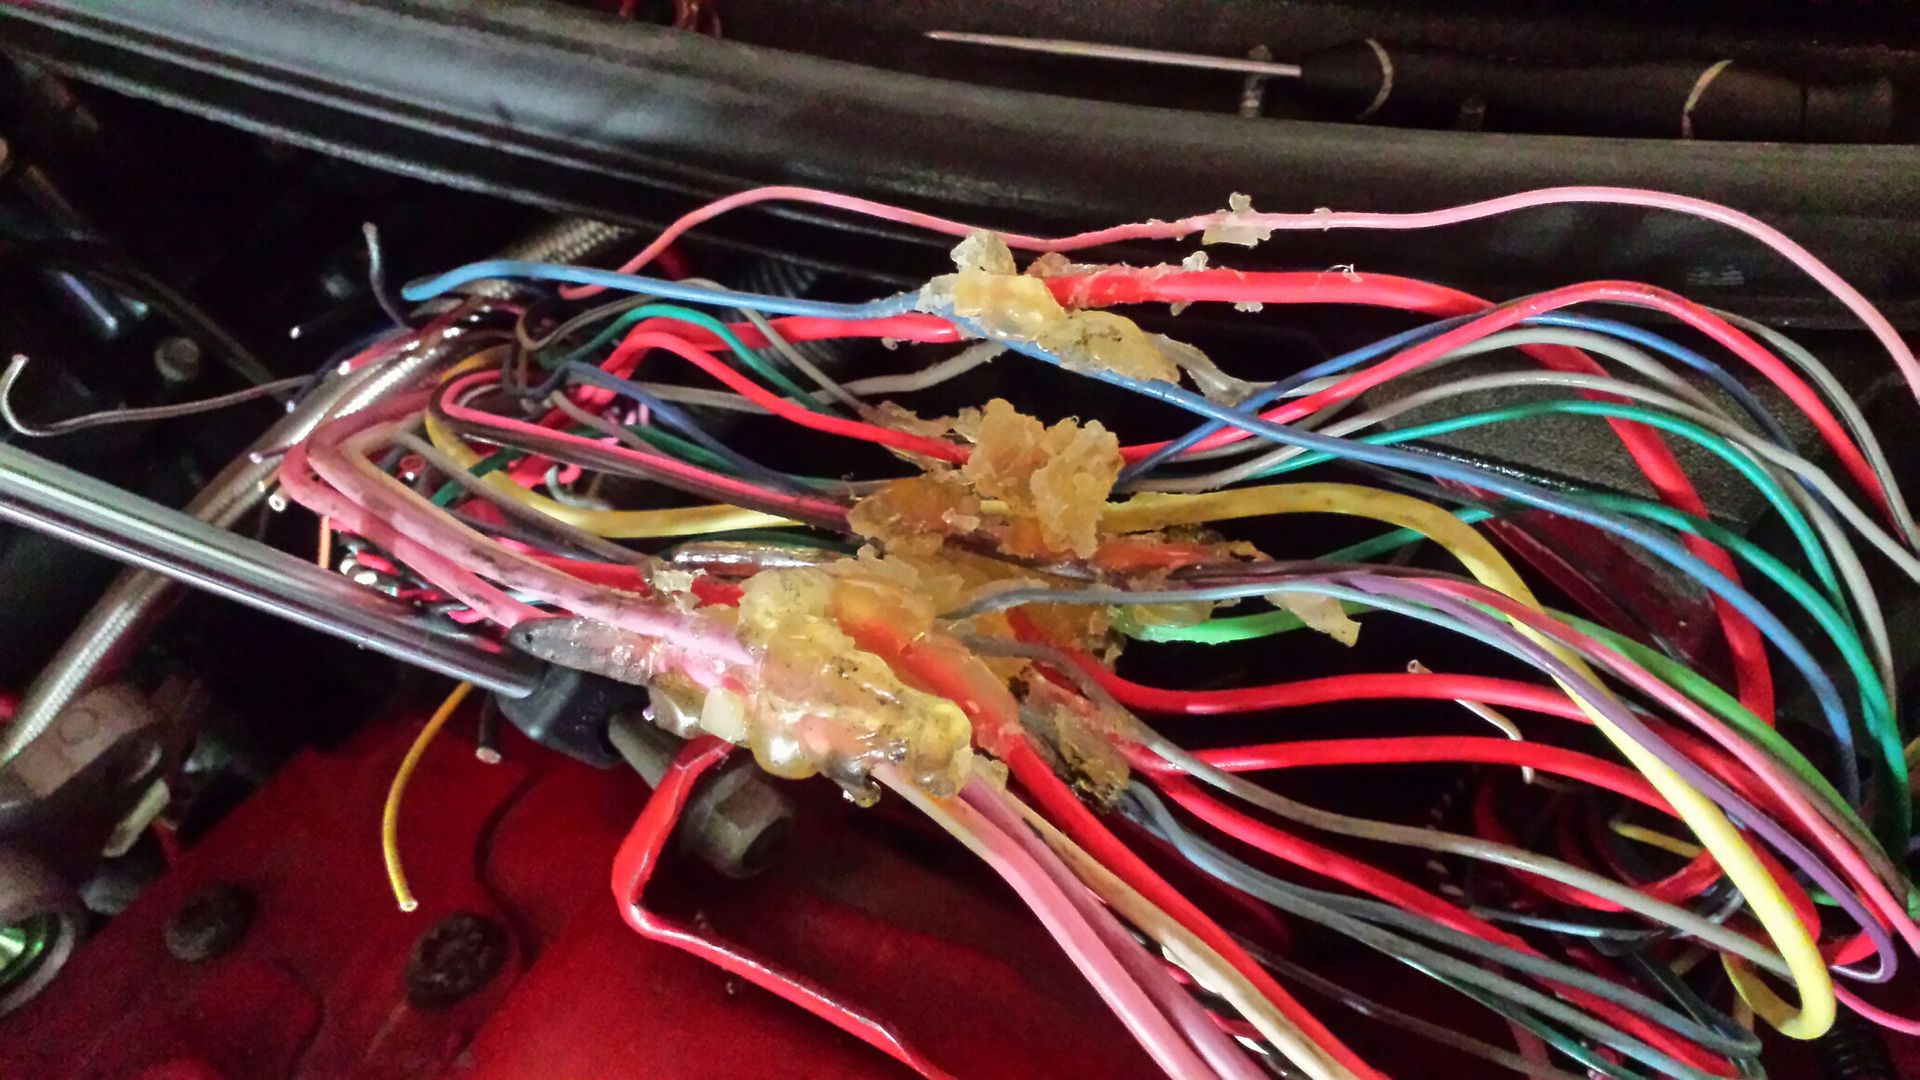 With the 4 wires cut, and a couple off the steering column disconnected, you can pull the whole harness from the drivers side to keep going. At this point the whole thing is only connected through the passenger side. 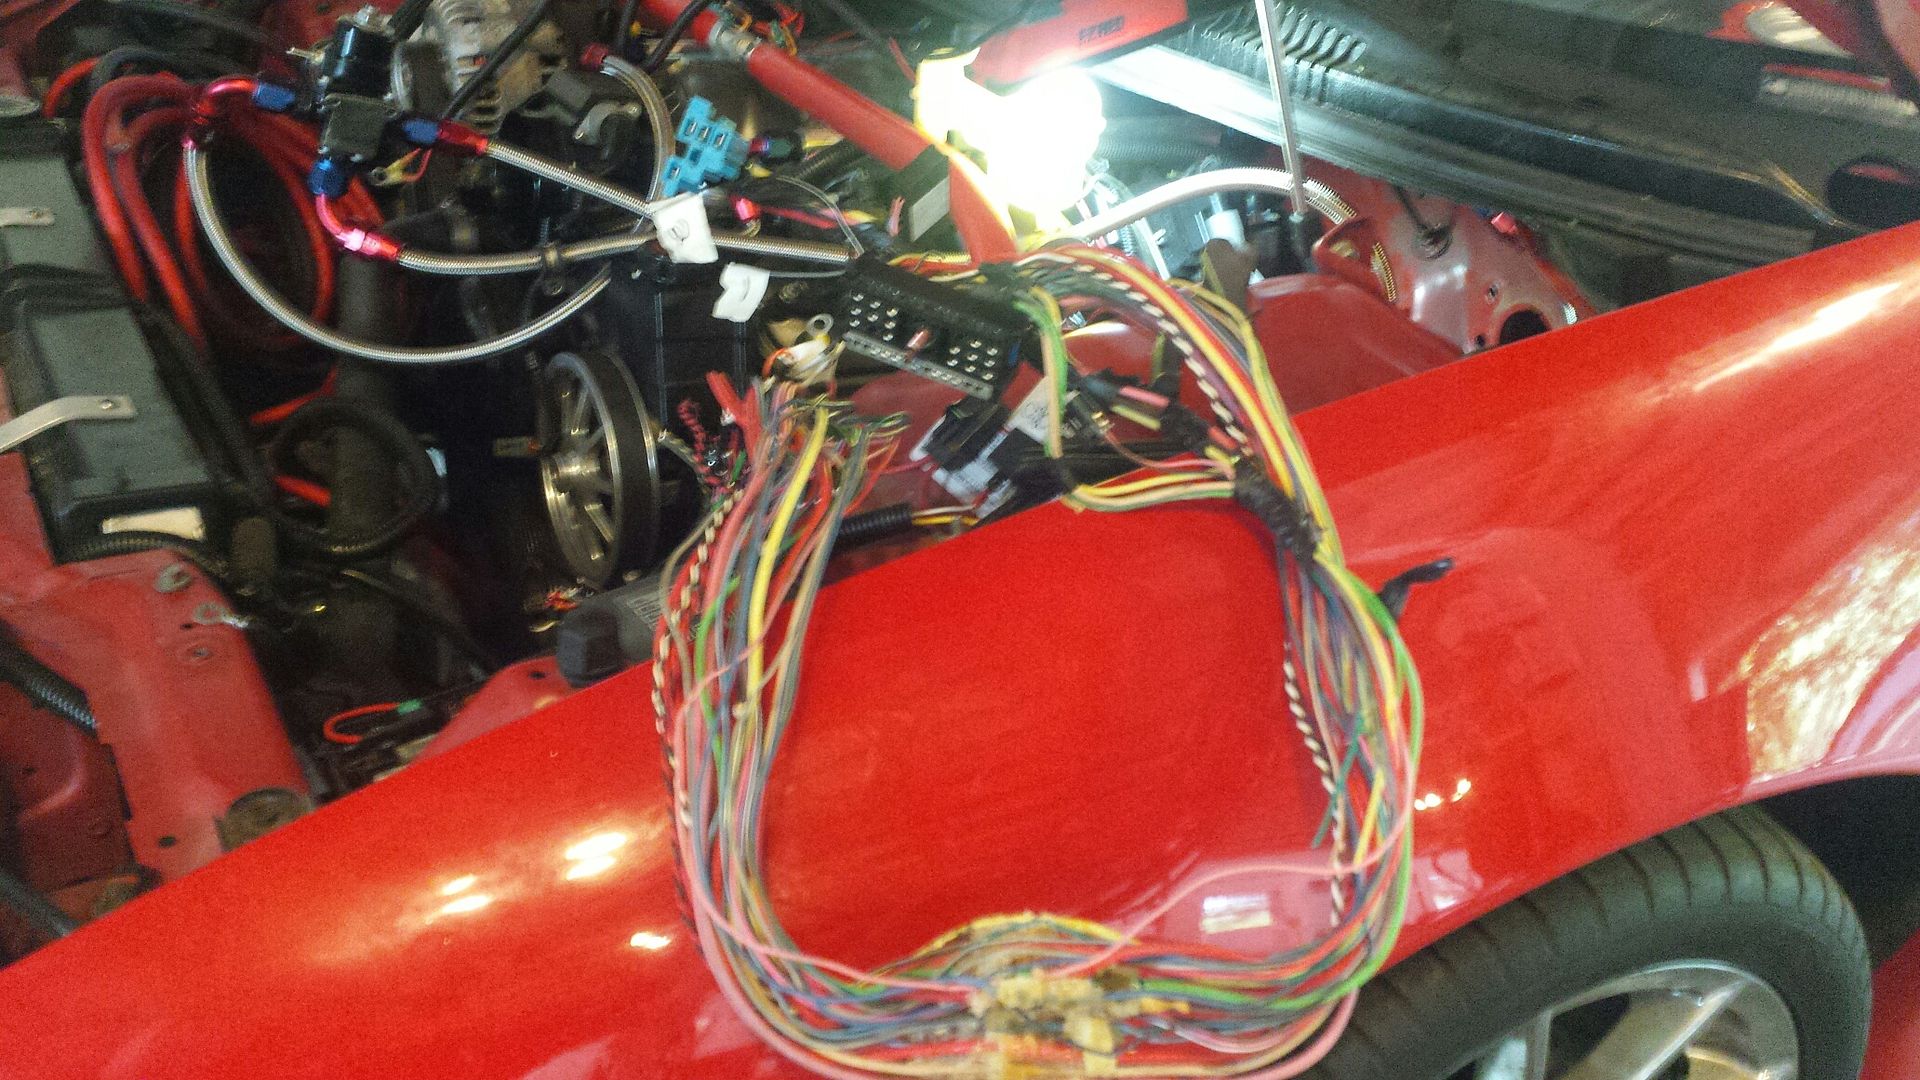 Pull out fog lights, horn, whatever is along your way and get those fuse boxes un-mounted. 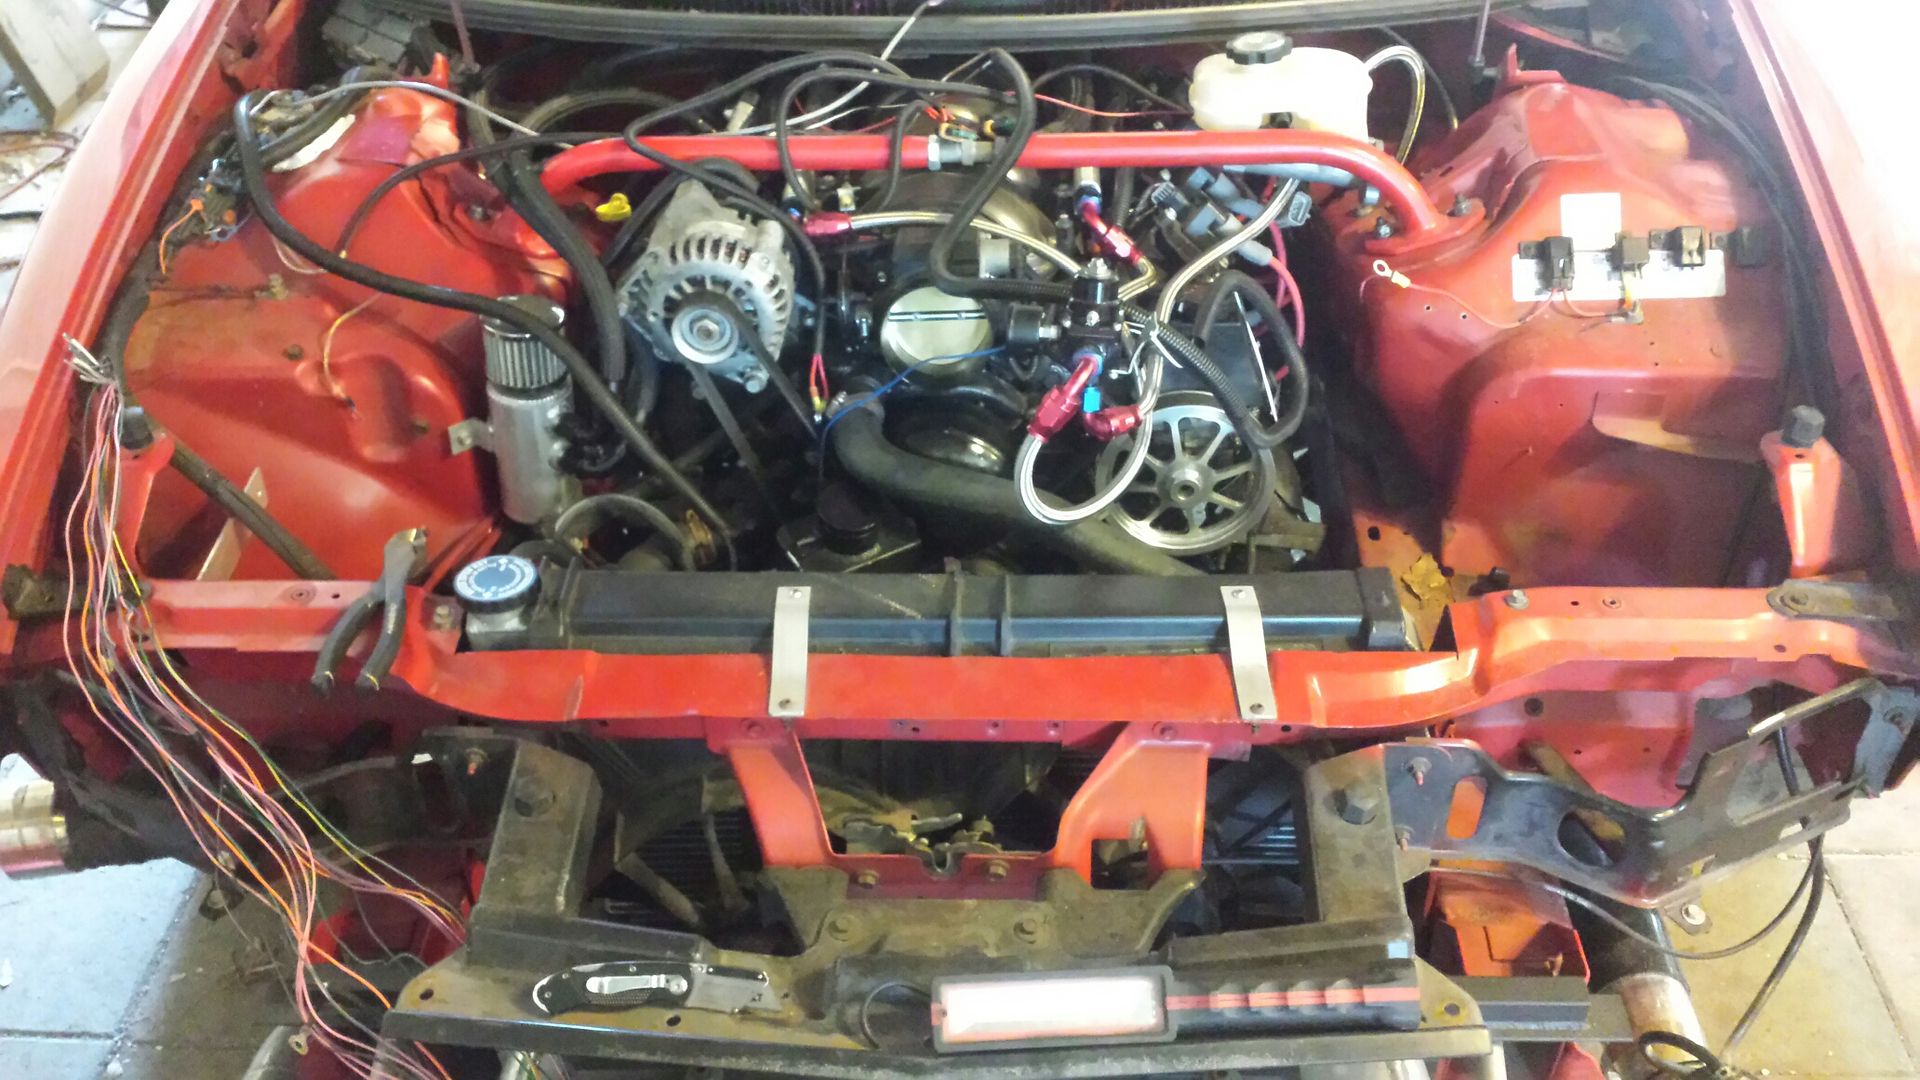 Here's the end of the harness, this was plugged in about where the yellow and black met in the crappy pic above. Once we shove it back through the passenger side, they will reach easily to reconnect, this time on the inside of the car. 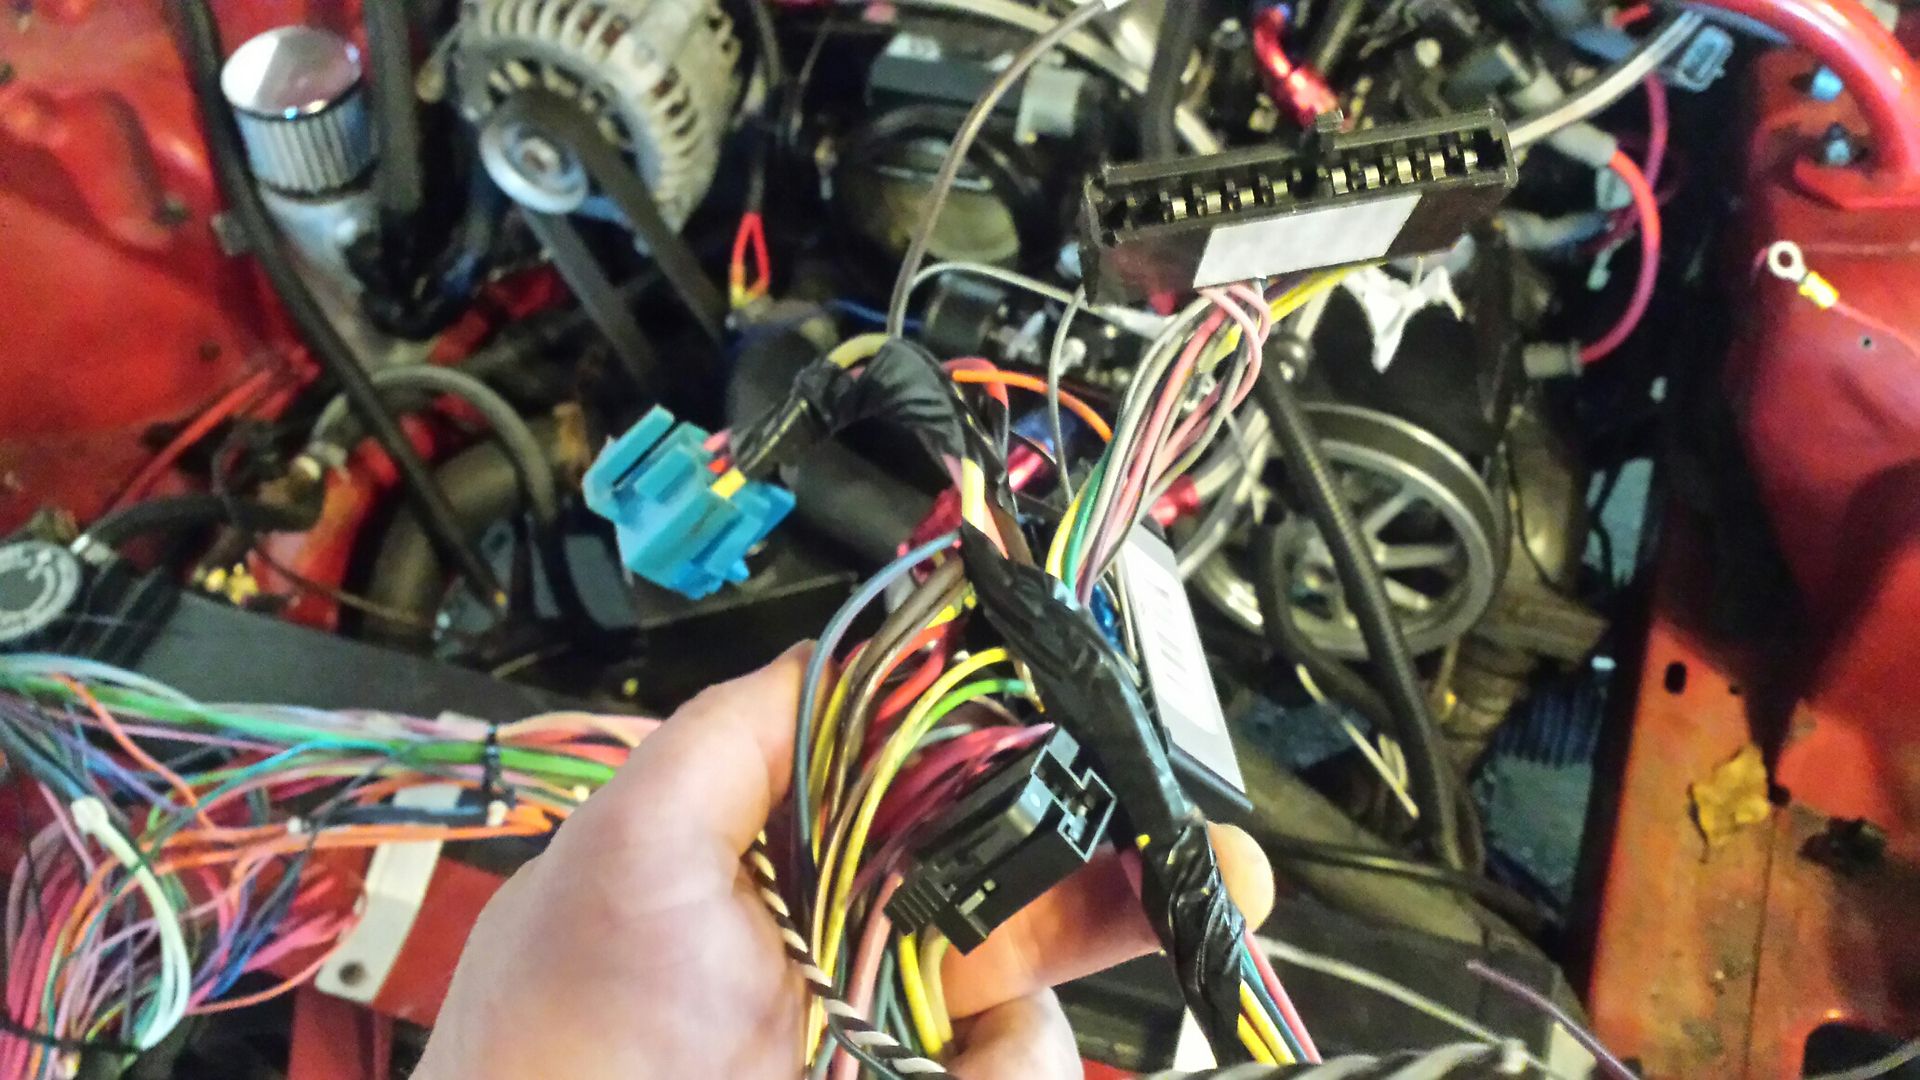 For simplicity sake i tied up each headlight side wiring and fan harness as they have to come too. 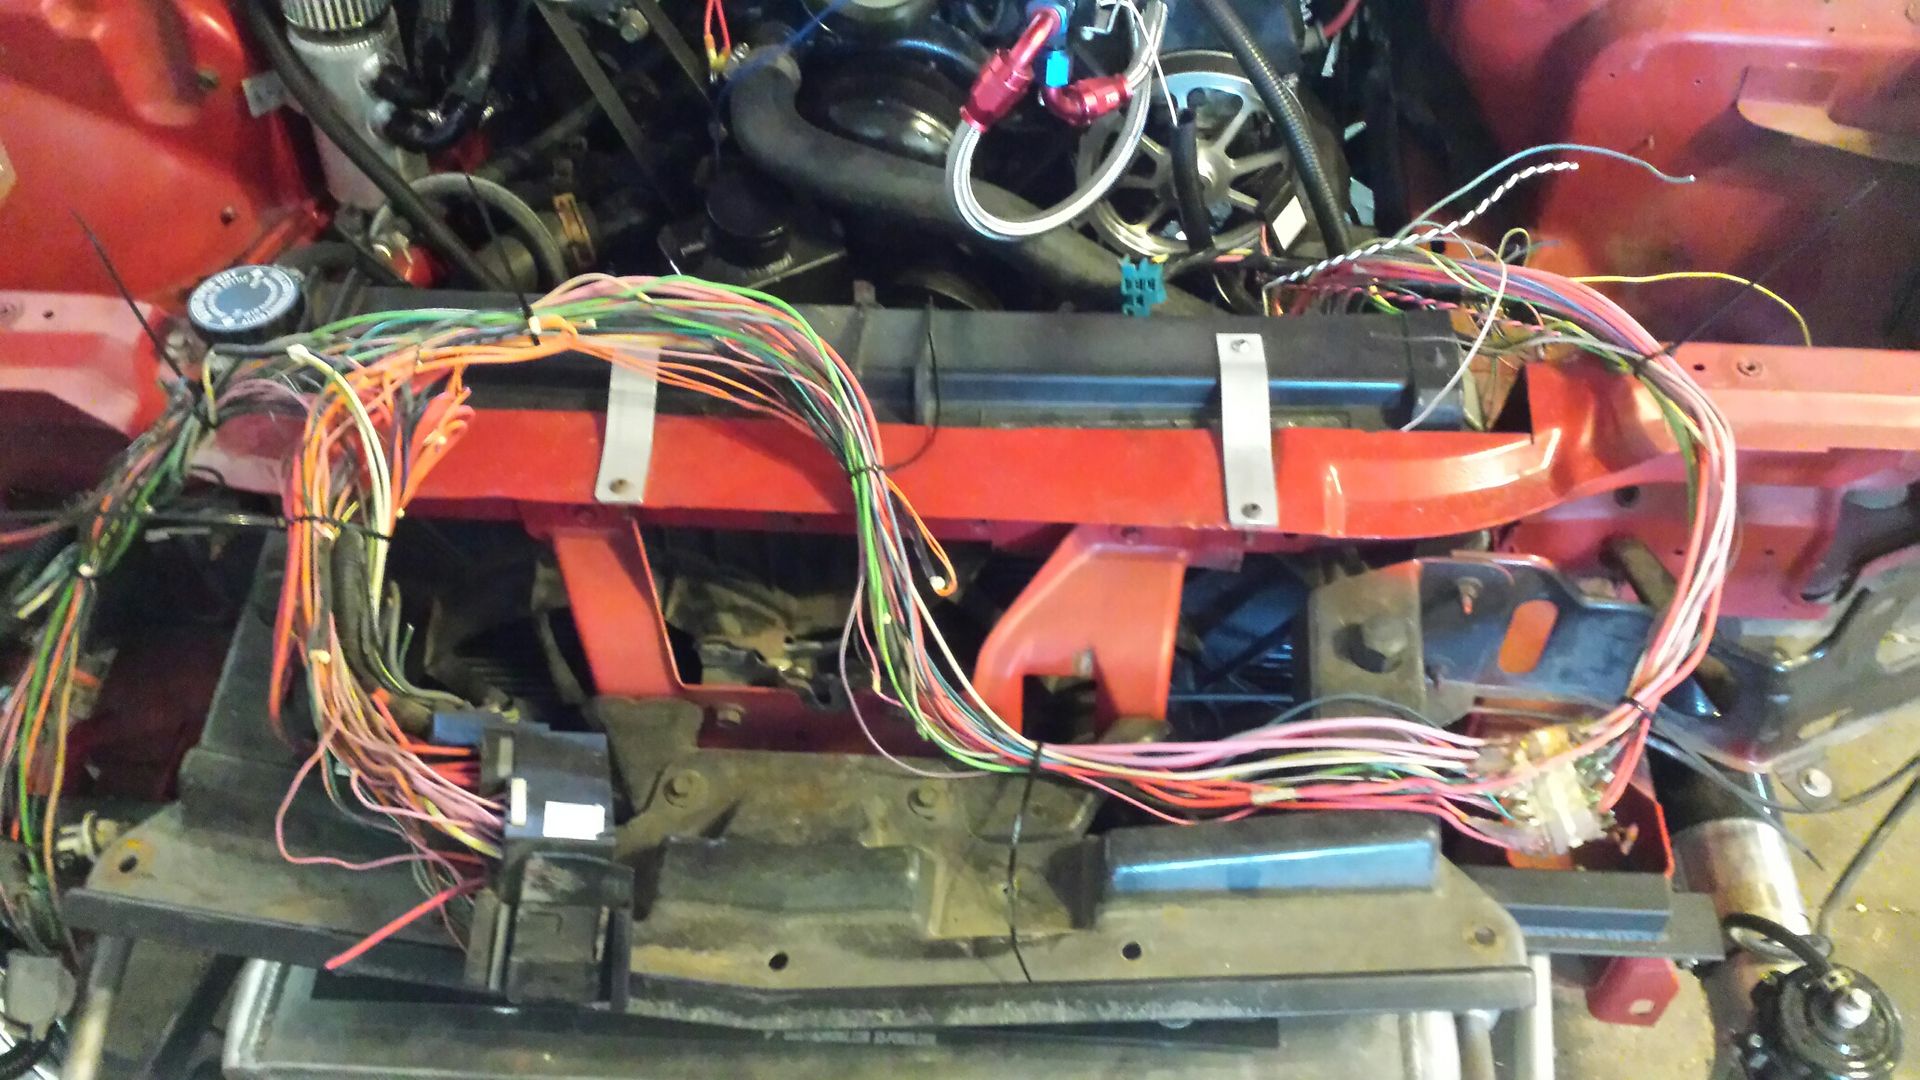 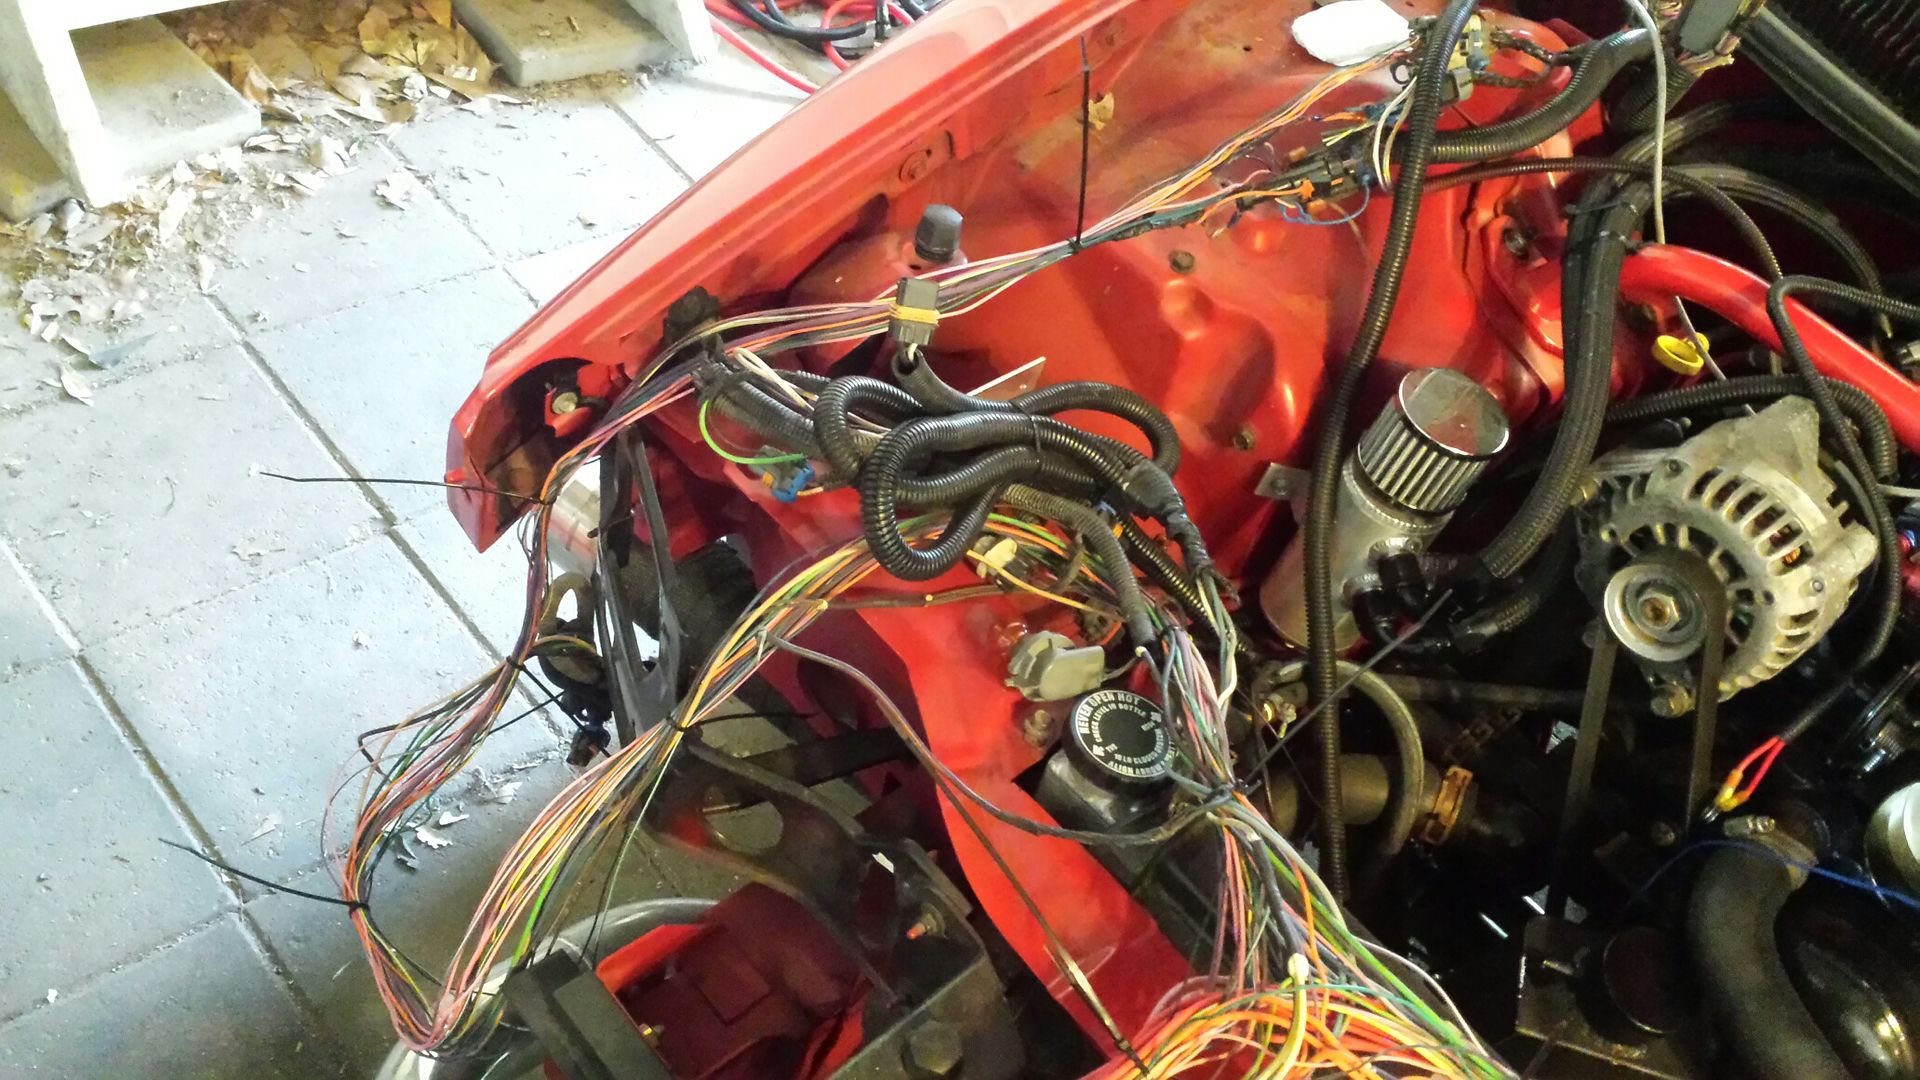 Take the pcm, its passenger fender connectors, and both fuse boxes and shove em through the delete panel. 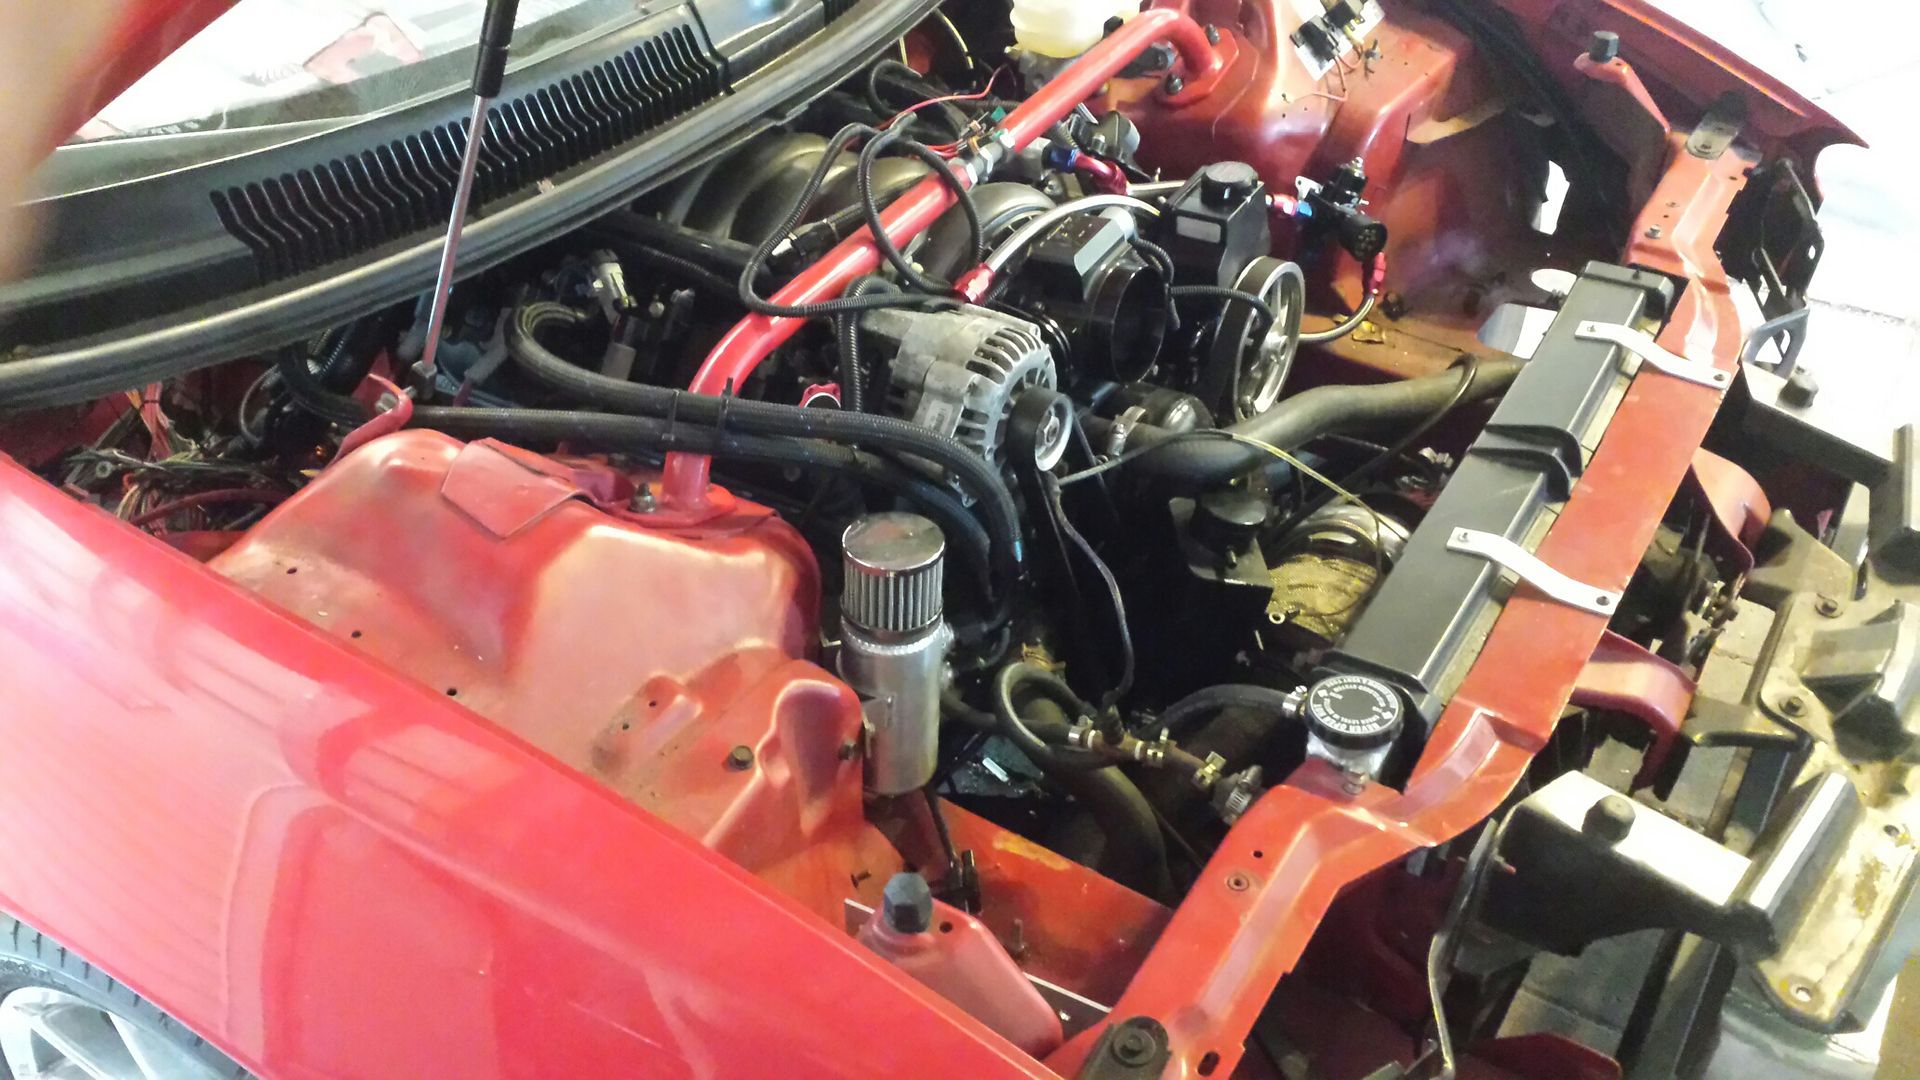 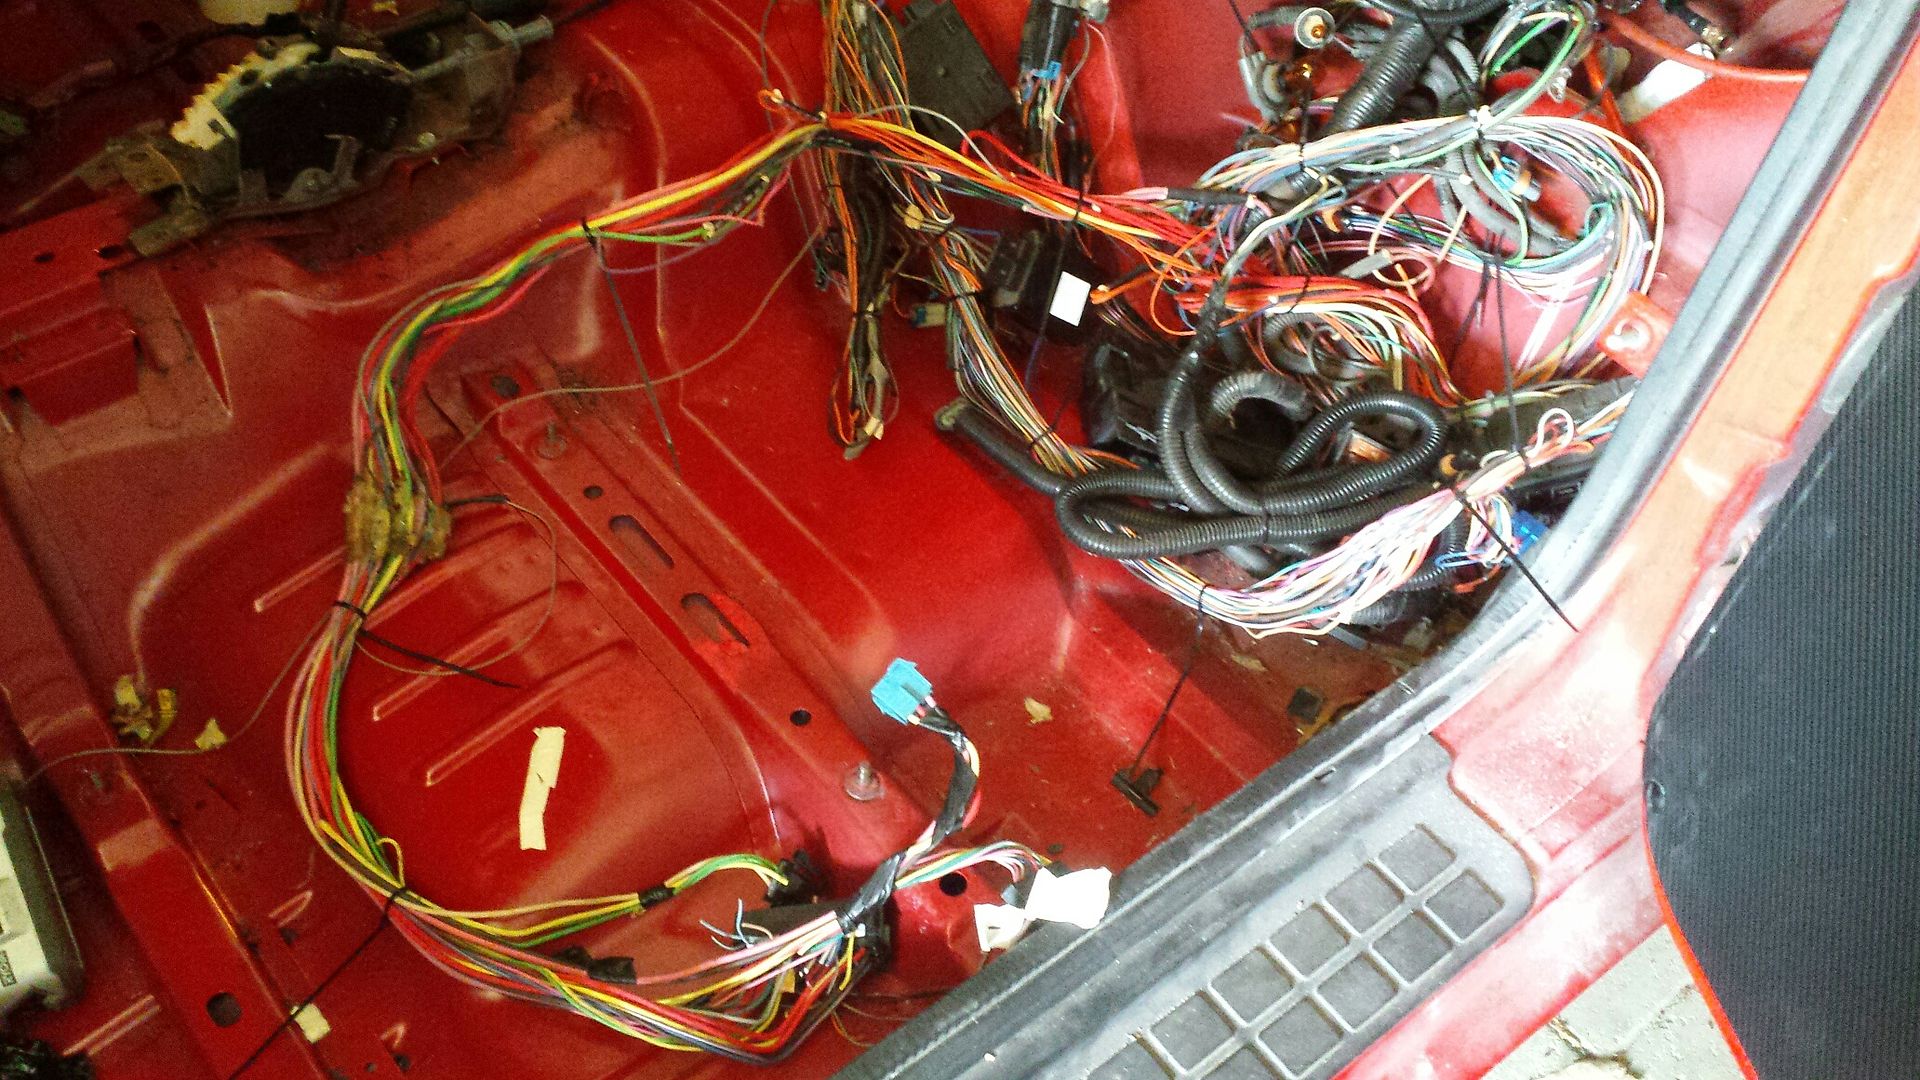 Notch your plate at the bottom corner for the starter wire, and the top corner for the PCM bulk wiring. 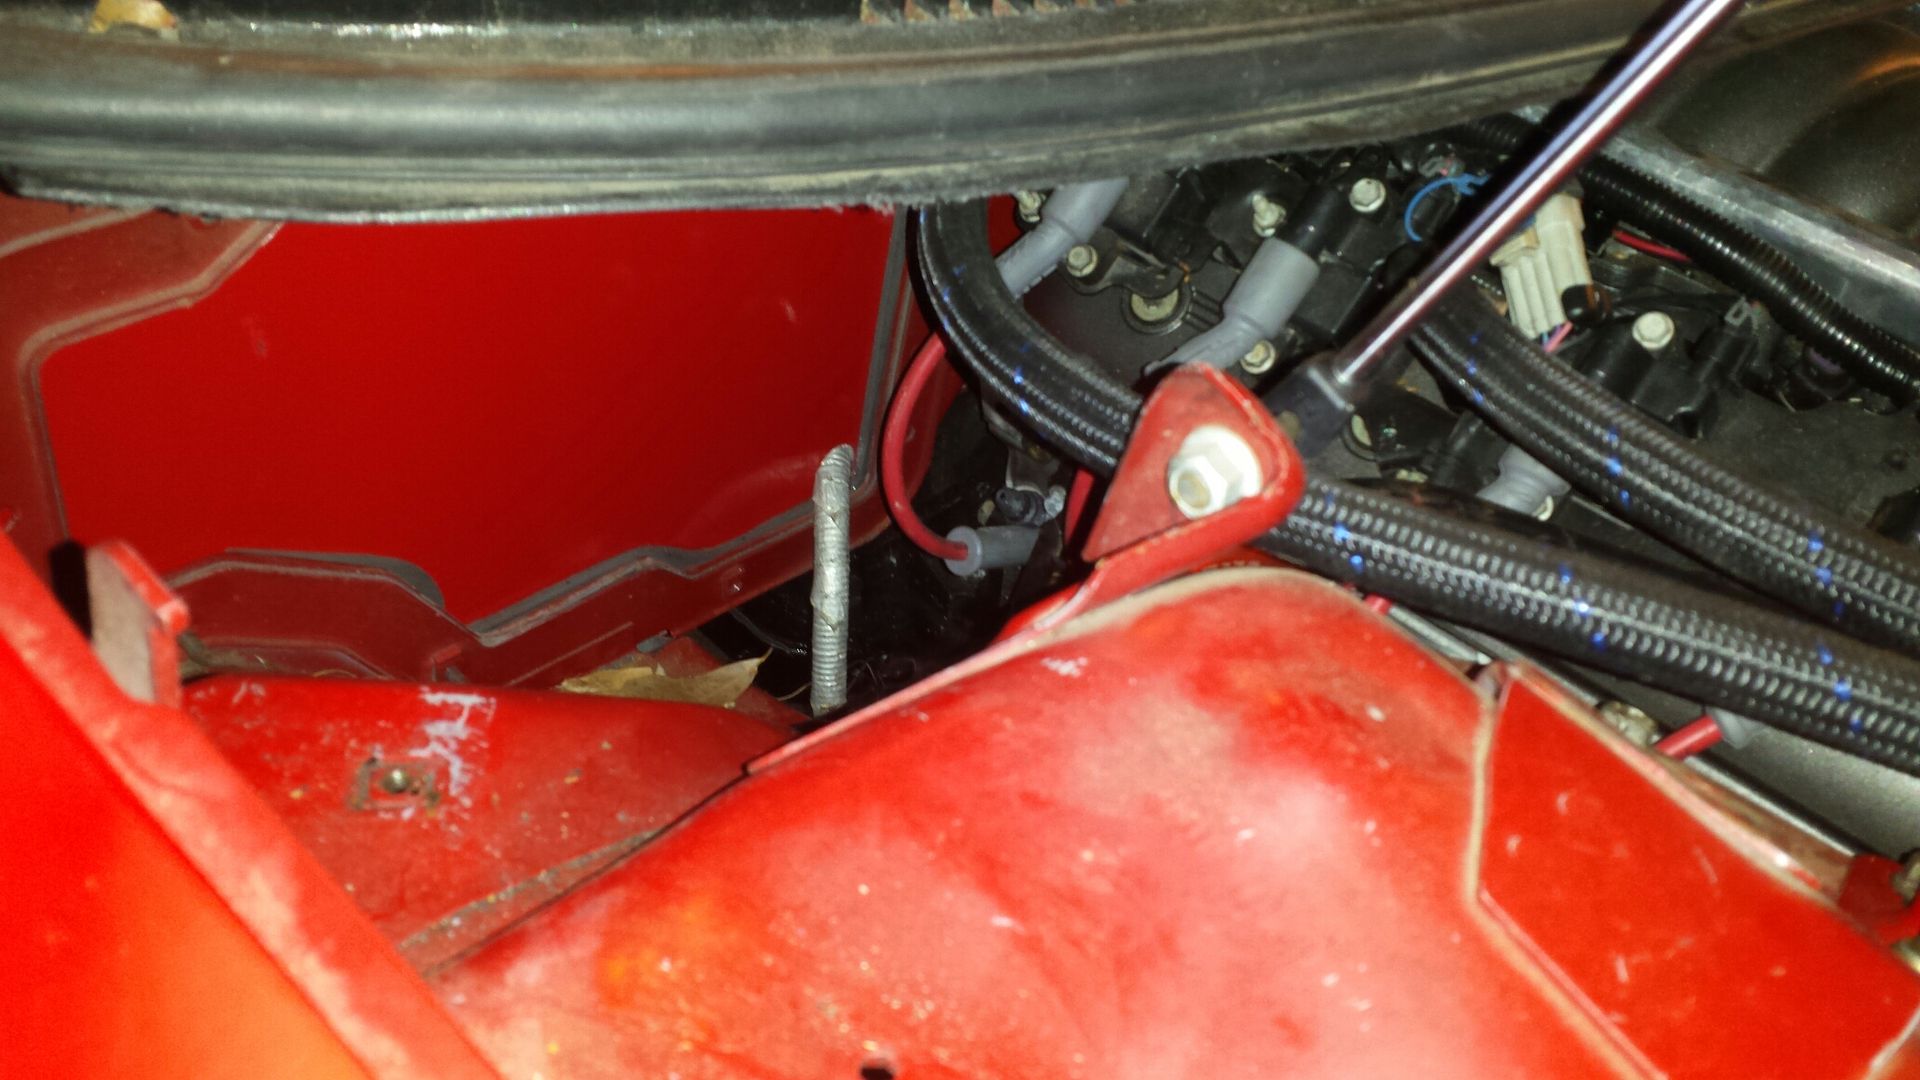 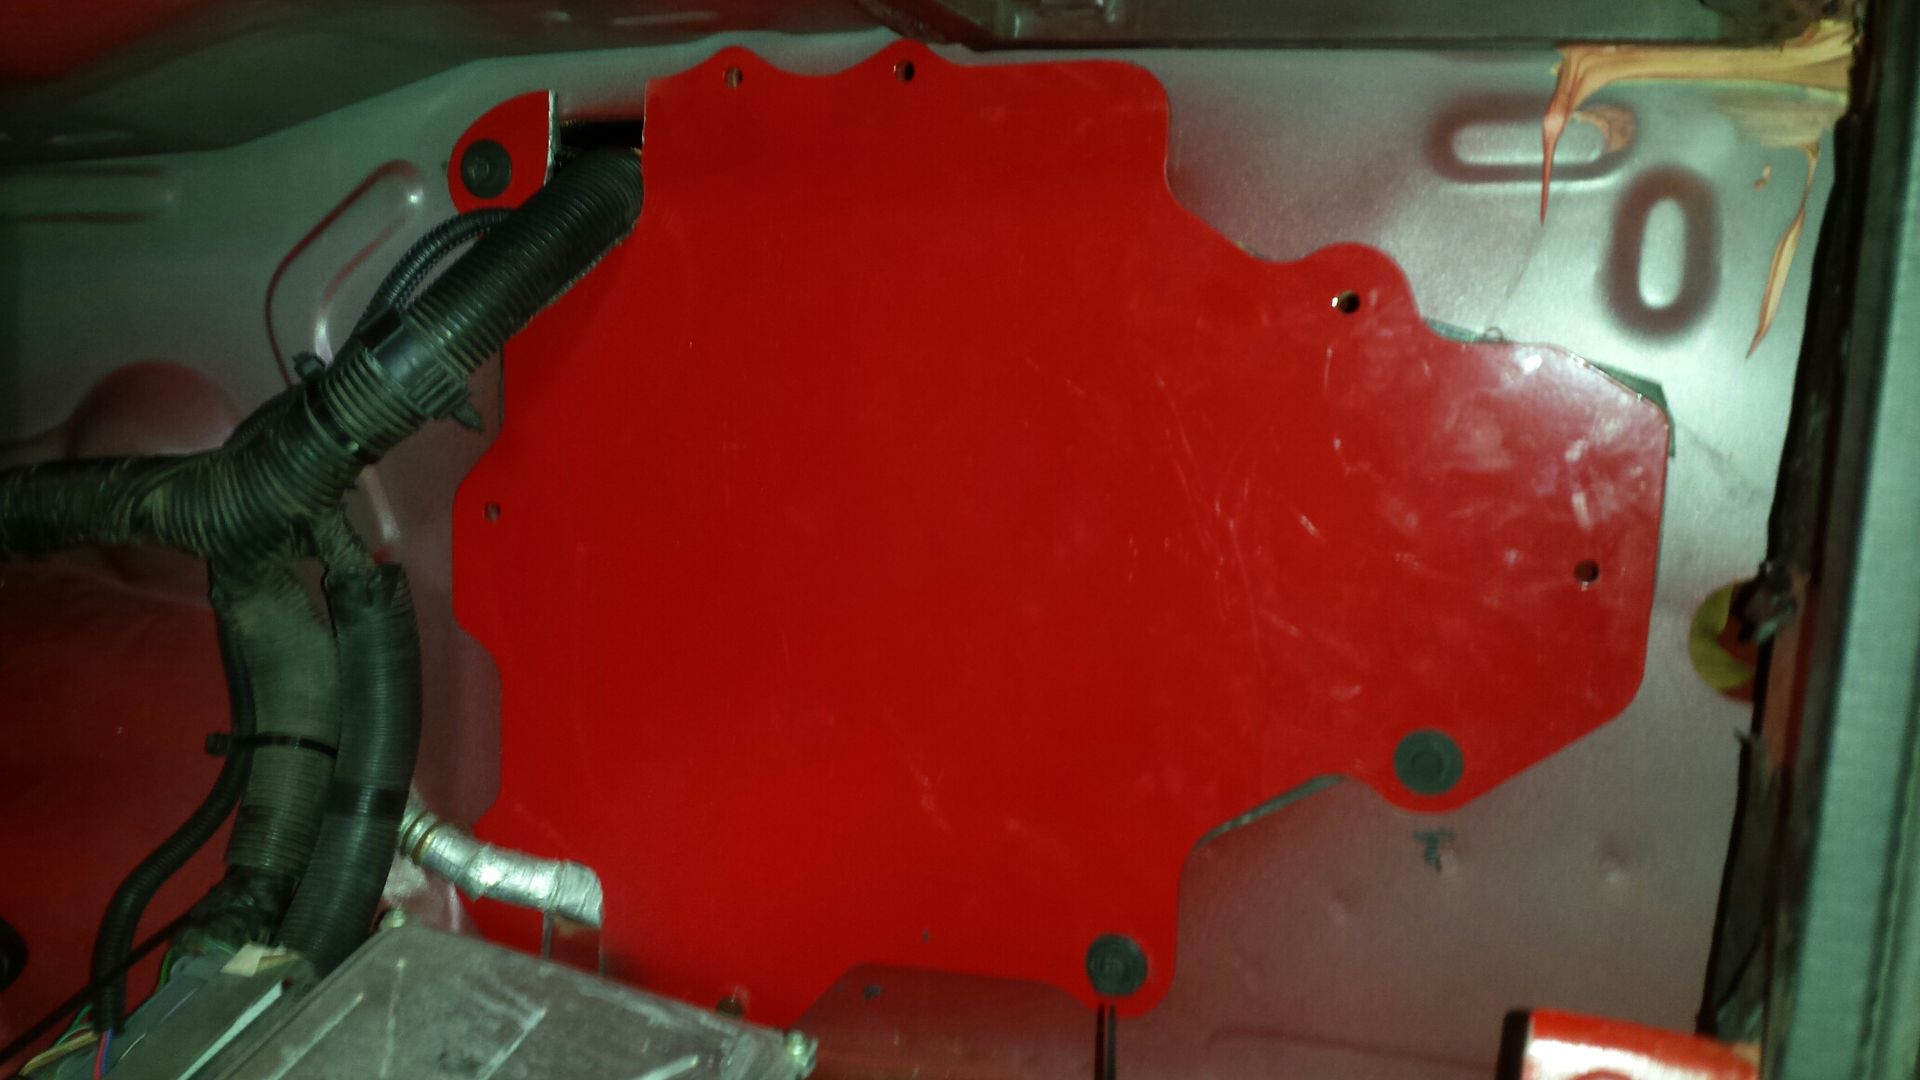 Im moving my battery to the back so I'm adding bulkheads here to distribute main power wires. Pcm will be mounted right next to them. 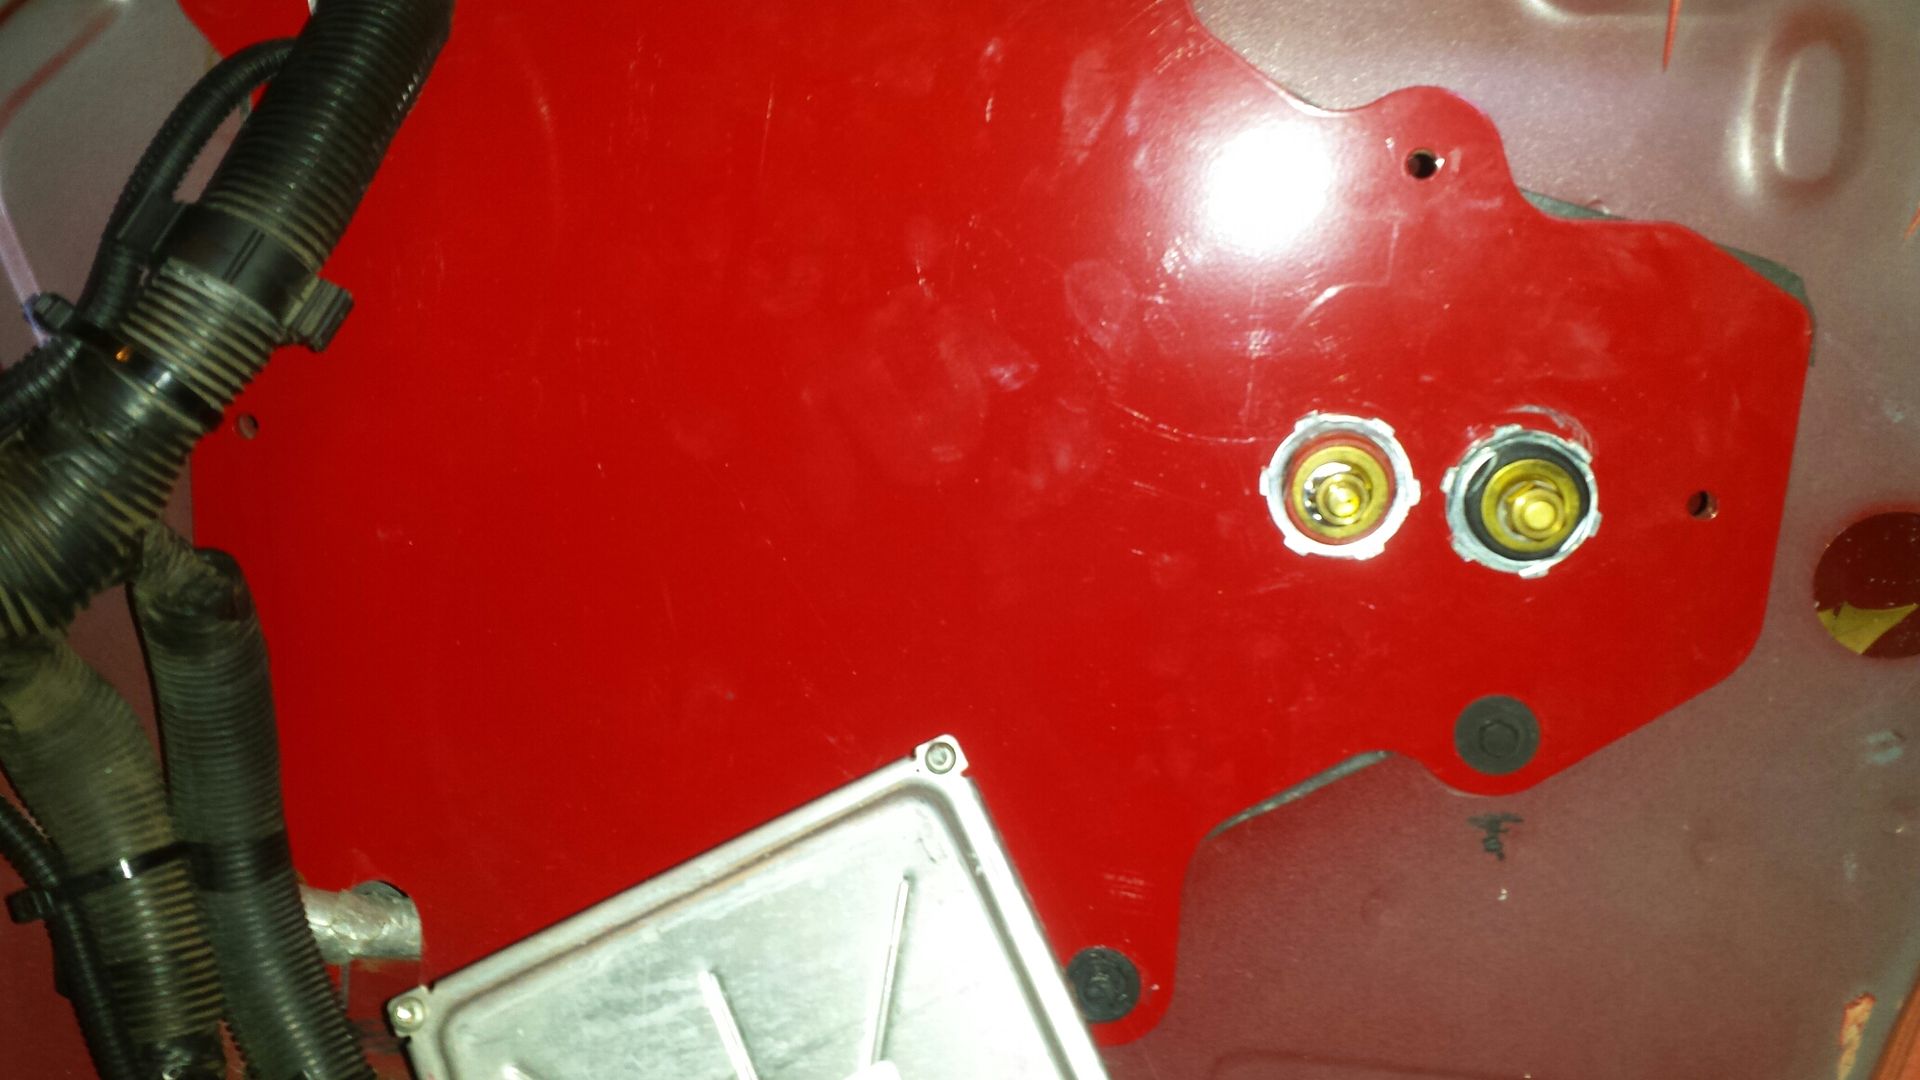 Here's the wiring I deleted. Xbox remote for size reference. 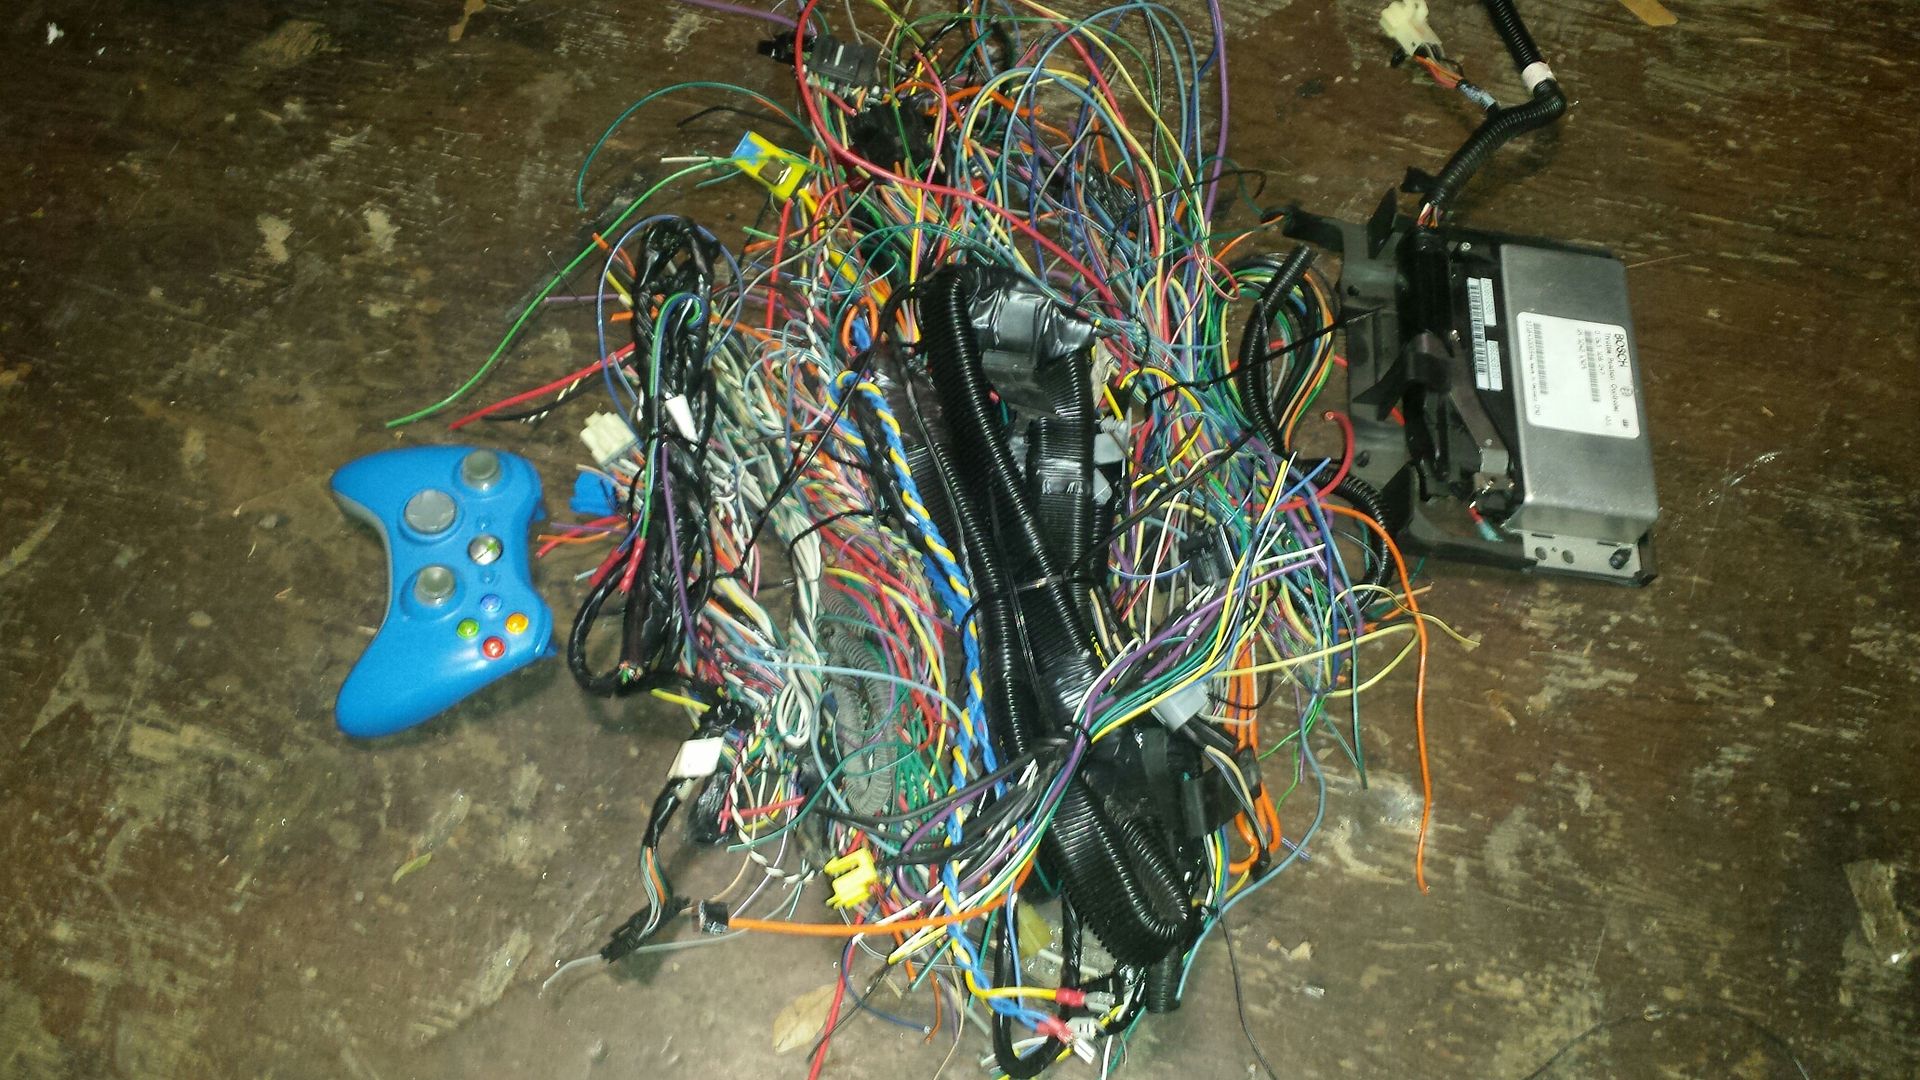 Other variations for YOUR car will include what you do with your battery, what all you delete, and how you want to get PCM wiring back through OR leave it where it was. I want the PCM inside the car for whatever dumb reason. You'll need to get headlight and fan wiring back to the front. So cut it and extend it (maybe 15 wires), route how you like. I'm doing a tubular front end so I'm waiting on that first. Remember to reconnect the black harness where you disconnected from. Make a PCM/fuse block mount to whatever you fabrication skills allow.
__________________
06 Foreman 500 - 29.5 OG Outlaws, 35%, Warn 2.5k, HL^2", <2.5">, EPI, HMF 95 Fourtrax 300 - 27" Zillas, SS212s , Viper 3k, HL^2" 04 XR80 - Stock 07 CRF50 - Stock |

|
|
|
#218 |
|
Join Date: Jun 2012
Posts: 220
|
Well here's what Im going for.:
https://rock-solid-motorsports.com/p...ular-front-end Me and the owner of the company couldnt strike a deal on his kit so I decided to build my own. There is a certain amount of pride when you can say its made by you, instead of ordered off a website. First thing is first, strip the front. 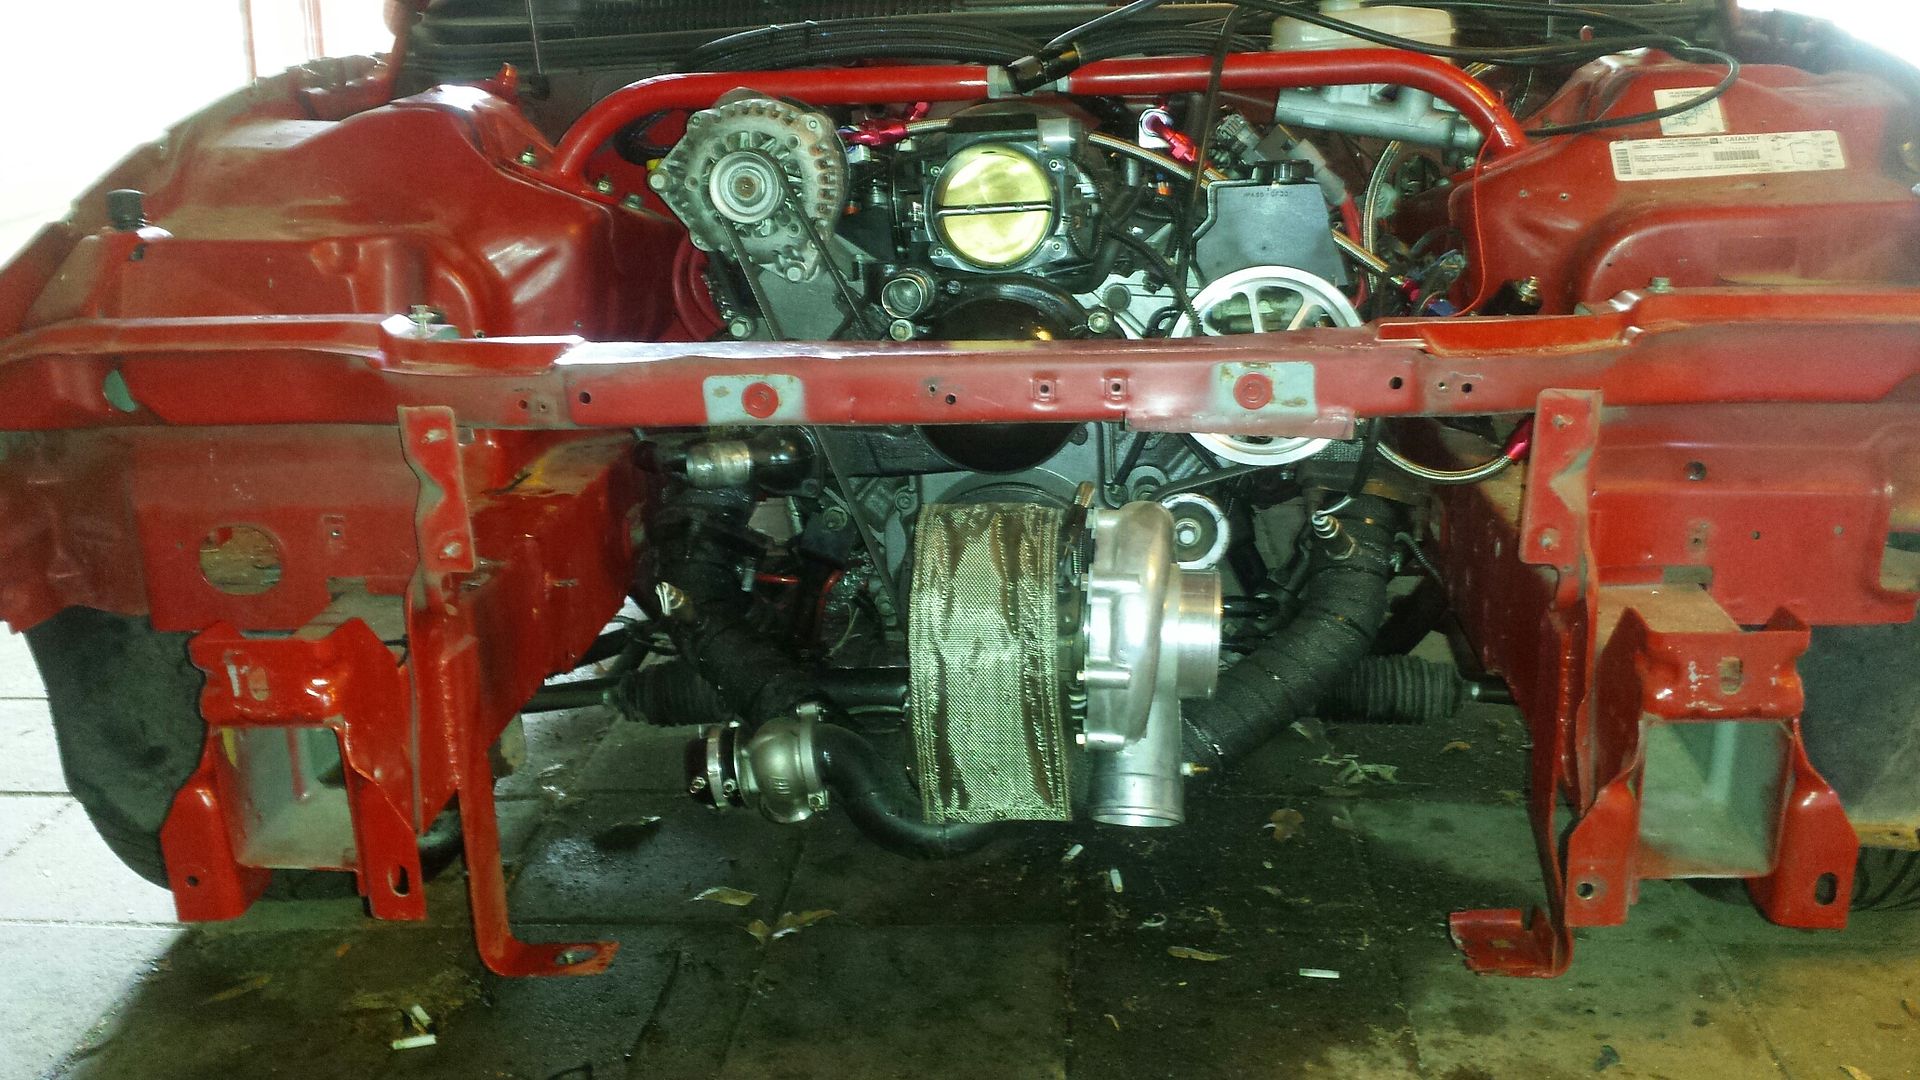 I chose to leave the hotside on for now (hoping I had enough room for the cuts) and since about 75% of the kit is uninstalled, and about 50% of it will likely need to be rerouted, it is listed locally for sale. If it sells I will build a t6 kit from scratch, if it doesnt, i wont modify the pipes in this kit just replace certain parts and keep the others intact to sell it later as a complete kit. Cliff notes: t6 turbo coming, but not sure when. Made the initial cut, just to get the bulk of the metal out of my way. Fun fact: I removed the inner plastic front fender liners, and in like 11/12 years of owning this car are one of the few pieces that have never been off the car. I threw them in the bushes. 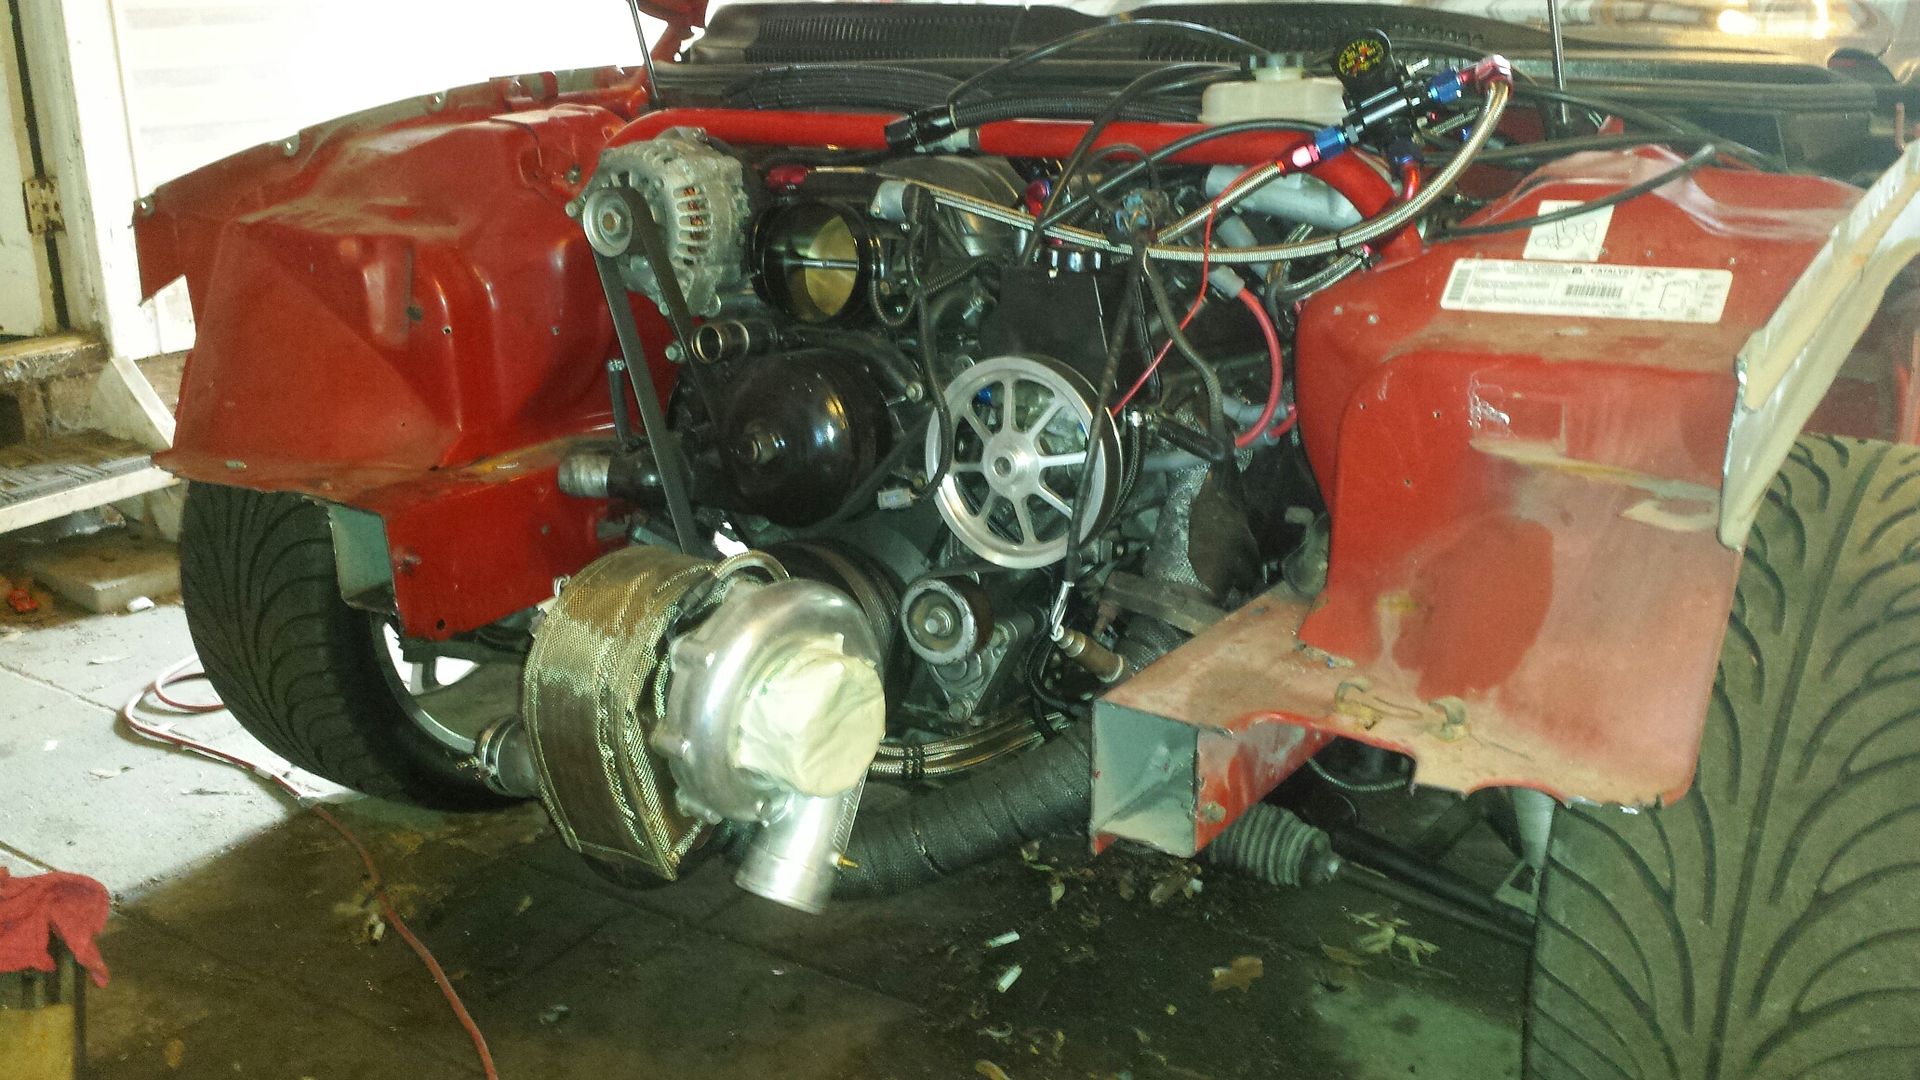 Here's where we ended up. This was a rough cut and frame rails need to be smoothed out and all that. The plan now is, I have steel plate to cap off the rails and fender area. I need to select pipe, buy it, bend it, and get to welding. 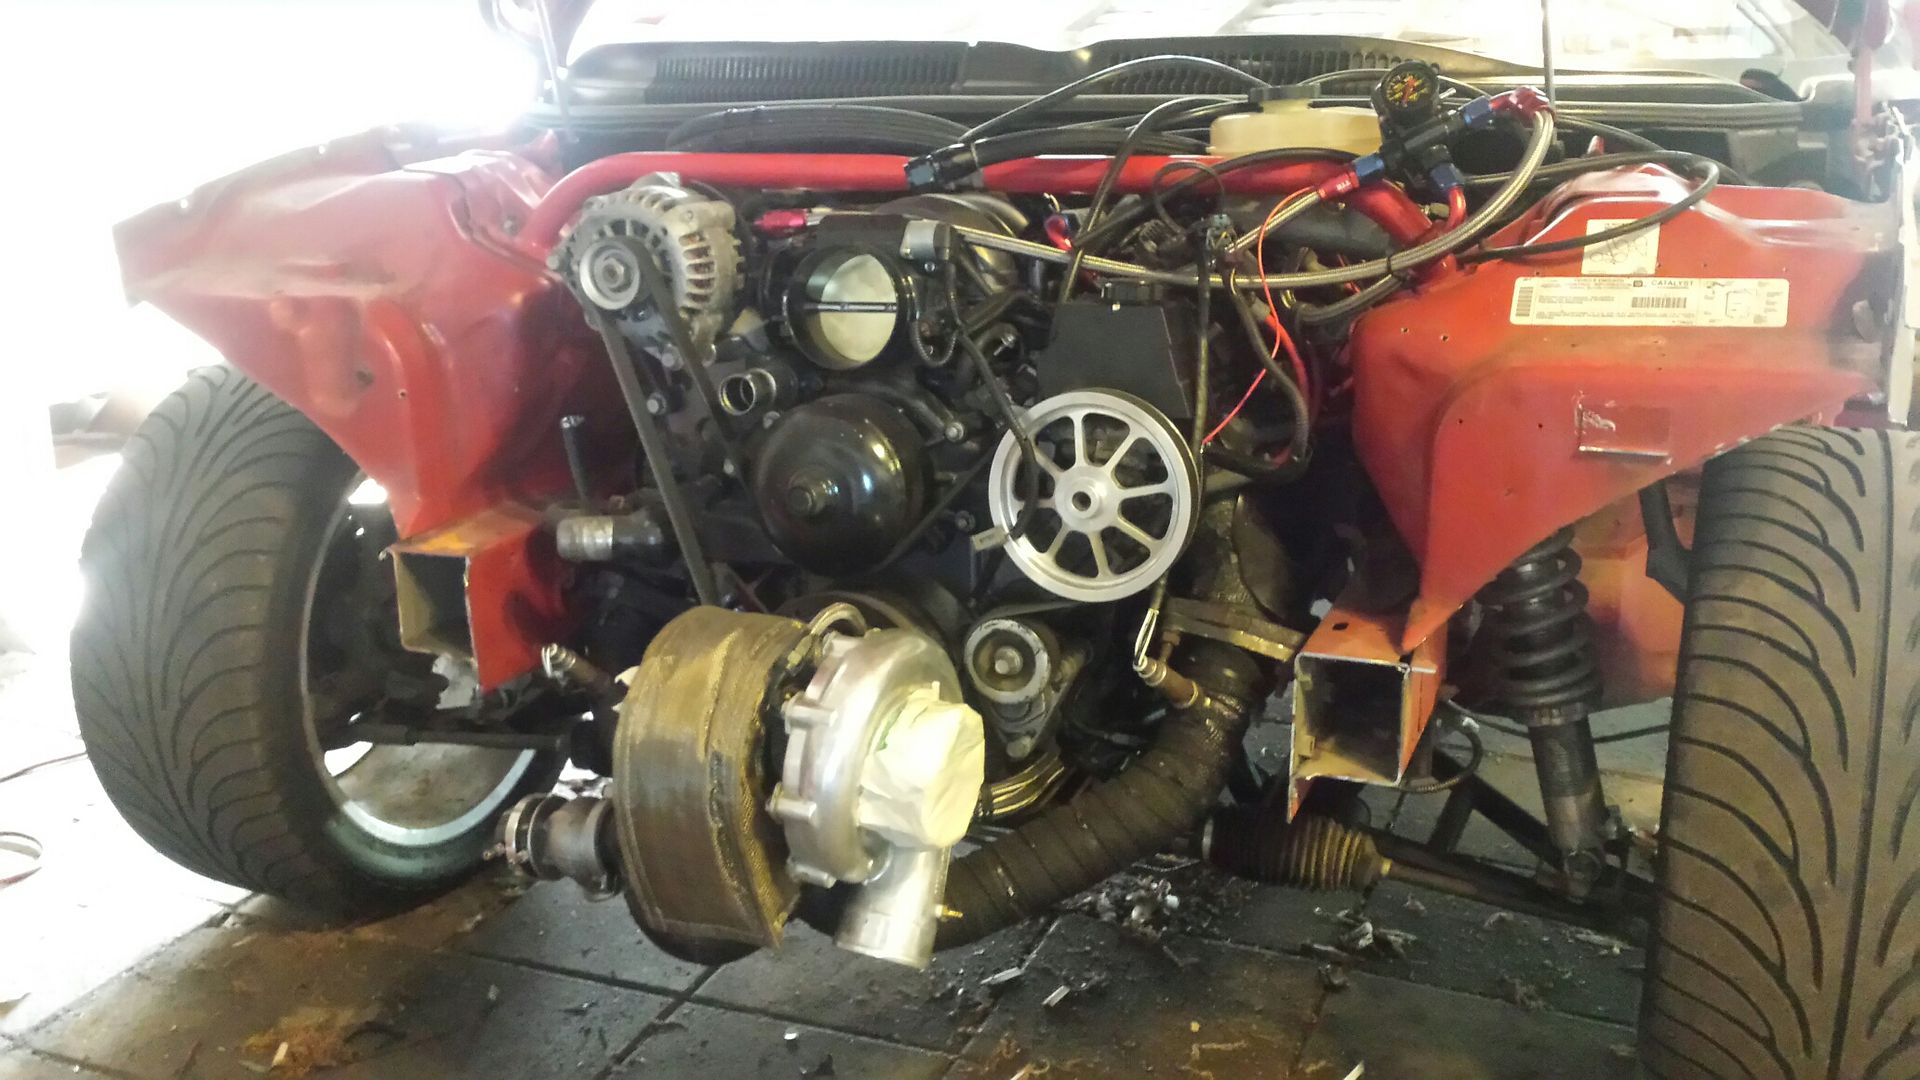 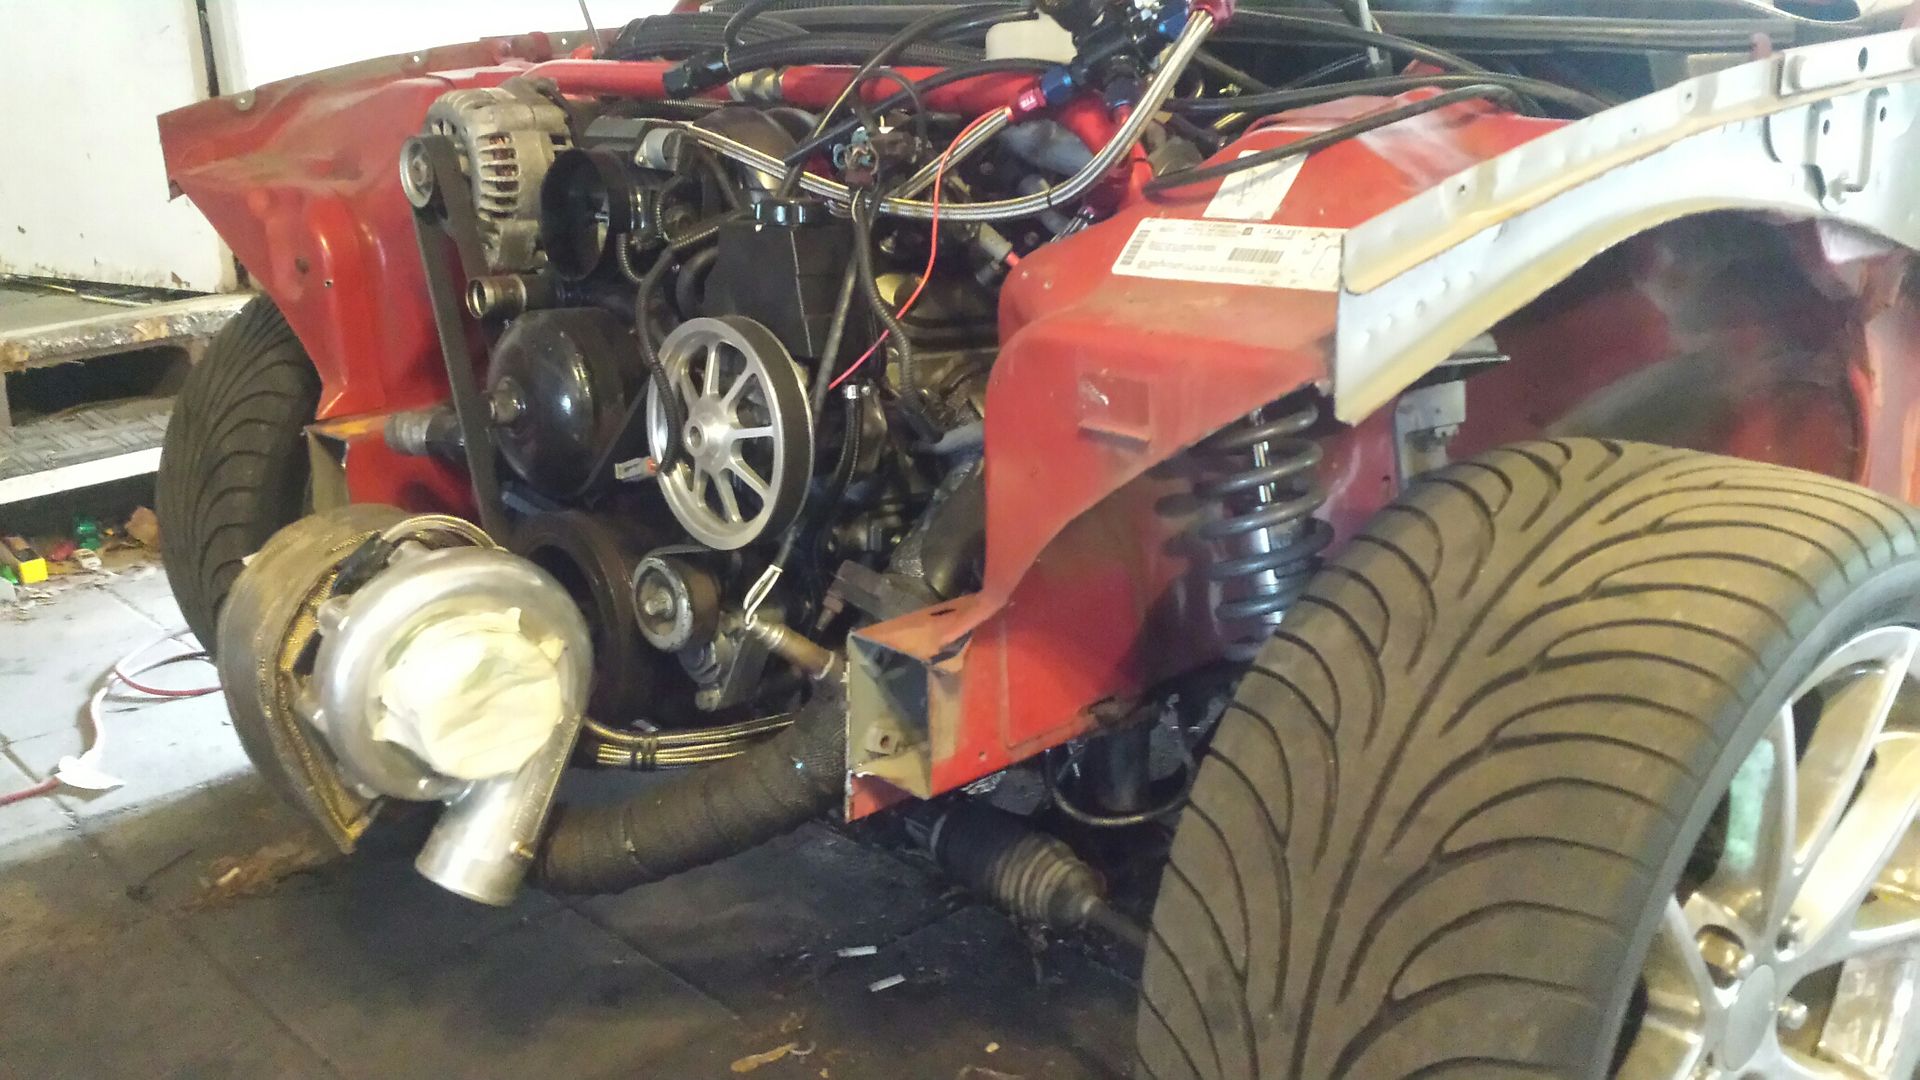 The look on my kid's face was priceless when they walked around and thought daddy WTF did you do to your car?? I'm pretty sure no one in the house thinks it will ever run again.
__________________
06 Foreman 500 - 29.5 OG Outlaws, 35%, Warn 2.5k, HL^2", <2.5">, EPI, HMF 95 Fourtrax 300 - 27" Zillas, SS212s , Viper 3k, HL^2" 04 XR80 - Stock 07 CRF50 - Stock |

|
|
|
#219 |
|
Join Date: Mar 2009
Location: Sardis, BC, Canada
Posts: 25,977
|
What are you bending tube with?
__________________
Weldangrind "I figure I'm well-prepared for coping with a bike that comes from the factory with unresolved issues and that rewards the self-reliant owner." - Buccaneer |

|
|
|
#221 |
|
Join Date: Jun 2012
Posts: 220
|
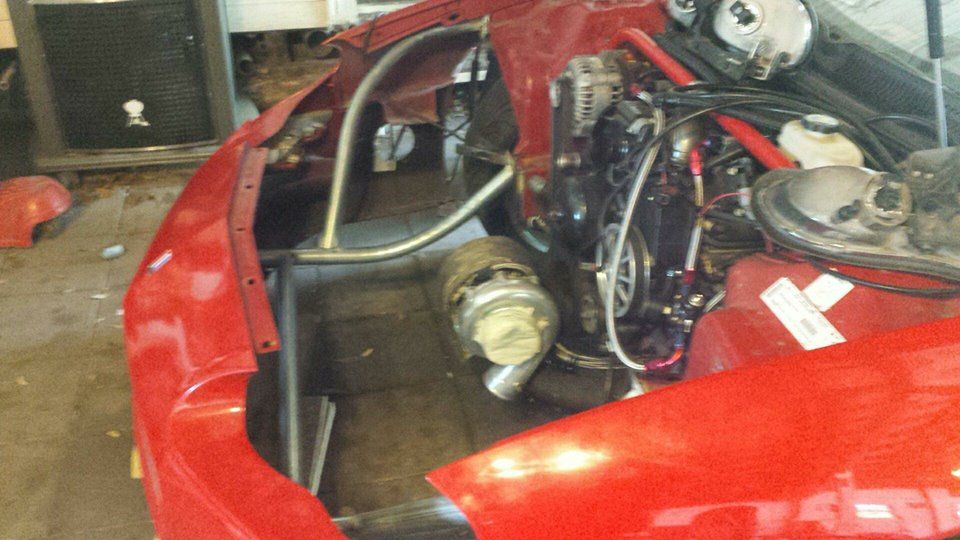
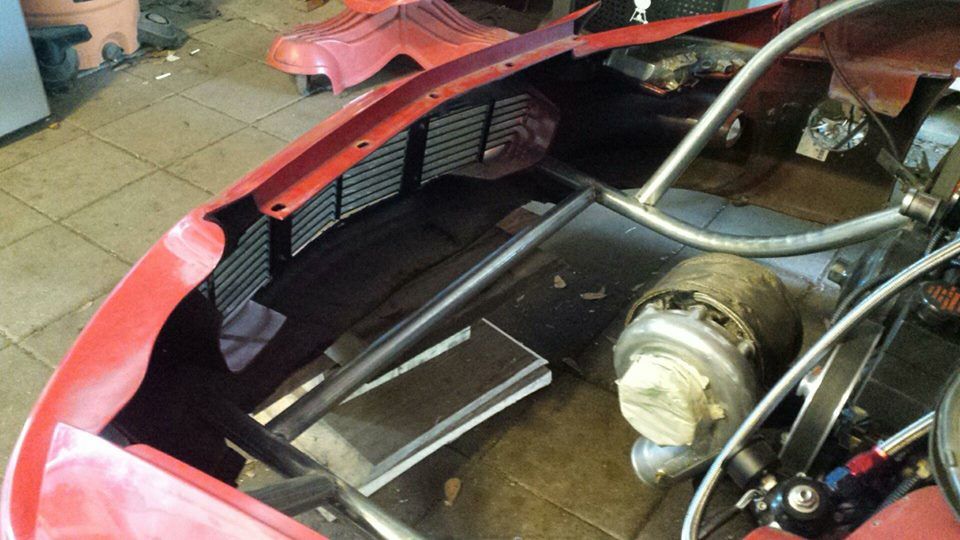
Made some progress with the pipe bender. I selected a 1 5/8" 16 gauge steel. This is easy to crush when bending it so you have to take your time and bend some, then move down the pipe and bend some more. That's why the bends look more rounded. Got a few pieces tacked on just to see how it all went together.
  The front of the car sits way up with all this stuff removed as an FYI. Long time F-body buddy Hilton let me borrow his welding 75/25 bottle. I swapped my machine over from flux to gas and started to finish the welding portion. Once done, through careful engineering calculations I determined my design, material selection, and welding procedure WOULD be strong enough for this application. My calculations consisted of......jumping/bouncing on the pipe. Success!! 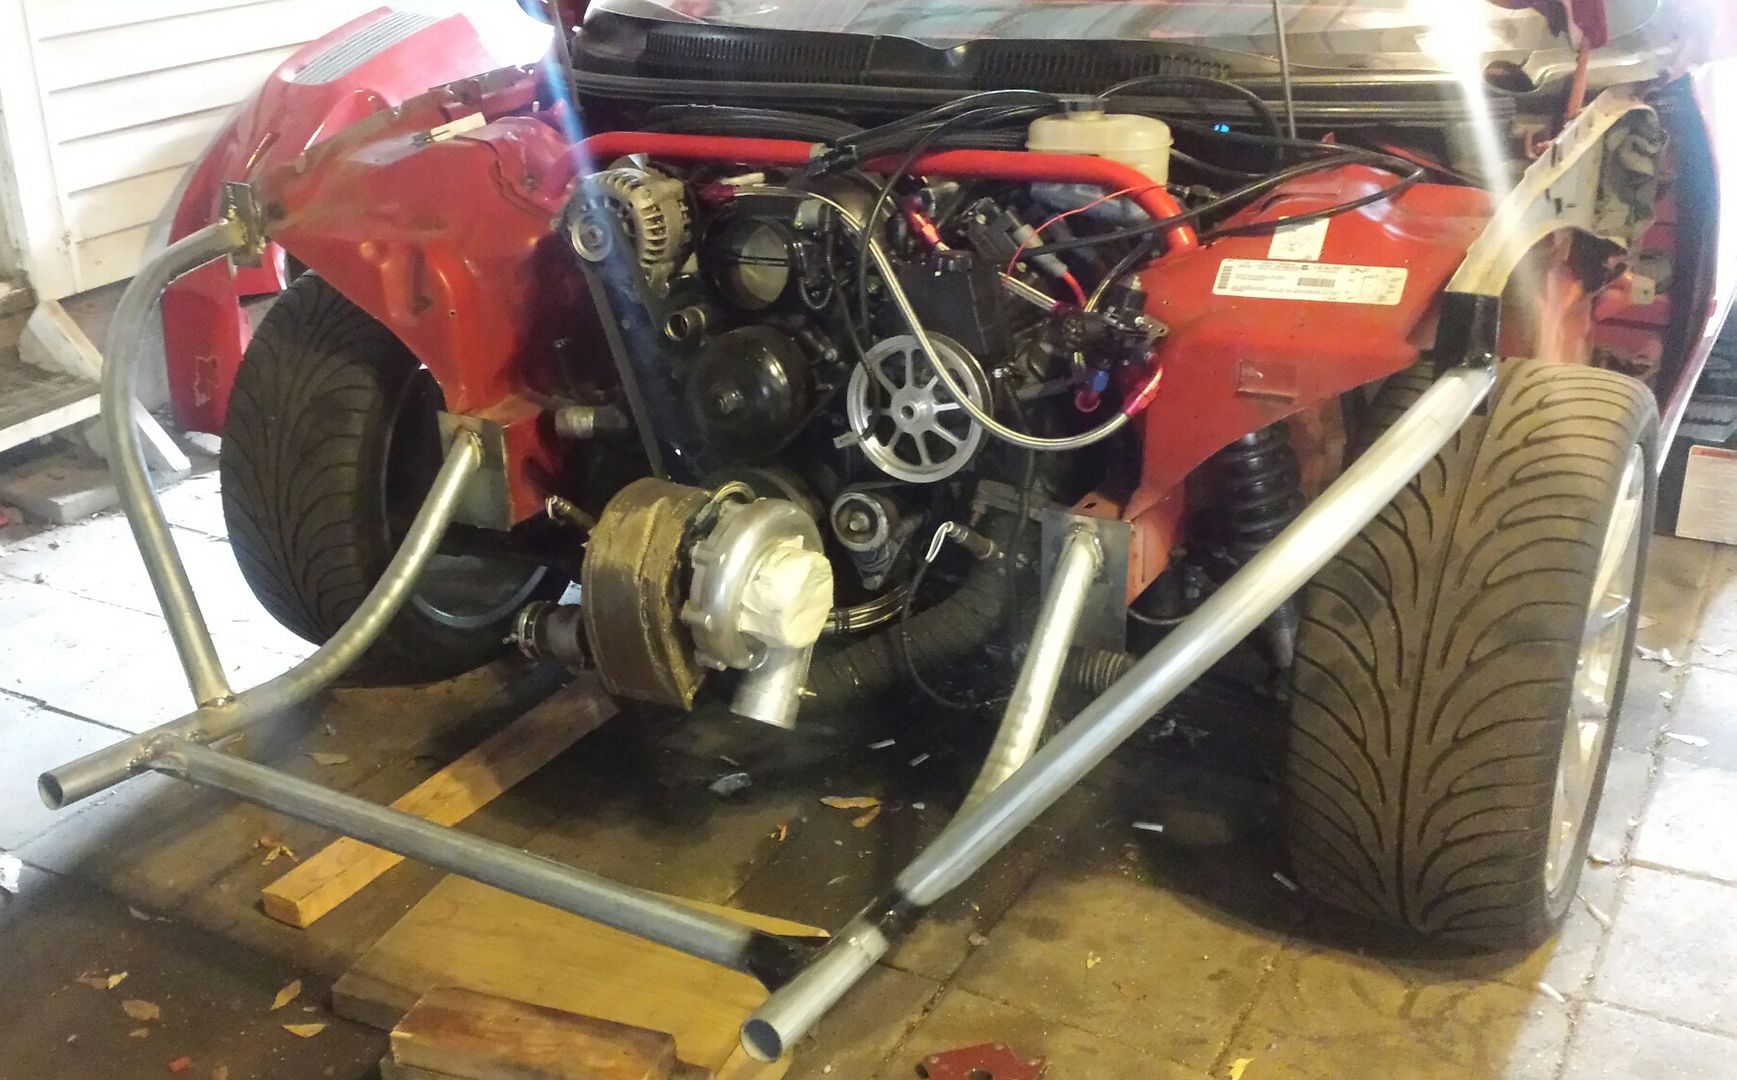 I started adding gussets and cleaning up welds while waiting for the front hoop bends to arrive (bought two 90 degree mandrel bends) and got delayed, so more to come this weekend. I'm also debating on color for the front pipes? Black? Red? Silver/graphite?
__________________
06 Foreman 500 - 29.5 OG Outlaws, 35%, Warn 2.5k, HL^2", <2.5">, EPI, HMF 95 Fourtrax 300 - 27" Zillas, SS212s , Viper 3k, HL^2" 04 XR80 - Stock 07 CRF50 - Stock |

|
|
|
#222 |
|
Moderator
Join Date: Oct 2016
Location: Houma, La.
Posts: 11,590
|
I've been following this thread. Coming along real nice.
__________________
2023 Lifan Lycan 250 Chopper 2023 Venom Evader 2022 Lifan KPX250 2020 Kawasaki Vulcan S (Sold) 2004 Honda ST 1300 2016 Black Hawk 250 (sold) Keihin PE30 carb,125 main,38 slow.Pod filter,ported & decked head 10:1 CR,Direct Ignition Coil,15/40Sprockets,NGK DPR8EIX-9,De-Cat,Dual Oil Cooler,Digital Cluster 2016 Cazador180 XL 2014 Coolster150 JerryHawk250.com My YouTube Channel |

|
|
|
#223 |
|
Join Date: Jun 2012
Posts: 220
|
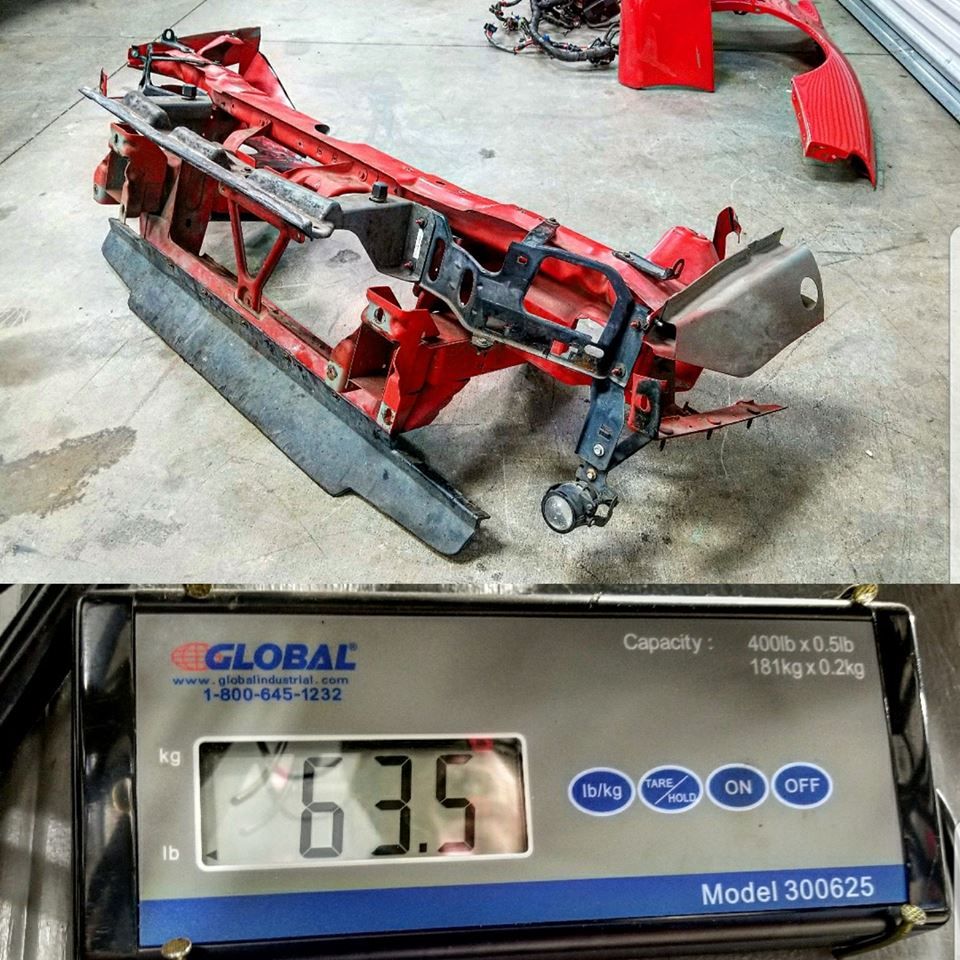
This first pic is off RSMs facebook page. I thought some would find it useful.
 Got the main hoop made and some simple flat bar brackets welded on to hold the intercooler. The 90 degree bends here are stainless and were found on ebay for 20 bucks. No way I could have made a bend that nice so I decided it was ok to buy/use these. 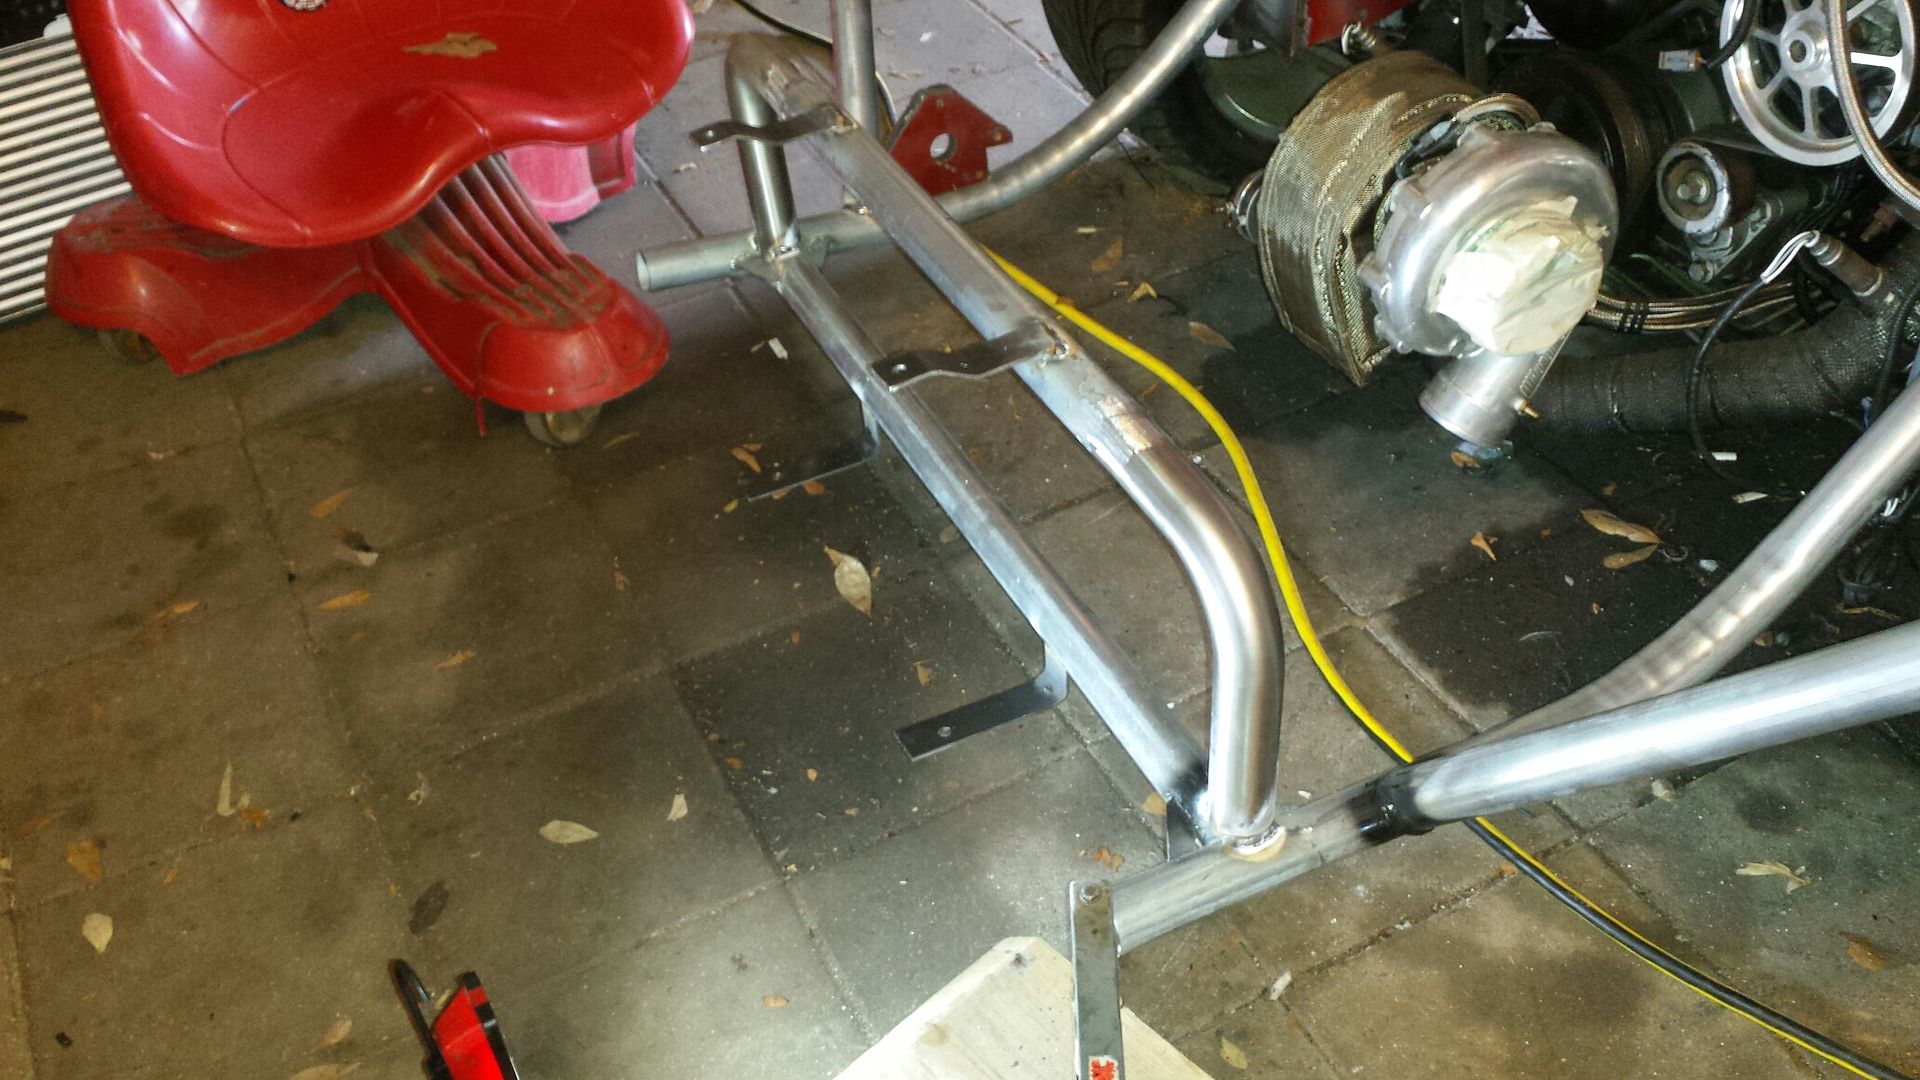 The intercooler has been flipped where the outlets are up top. With 90 degree elbows they just clear the main hoop, and are just under the headlights. I also made an extension on the main hoop to hold 5 tabs that support the bumper and have holes for the pushpins. 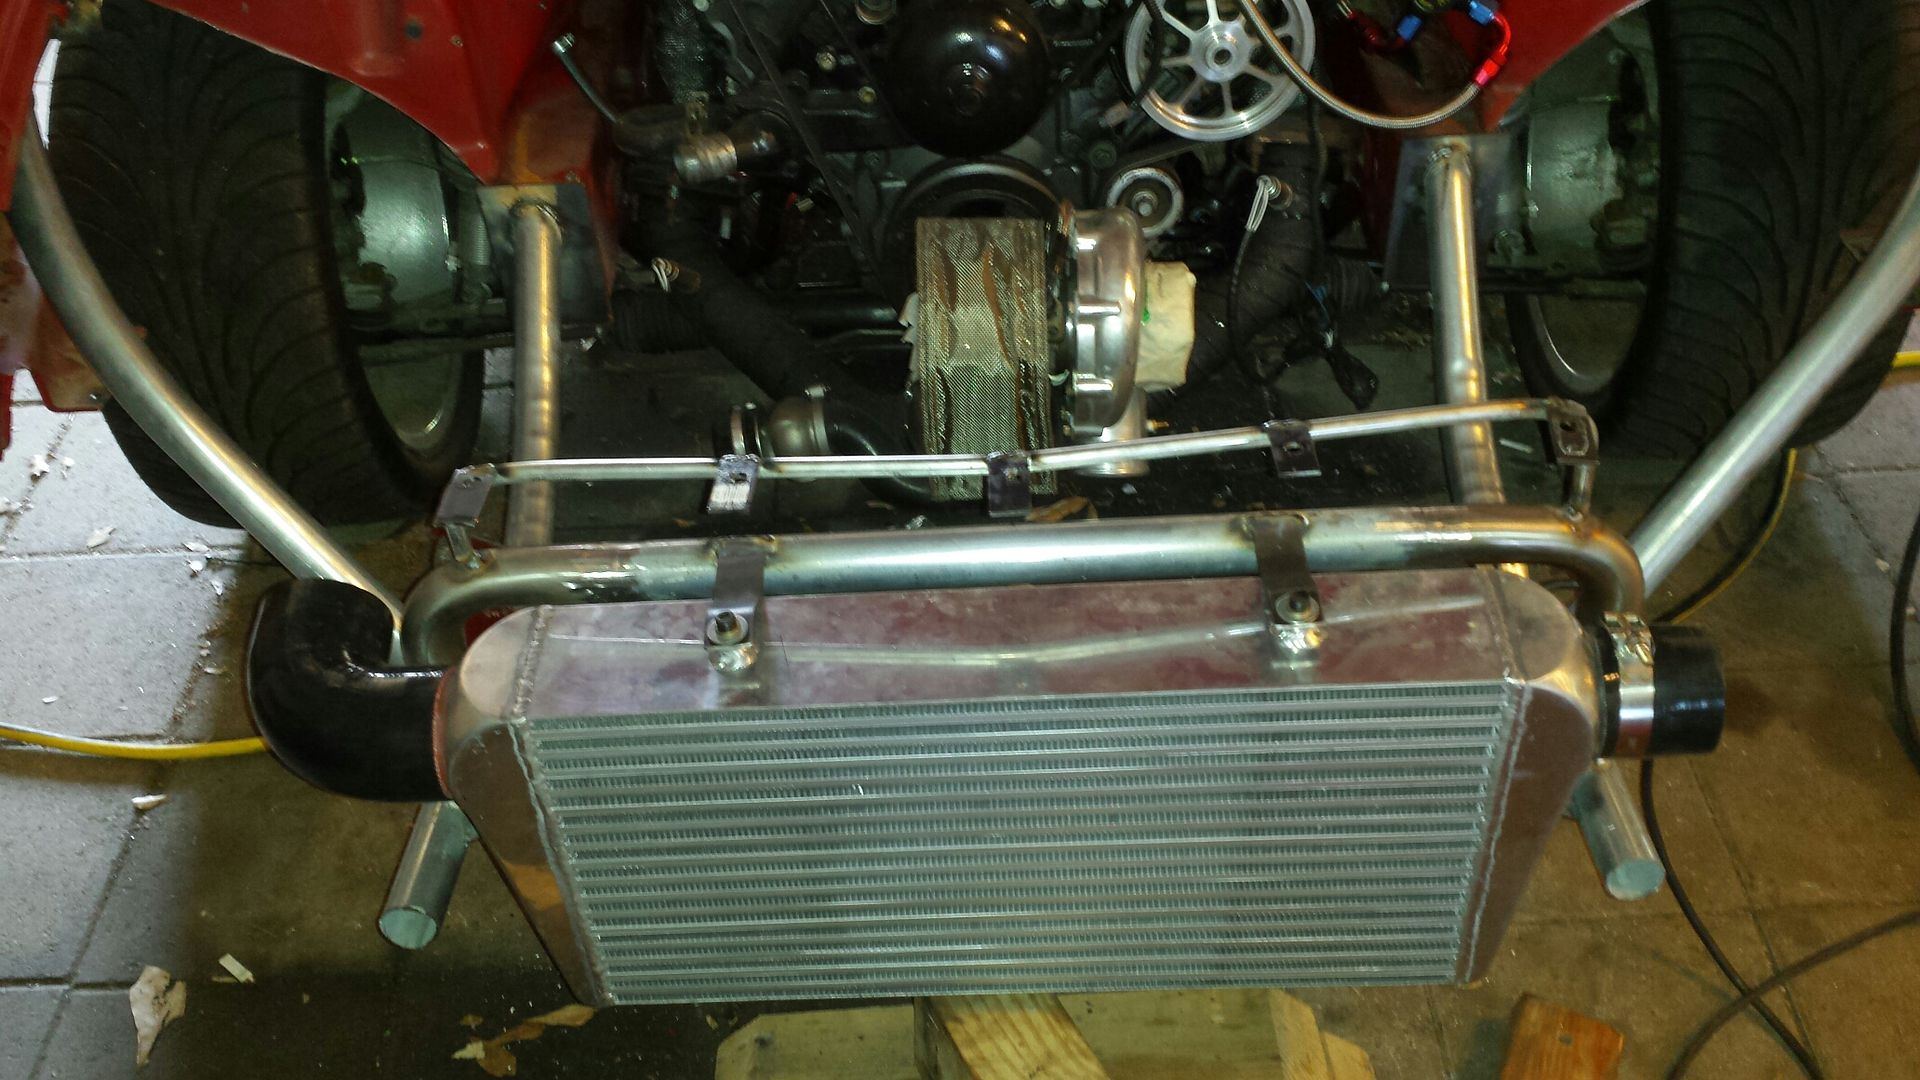 Hood latches, and the biggest tap Ive ever owned. 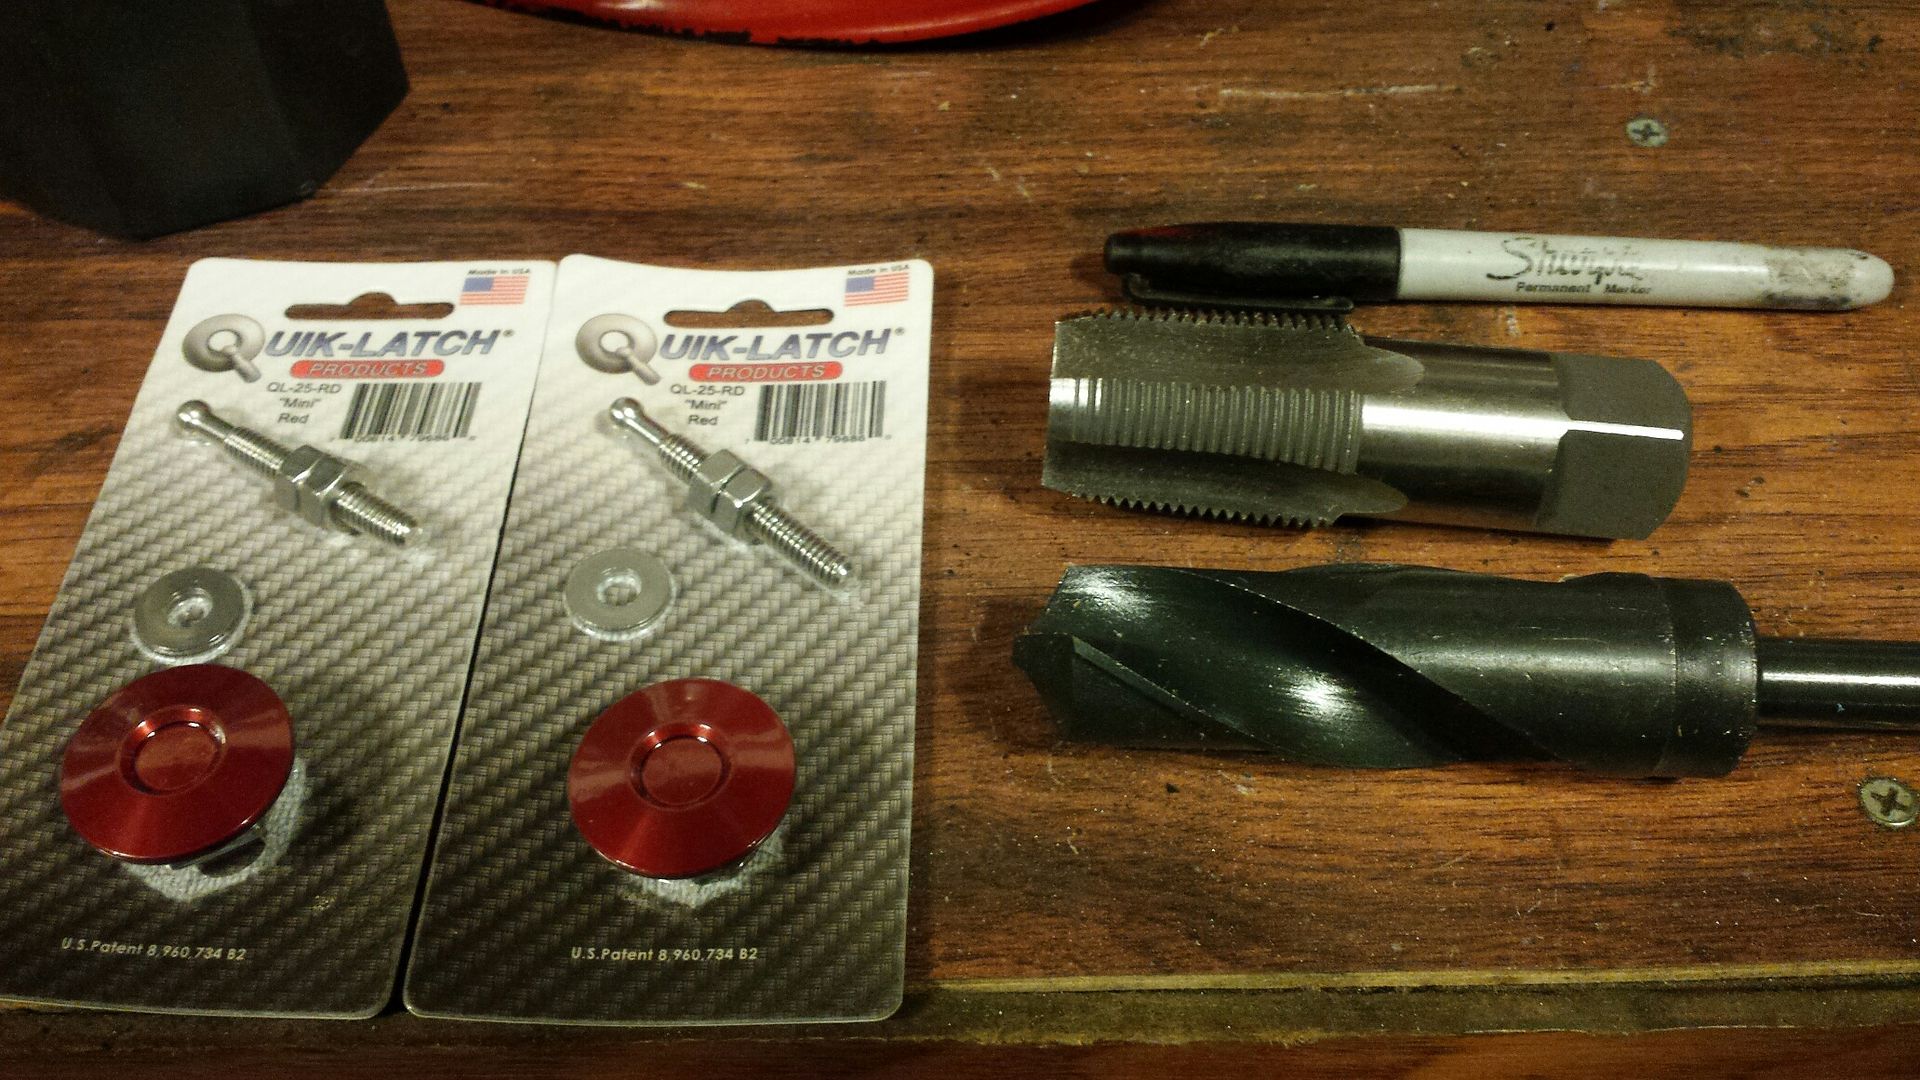 I cringed a little drilling through the hood. Not a lot but a little. 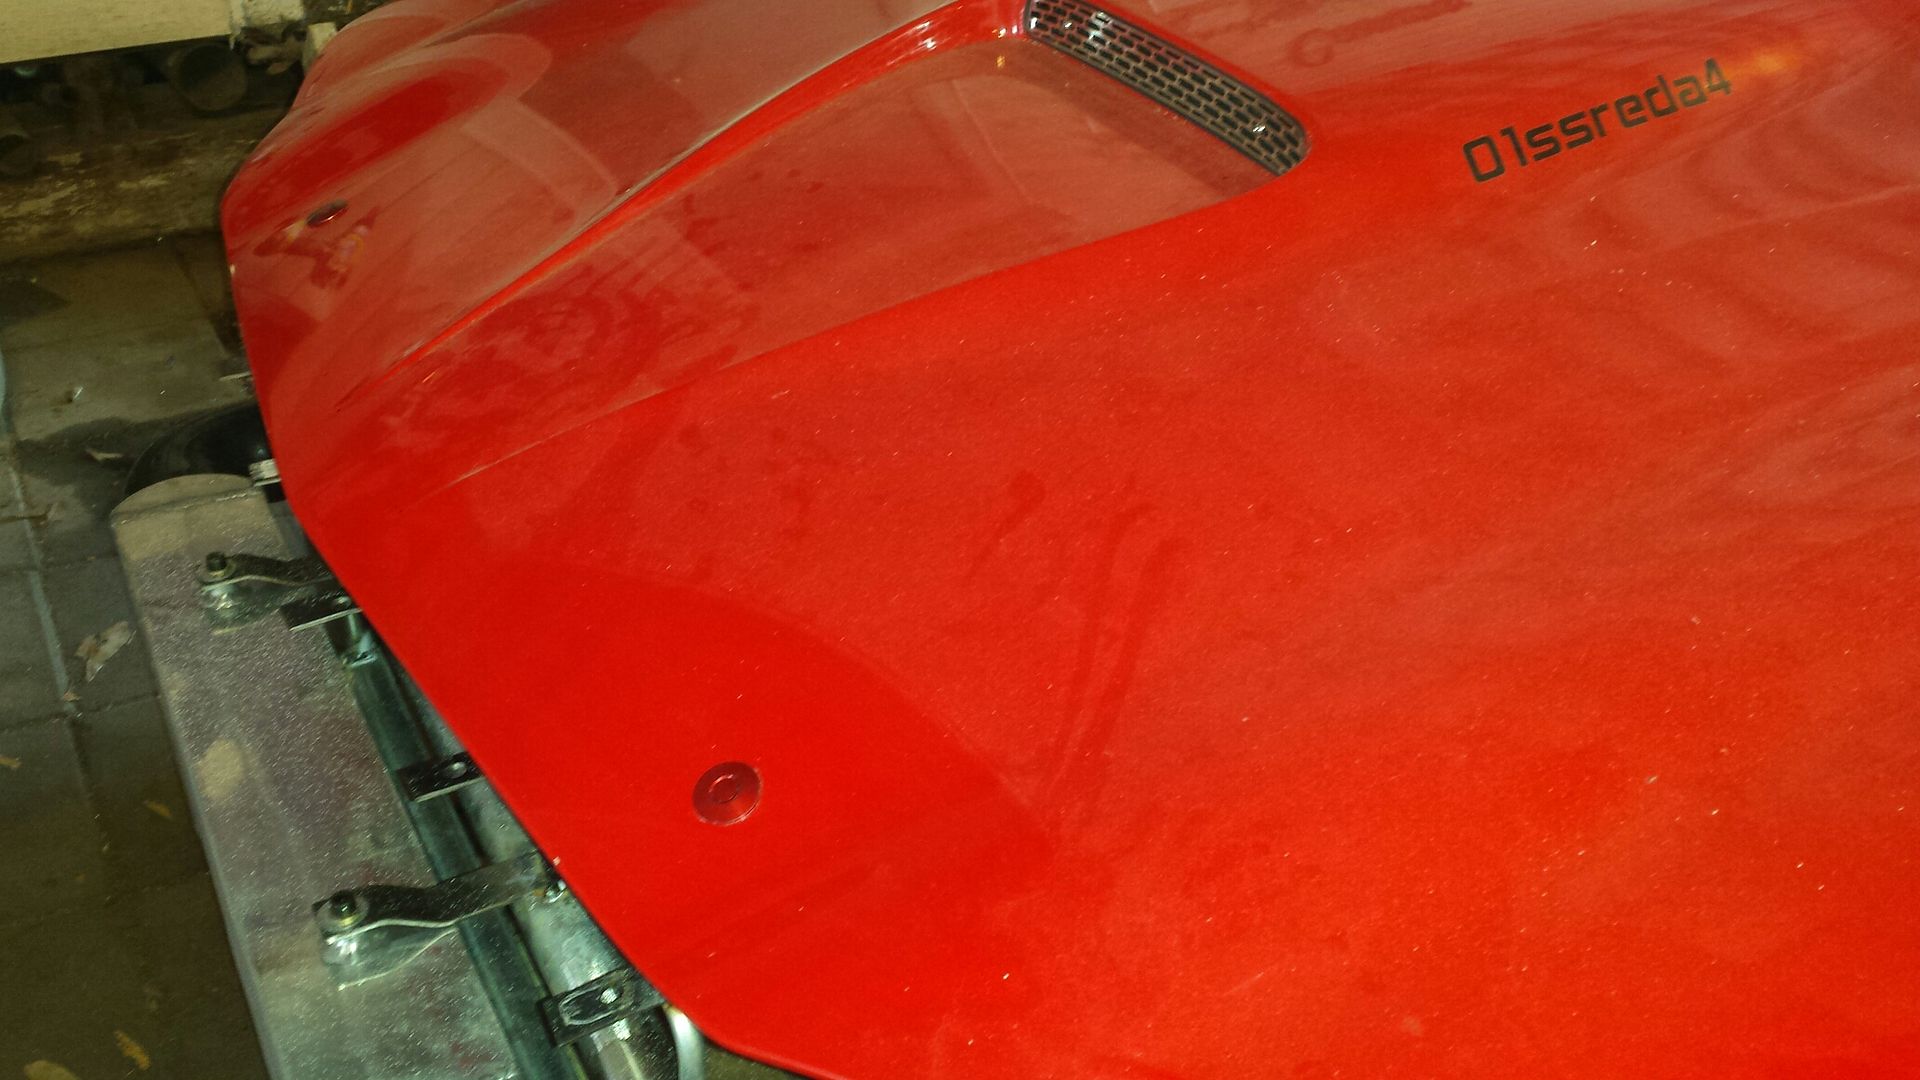 Some simple square tube and flat bar brackets for the hood latches. This was the first attempt. I realized the angle needed altered. These are welded on the main hoop. 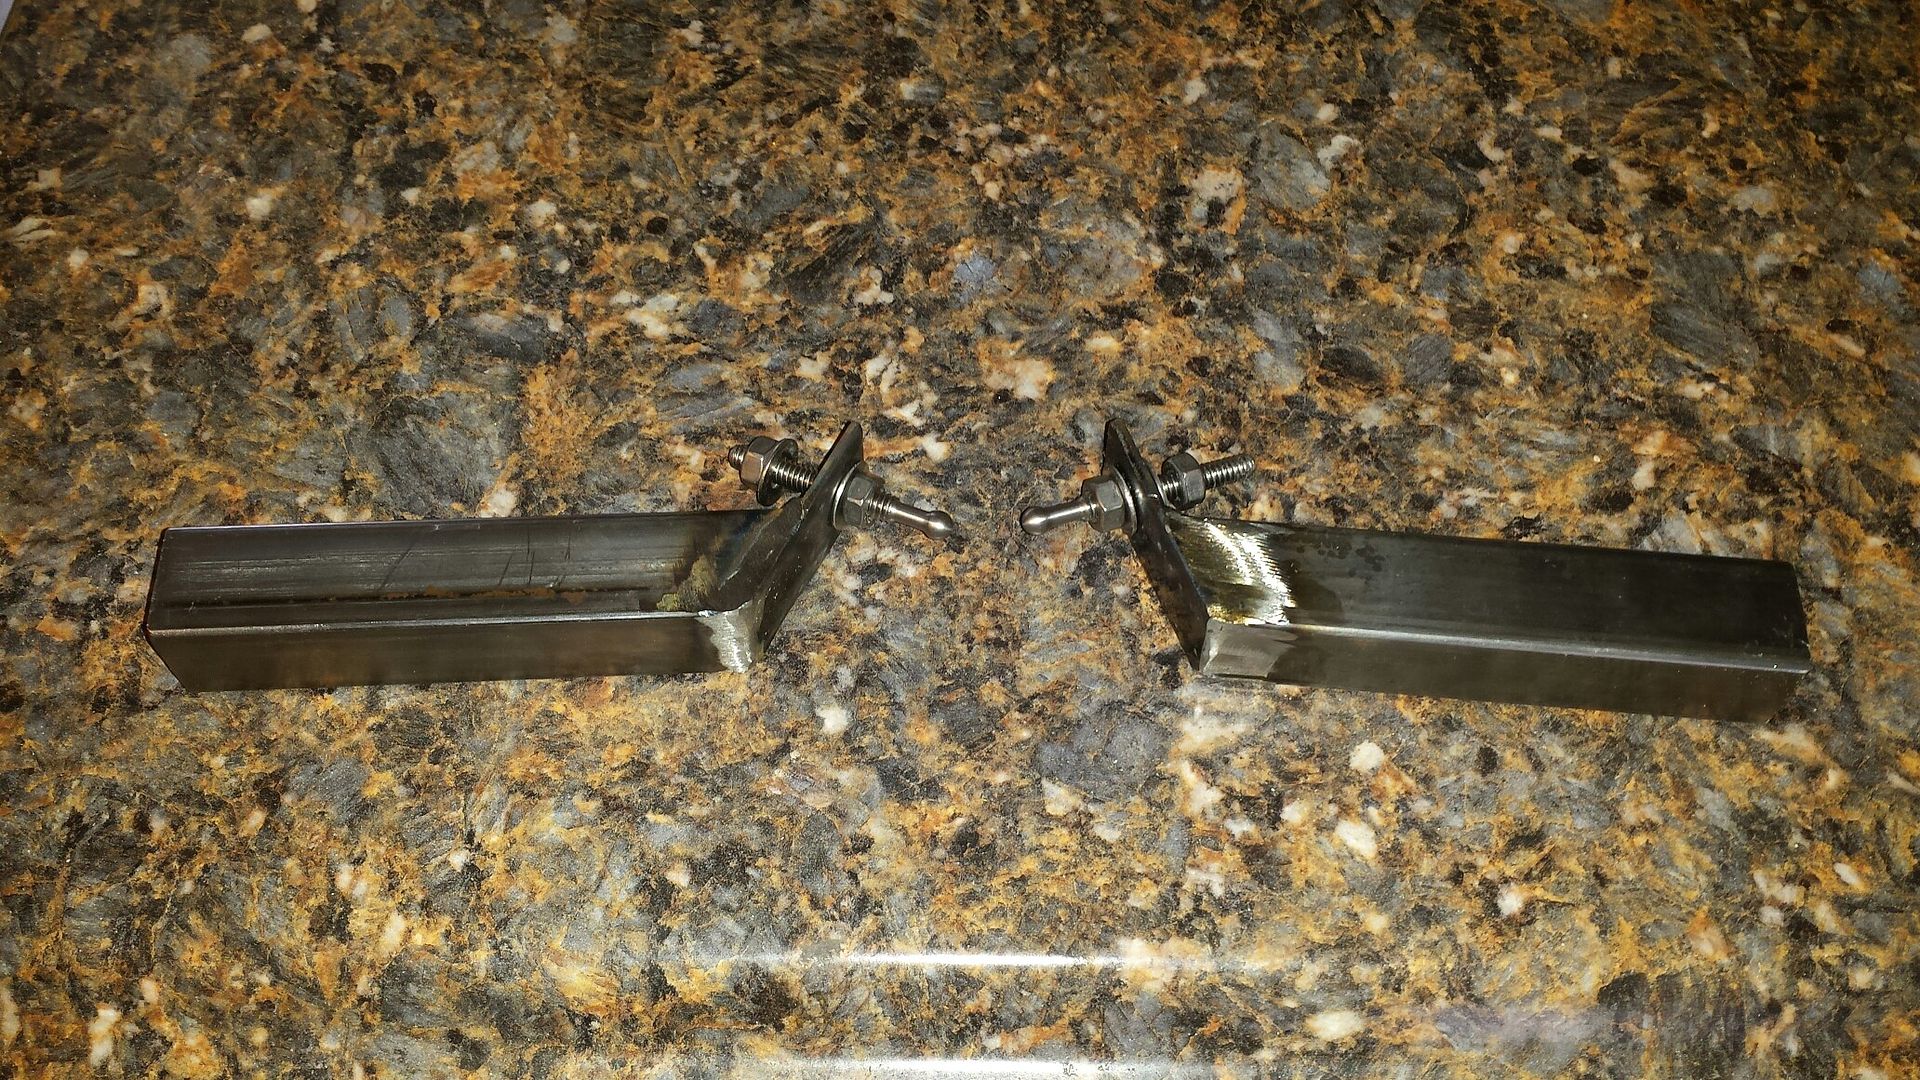 Homemade lower radiator support. I am using the passenger side rubber donut but otherwise the radiator will be sitting on the square tubing. The metal on the top and bottom of the radiator is fairly thick and by distributing the load over the entire area should not have any rubbing issues. 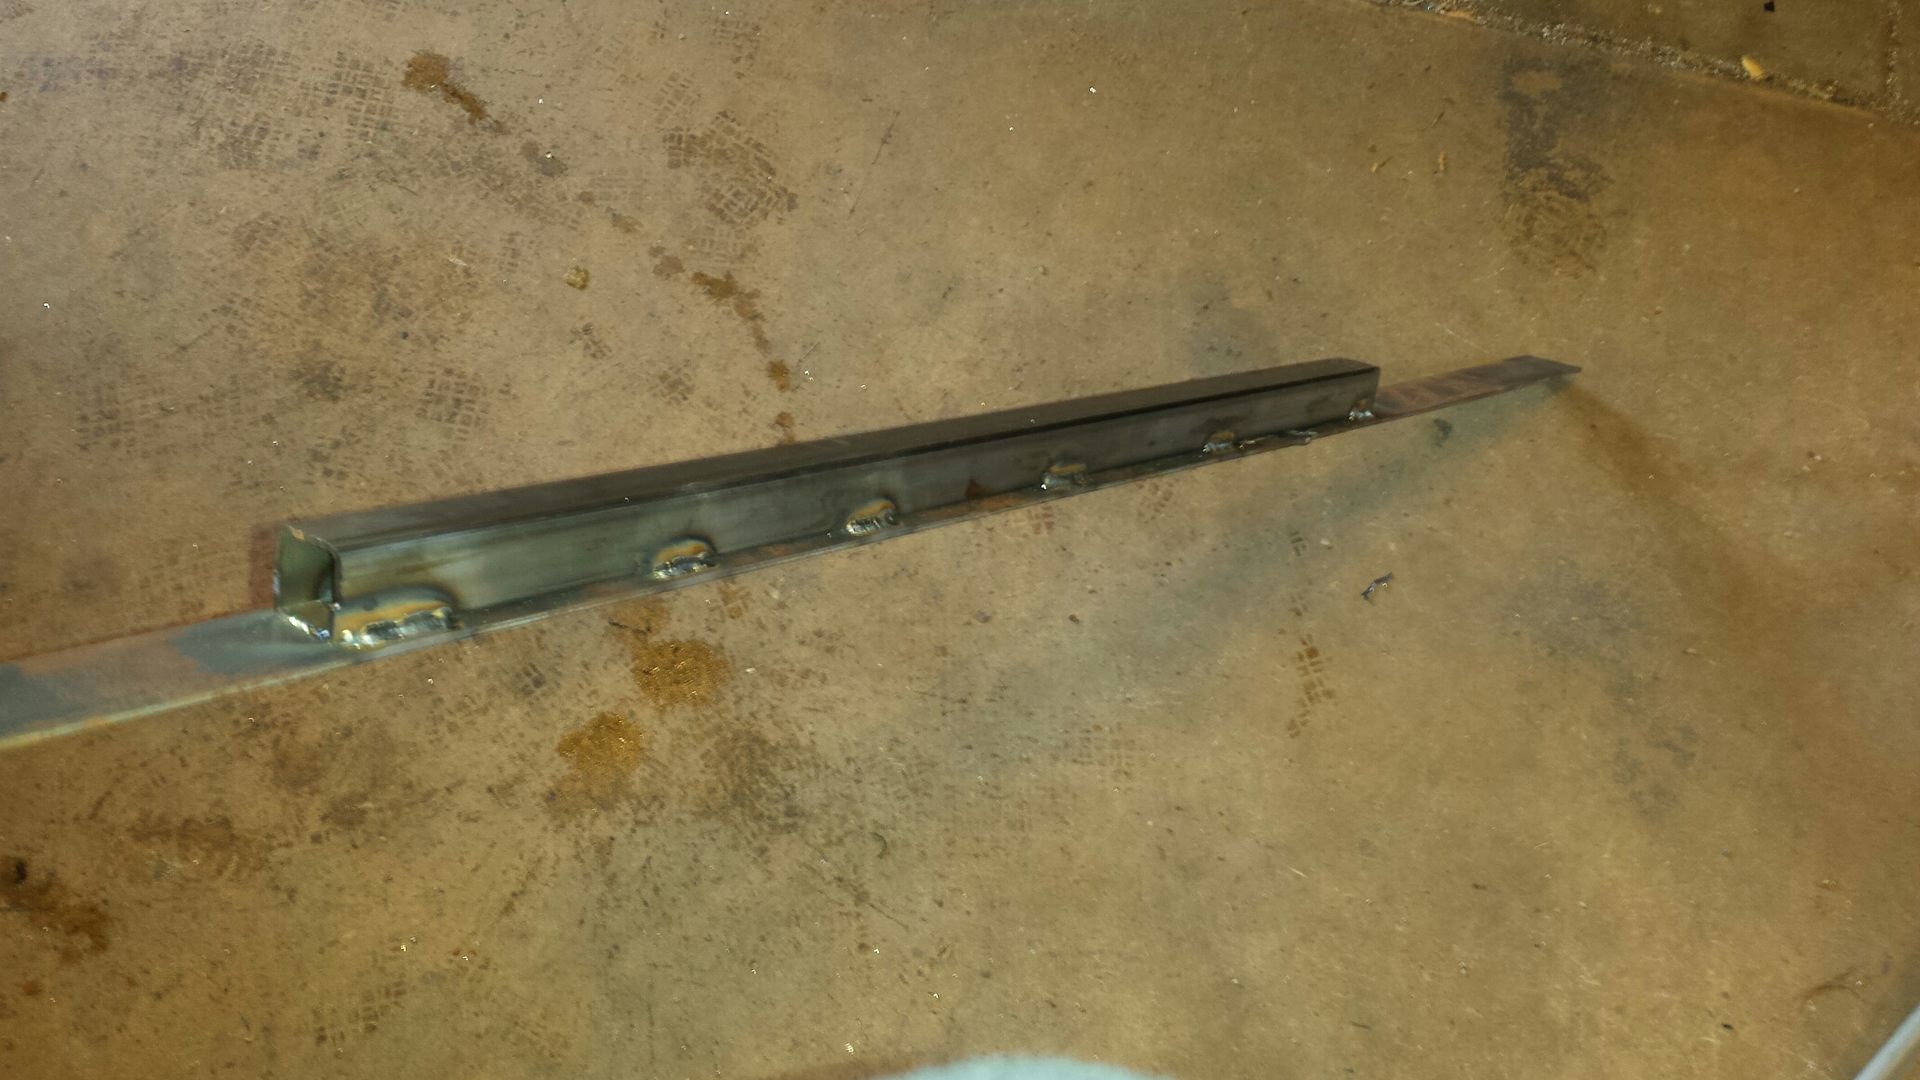 Here's the radiator sitting on the lower support. Im keeping it as close to straight up as possible for turbo clearance. Here I'm checking hood clearance. Zip ties are your "little helper". 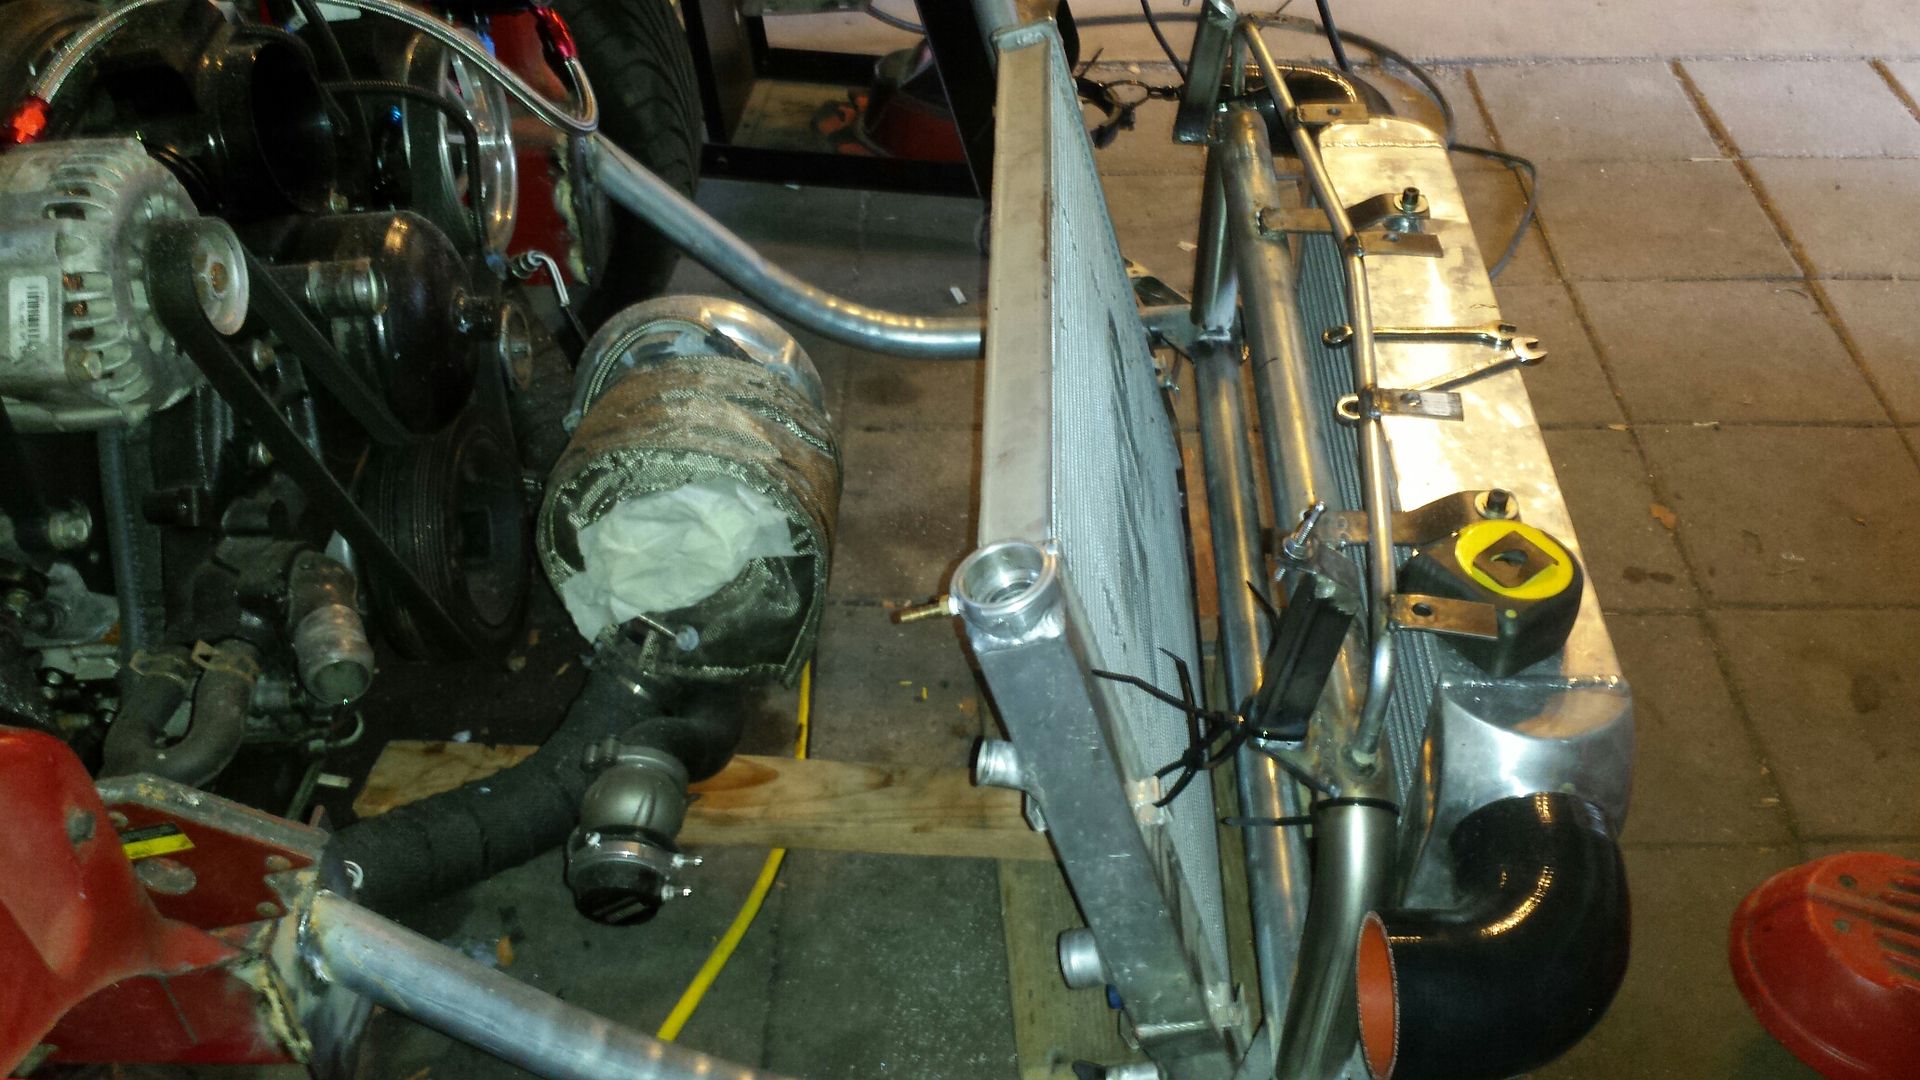 Upper radiator bracket made and fans mounted and back on the rear as they were stock. One bolt and the entire radiator comes out, yeeeah. Again, square tube up top and across to distribute load. 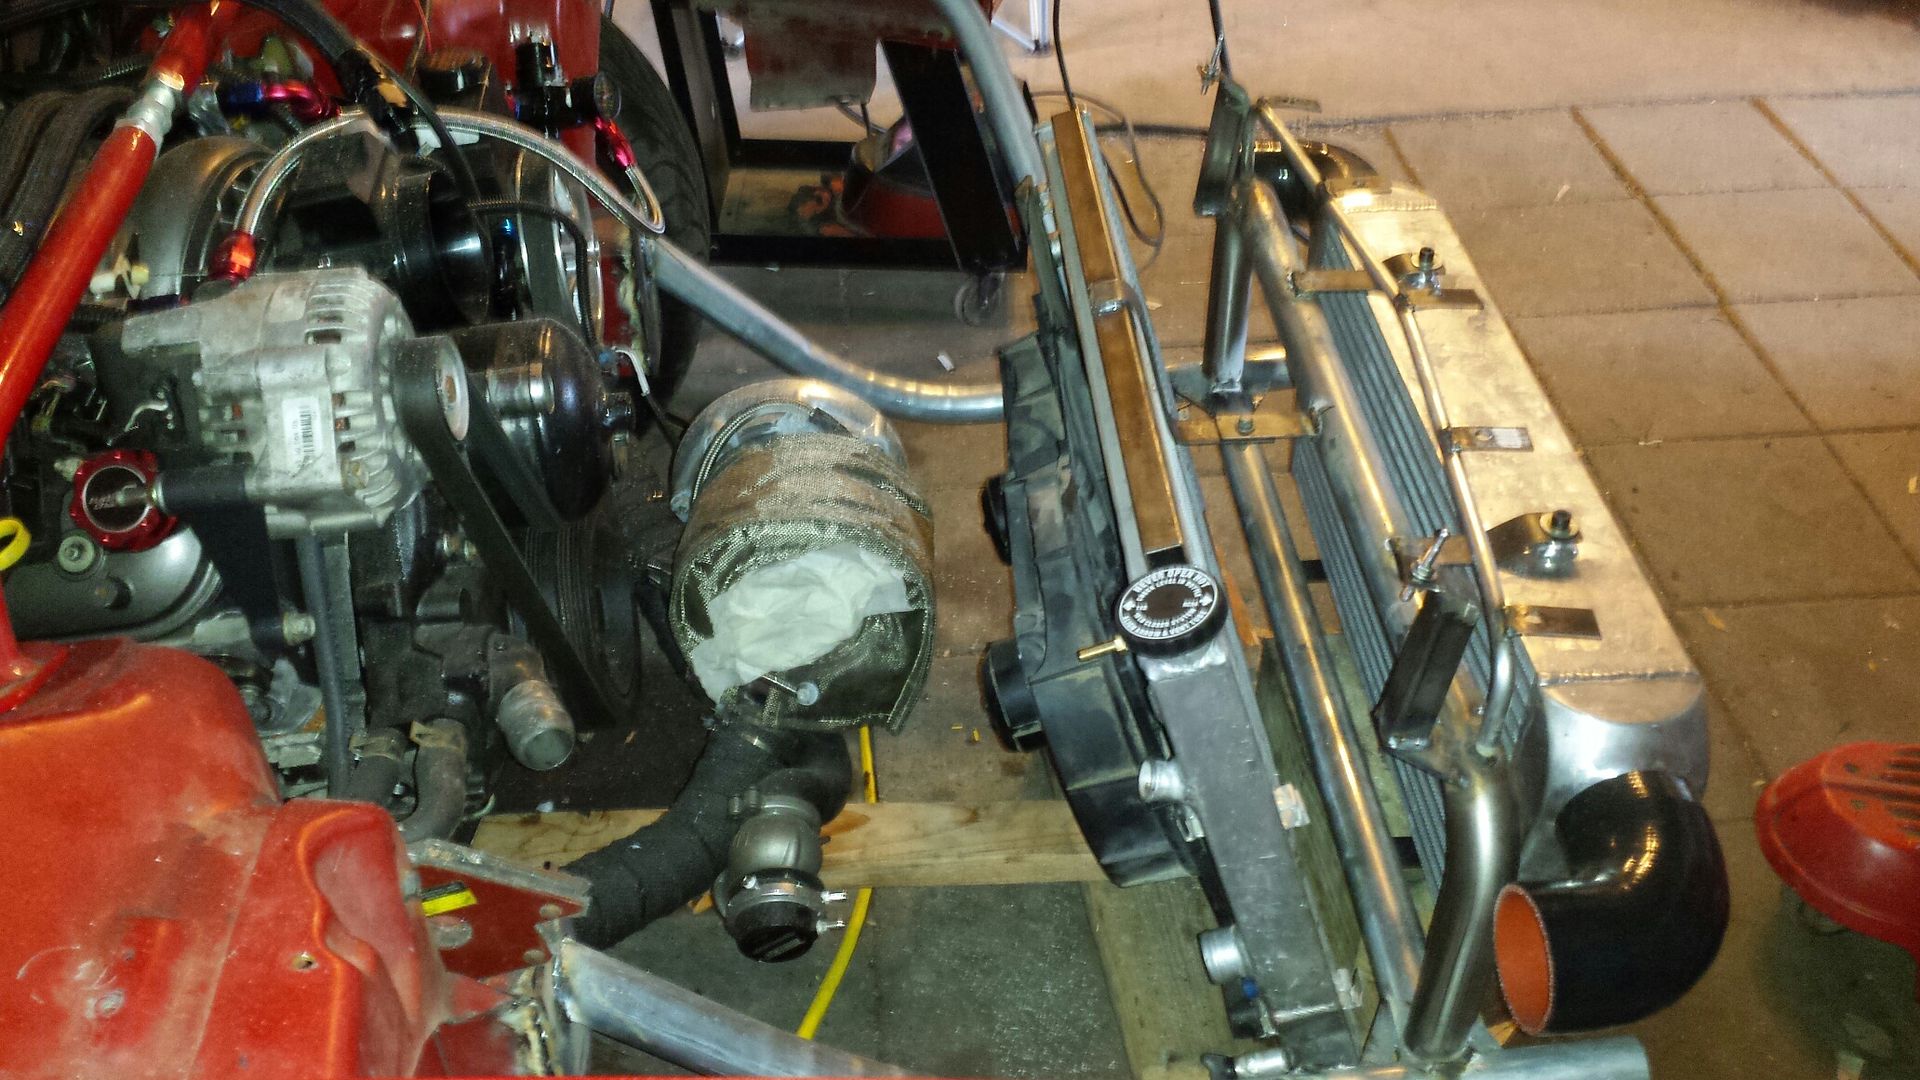 Another look. 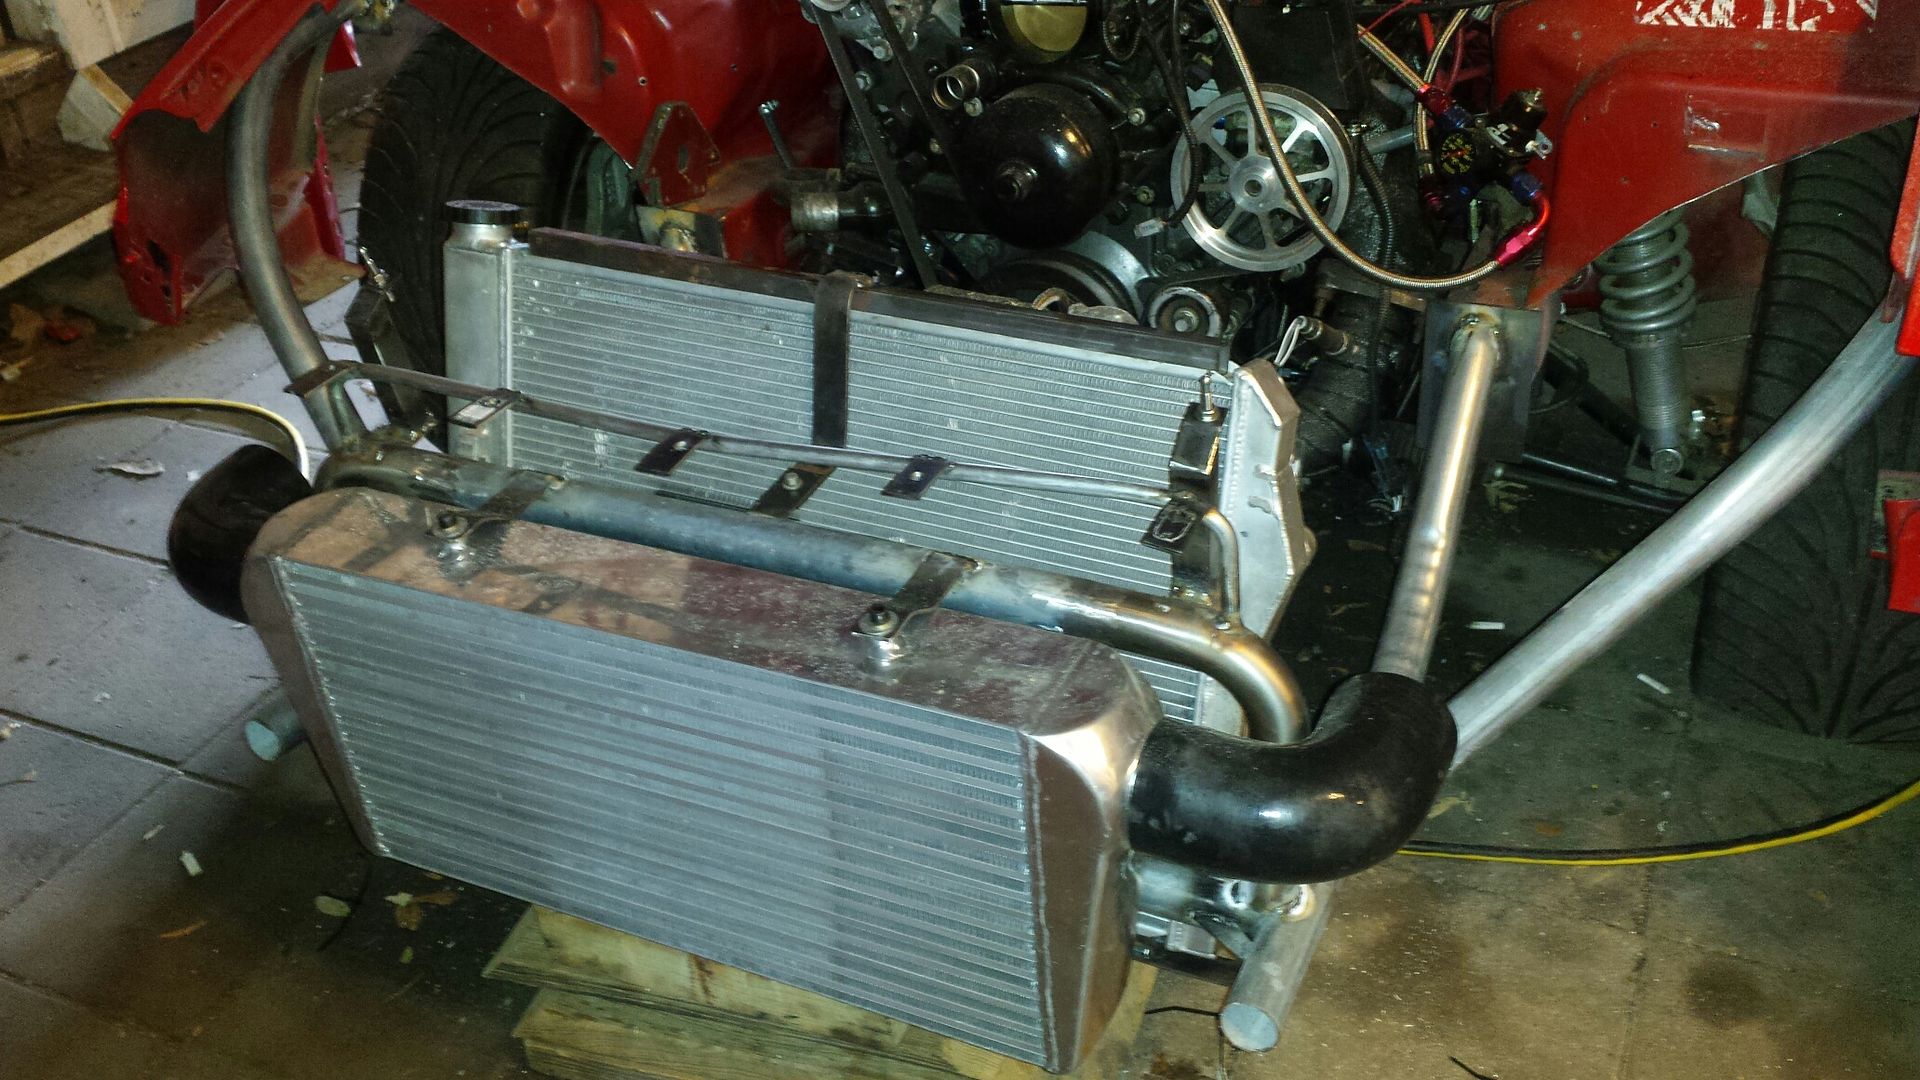 And Im done for the weekend. This is way more work then I originally thought. I "hope" my next update will be a road trip and a roll cage on a trailer. We shall see.
__________________
06 Foreman 500 - 29.5 OG Outlaws, 35%, Warn 2.5k, HL^2", <2.5">, EPI, HMF 95 Fourtrax 300 - 27" Zillas, SS212s , Viper 3k, HL^2" 04 XR80 - Stock 07 CRF50 - Stock |

|
|
|
#224 |
|
Moderator
Join Date: Oct 2016
Location: Houma, La.
Posts: 11,590
|
Nice!

__________________
2023 Lifan Lycan 250 Chopper 2023 Venom Evader 2022 Lifan KPX250 2020 Kawasaki Vulcan S (Sold) 2004 Honda ST 1300 2016 Black Hawk 250 (sold) Keihin PE30 carb,125 main,38 slow.Pod filter,ported & decked head 10:1 CR,Direct Ignition Coil,15/40Sprockets,NGK DPR8EIX-9,De-Cat,Dual Oil Cooler,Digital Cluster 2016 Cazador180 XL 2014 Coolster150 JerryHawk250.com My YouTube Channel |

|
|
|
#225 |
|
Join Date: Jun 2012
Posts: 220
|
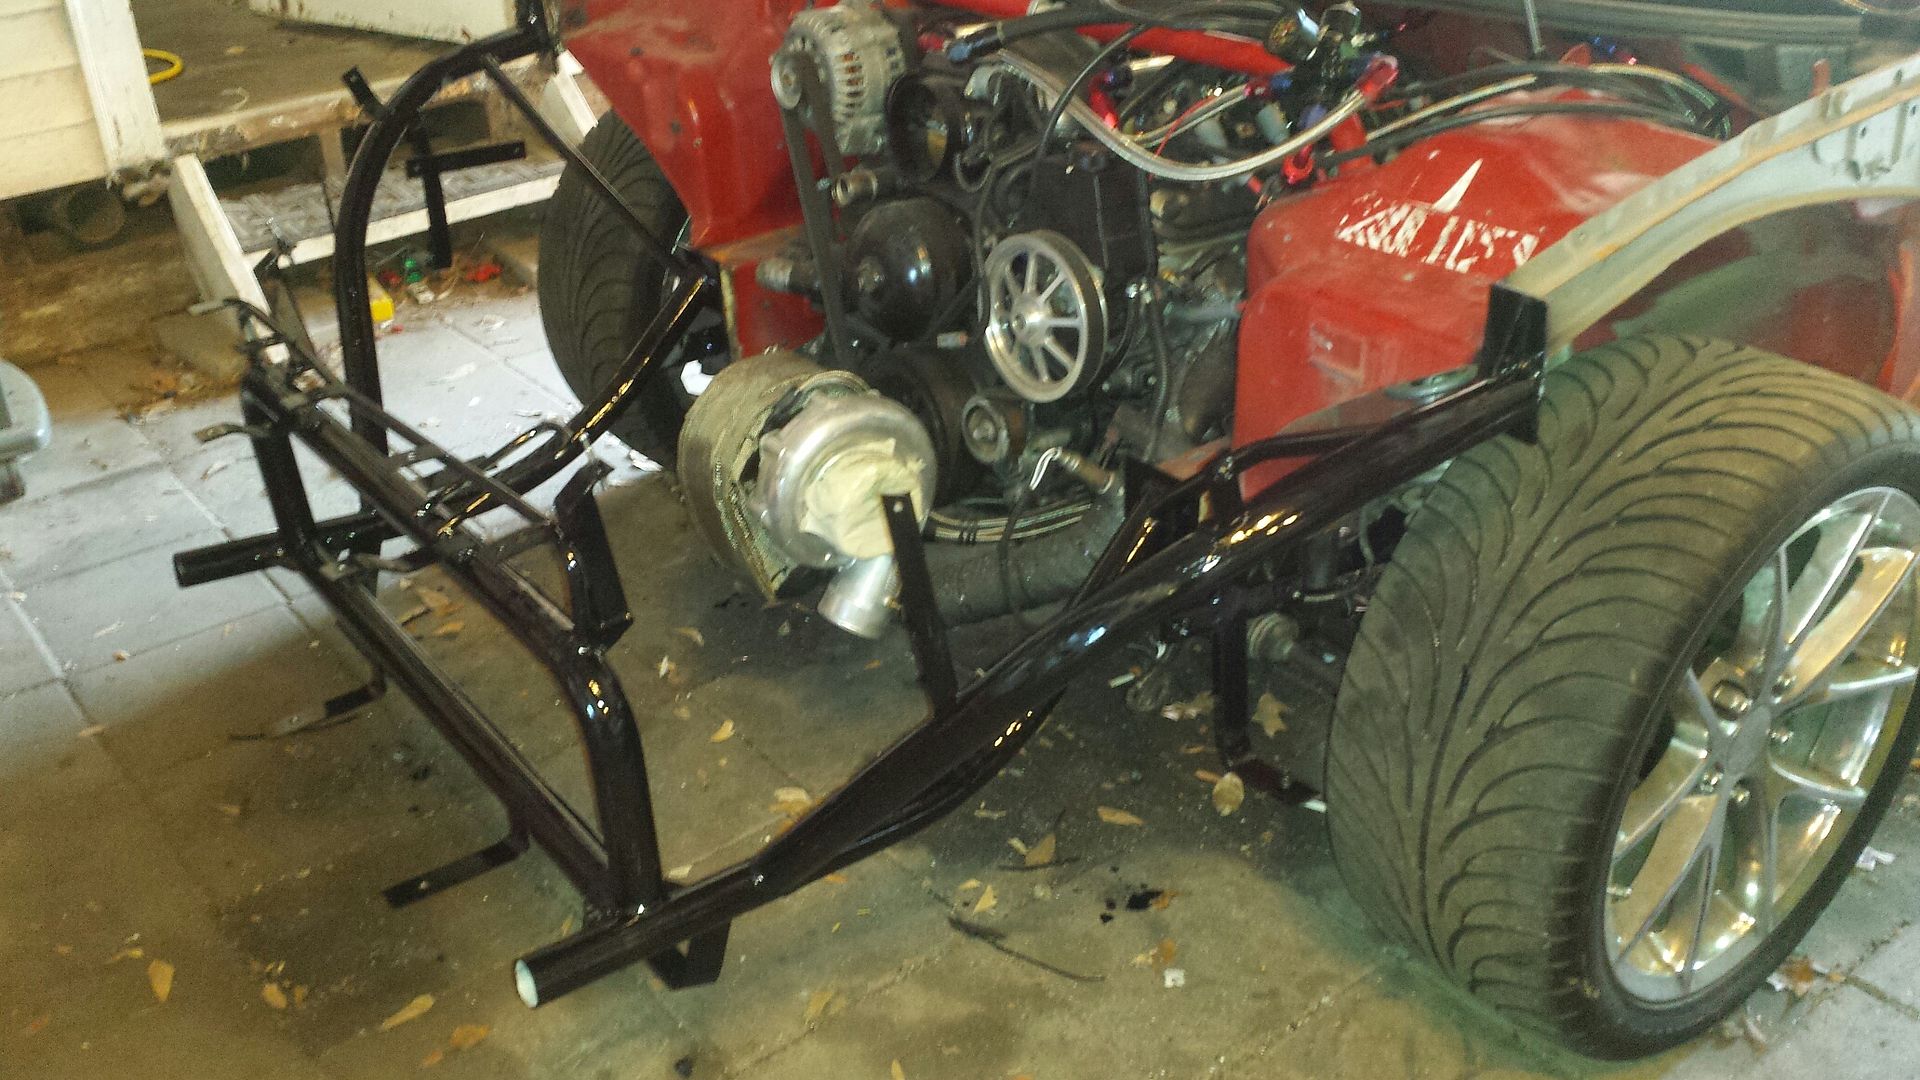
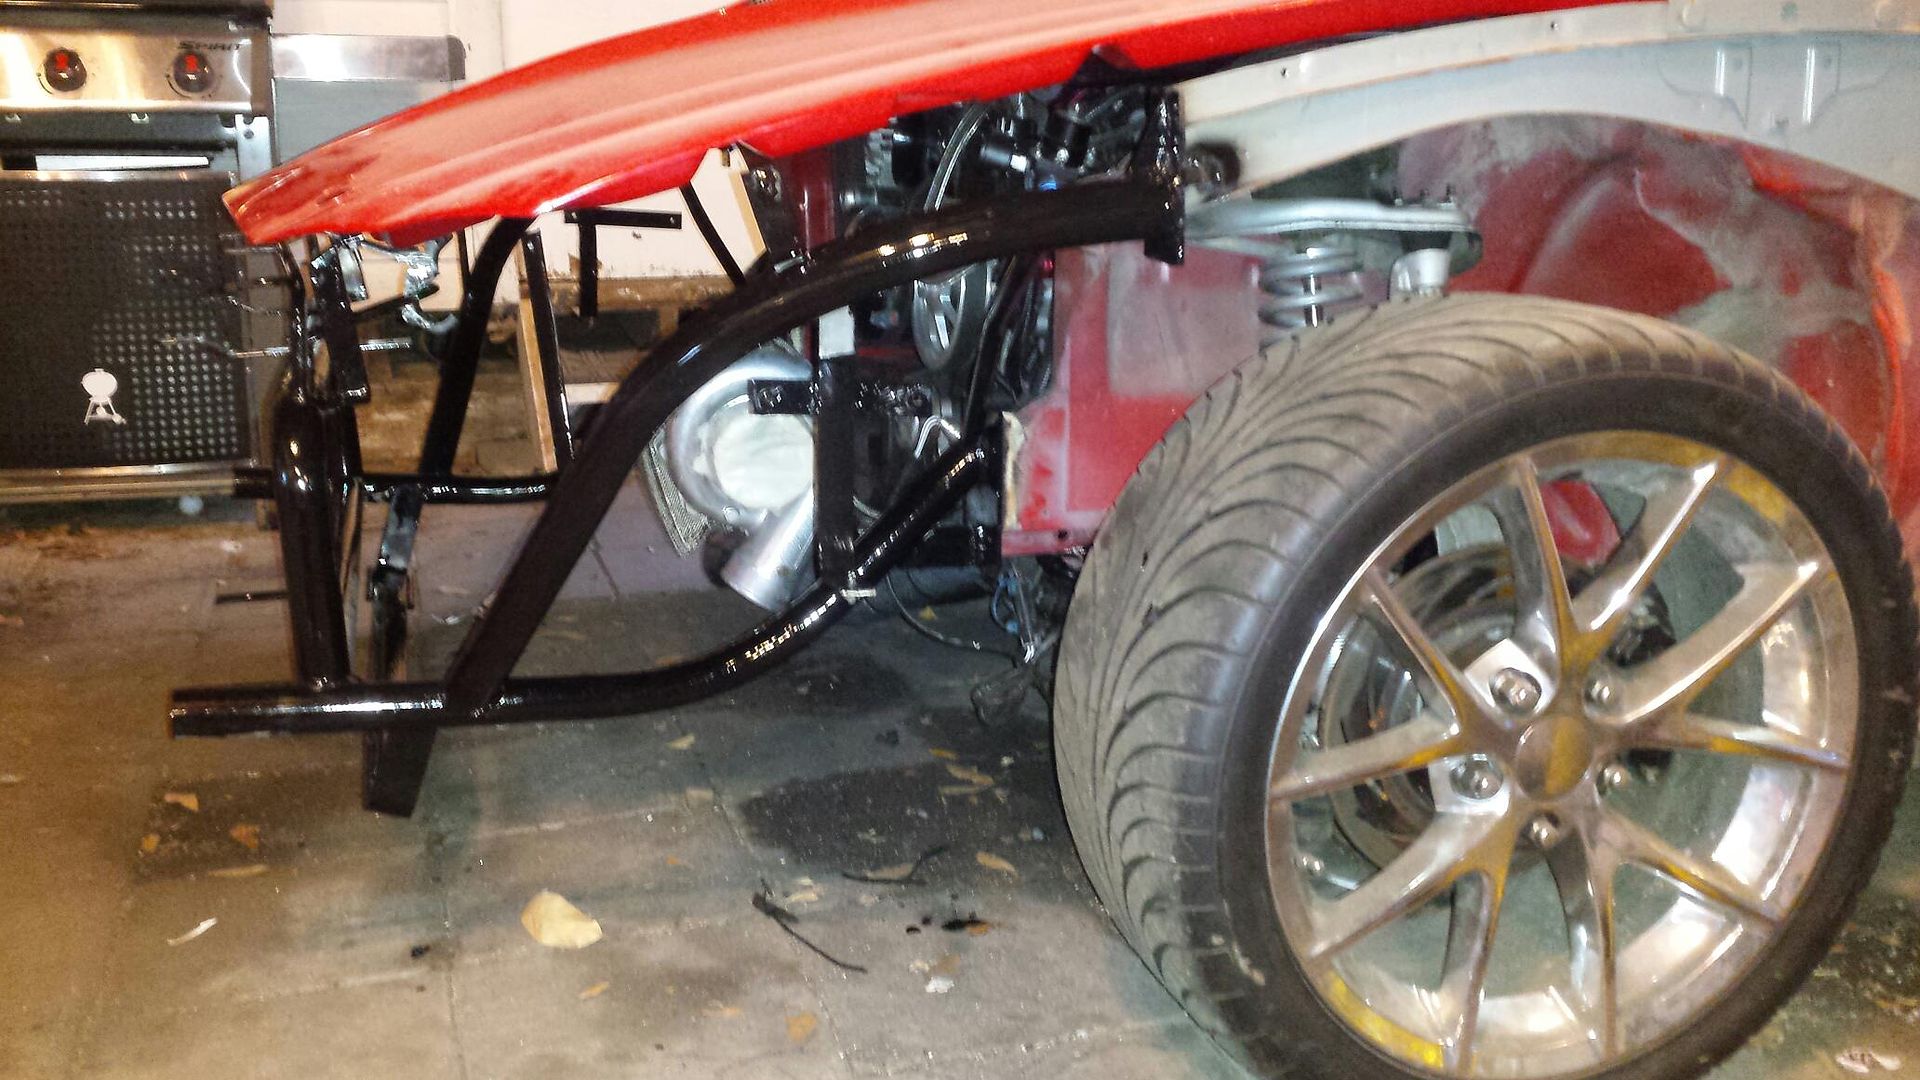
Quick update: Hood safety release handle is reinstalled, fenders/bumper are braced, headlight mounts are done, catch can and radiator over flow have mounts. Everything was test fit before disassembly. Radiator and fans have been cleaned and painted. I tried out some Rustoleum brush on paint. I may go back and do this red, haven't decided. I got the call, roll cage and wheel tubs pick up on Tuesday.......so that means, road trip finally!!
__________________
06 Foreman 500 - 29.5 OG Outlaws, 35%, Warn 2.5k, HL^2", <2.5">, EPI, HMF 95 Fourtrax 300 - 27" Zillas, SS212s , Viper 3k, HL^2" 04 XR80 - Stock 07 CRF50 - Stock |

|
|
|

|
 |
|
|