 10-17-2010, 05:33 PM
|
#1 |

Join Date: Mar 2009
Location: Southeastern Washington desert
Posts: 14,761
|
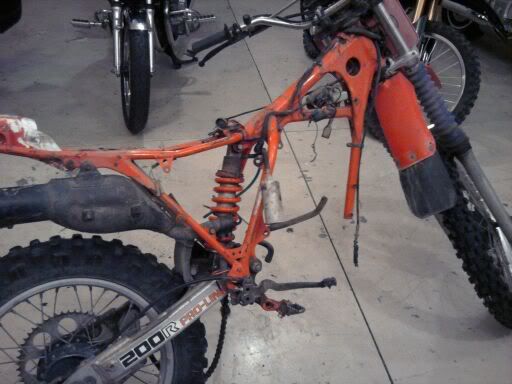
Some pics of the XR/Lifan project.
Sorry I did not take more pics along the way. I got caught up in the taking it apart phase and left the camera in the house. I also did not take pics of the rear shock exchange. That was a PIA, the whole linkage needed to come out to get to the lower mount.
I'm at an impasse now. I'm waiting on the electrical plugs for the CDI and the RR. I can't wire the new motor without them. I also need a sprocket, the XR one won't fit the Lifan, and the Lifan one is the wrong chain size. Bummer. Tomorrow I hope to receive the fork seals. I have a seat cover but need to borrow my friend's pneumatic stapler to install it. So, with no bike work to do, I'm gonna take my boat out on the river! Beautiful fall day. Low mileage on the bike. 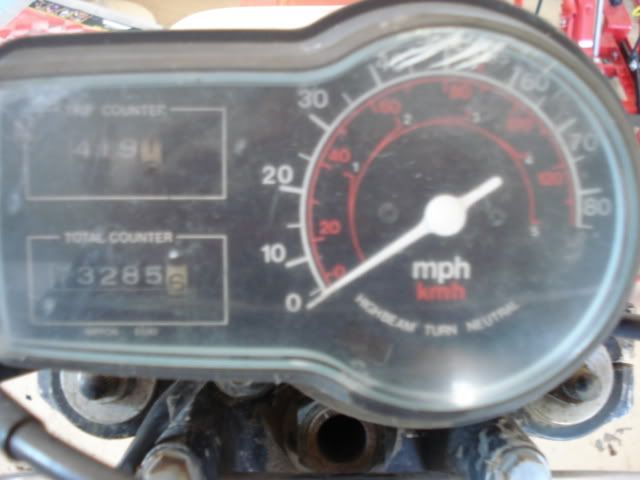 This is the cluster of tiny wires for the gear indicator. I will not be using this. 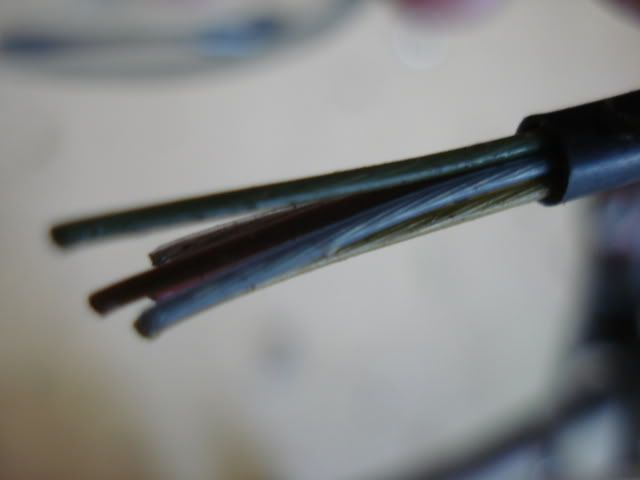 The main wires out of the motor. I'm irritated that there are 2 yellow wires. Don't they have more than 5 colors in China? 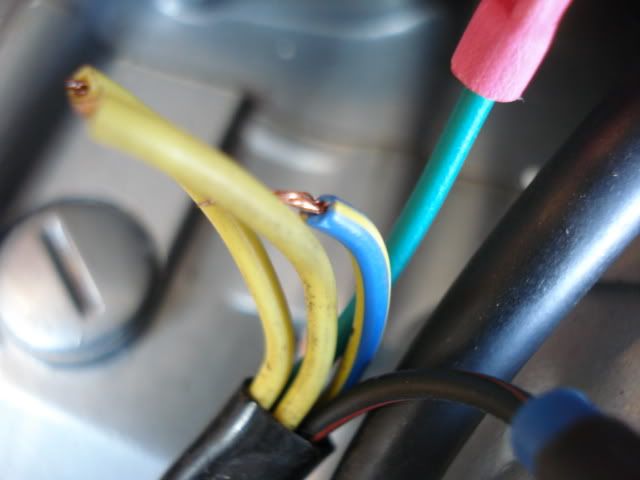 Leaky petcock replaced. 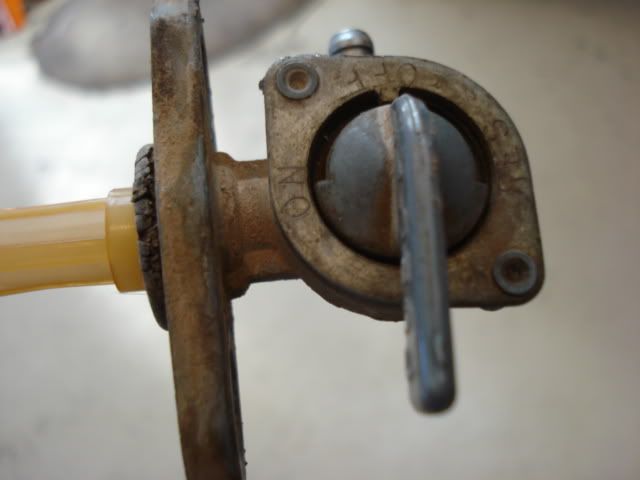 The old shock. It had no pressure or damping of any kind. 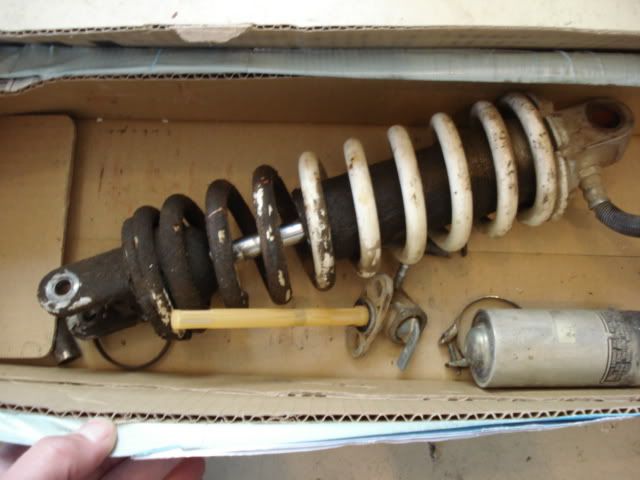 The old, siezed, motor. 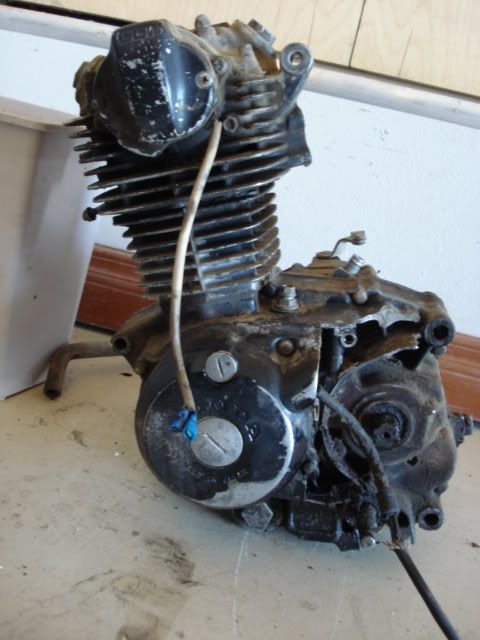 The new one's data plate. 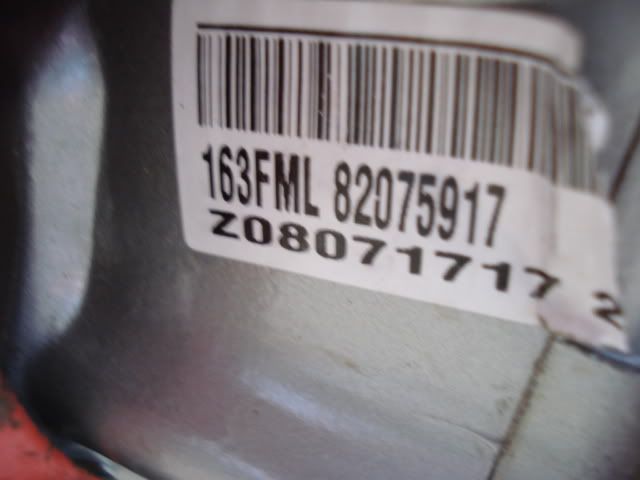 Part of the wiring. 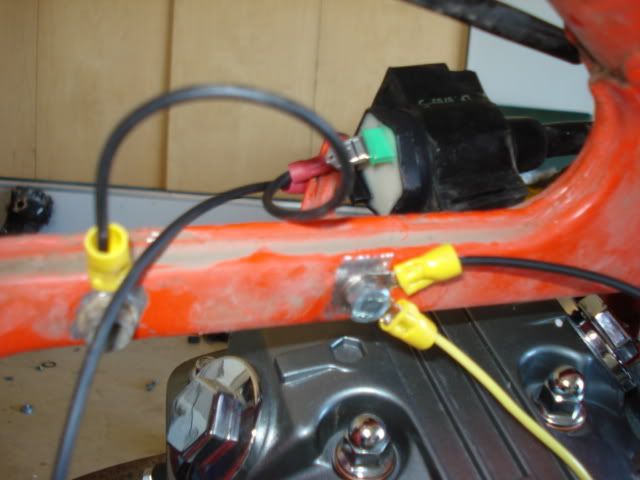 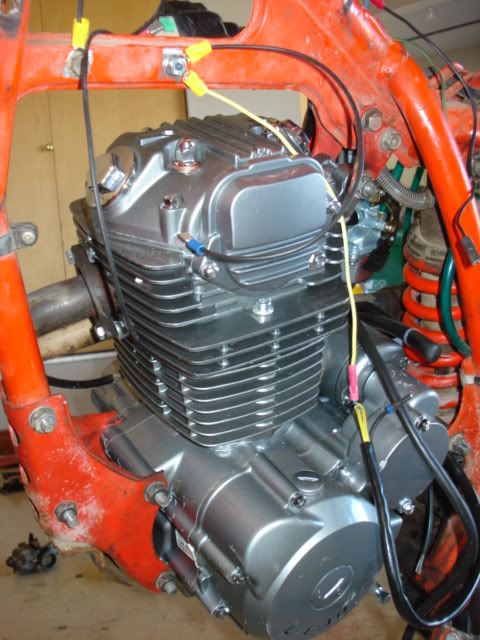 Leaky fork seals. 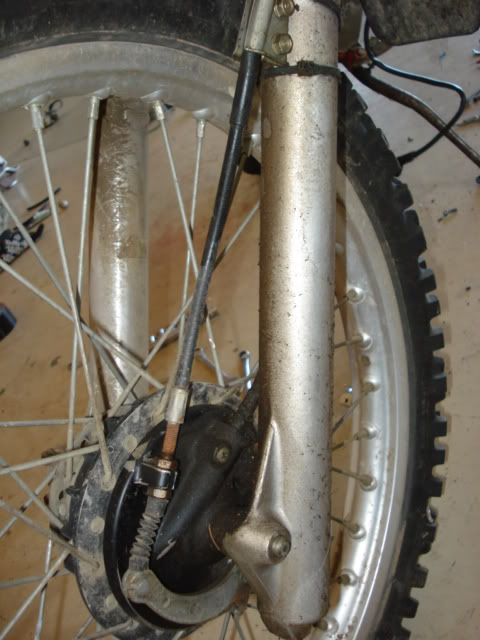 Old and ugly, but I hope she'll be a runner. 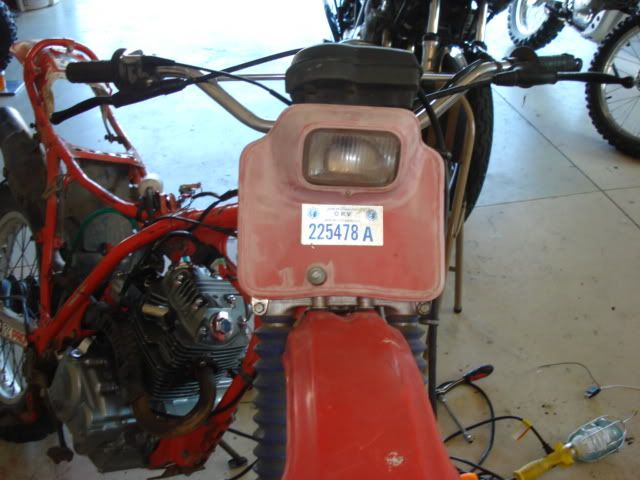 Parts everywhere. 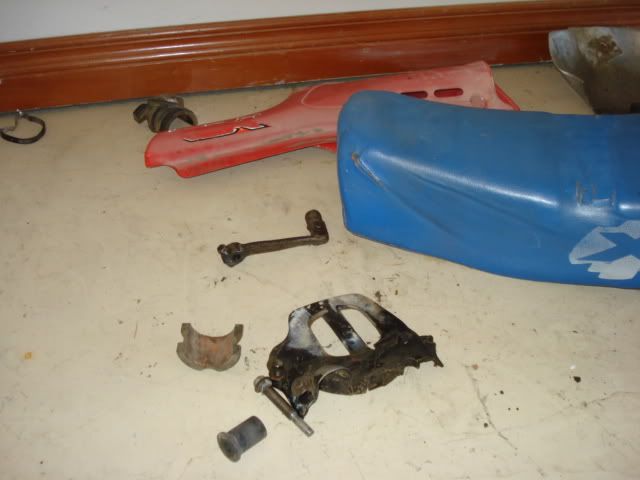 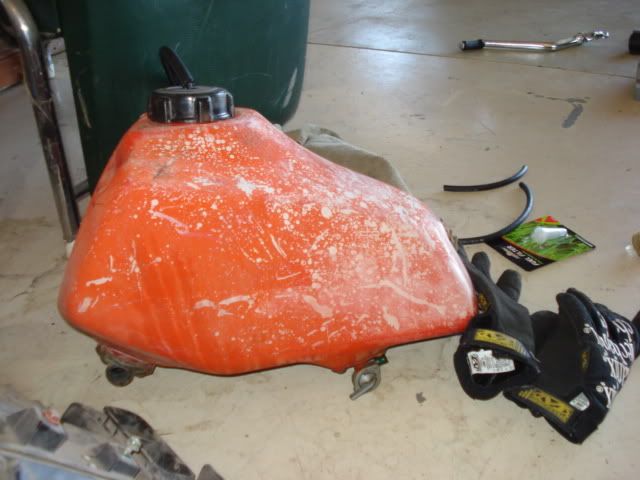 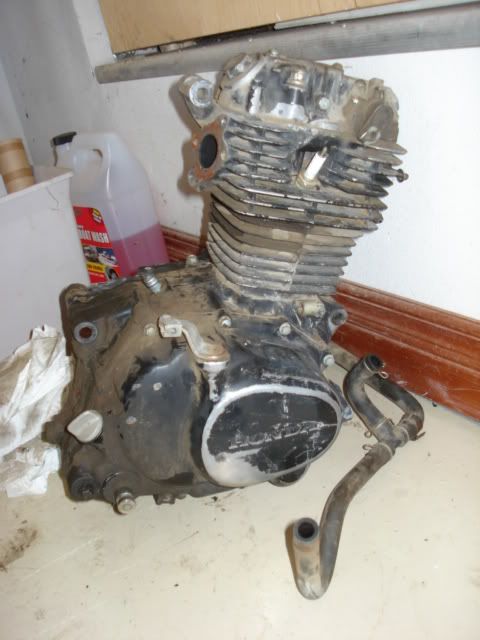 Here's where we're at. 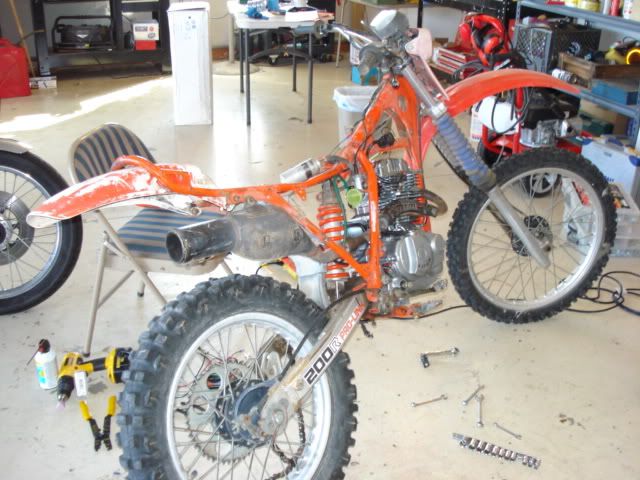 The mounts. 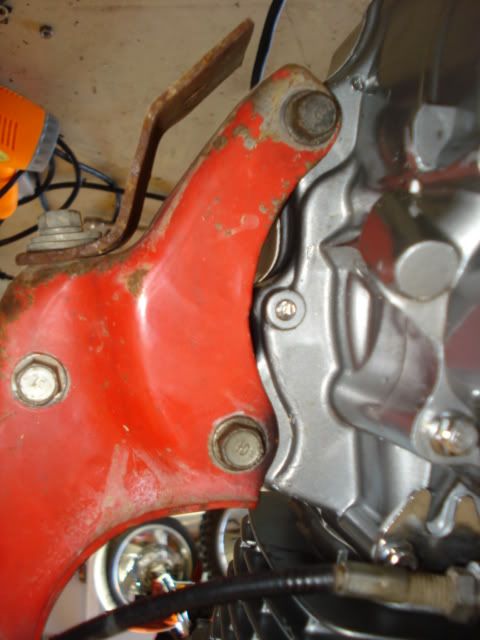 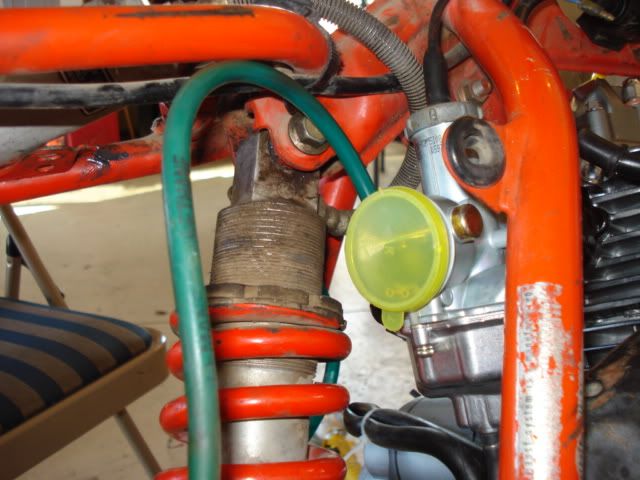 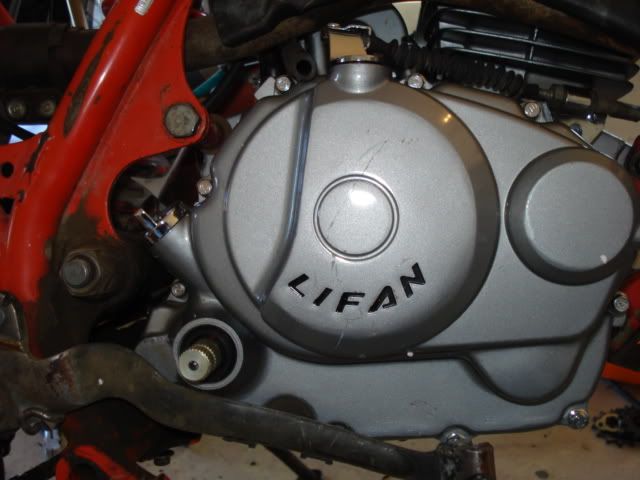 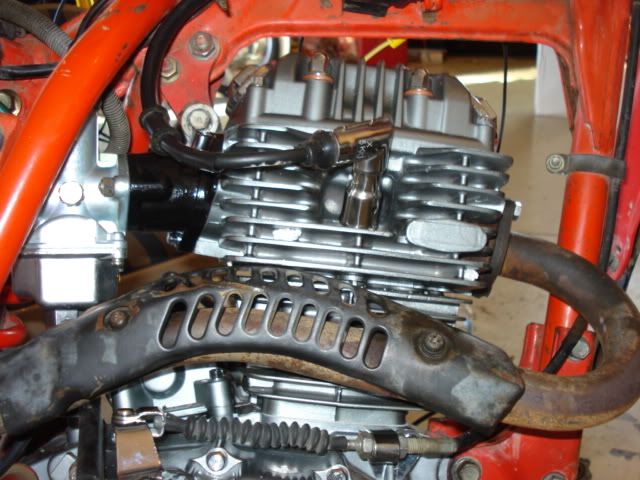 Odometer. it actually works. 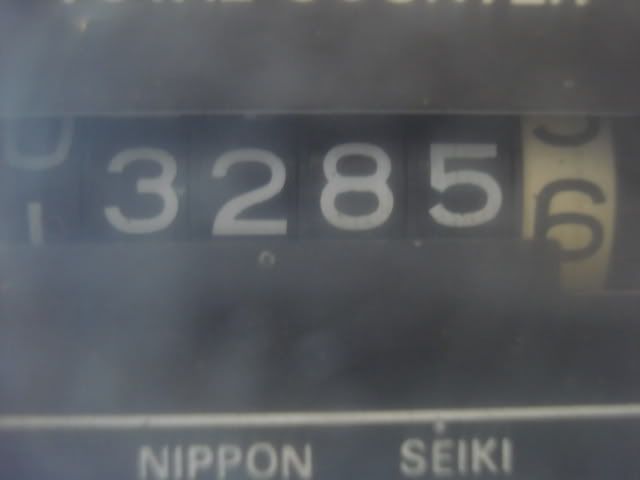
__________________
Happy to serve. |

|
|
10-17-2010, 10:21 PM
|
#3 | |
|
Join Date: Mar 2009
Location: Southeastern Washington desert
Posts: 14,761
|
Quote:
I had to use the old intake manifold, and I may have to use the old kick starter, but other than that it was pretty straightforward. Next obstacle is the sprocket.
__________________
Happy to serve. |
|
|
|
|
10-18-2010, 12:27 AM
|
#5 |
|
Join Date: Aug 2010
Location: austin, tx
Posts: 1,452
|
hey doc from what i can tell the 89 cr500 muffler would not "bolt on" to that bike.. but in all honesty it wouldnt take much to weld on a mount on the rear grab bar.. i will post a picture here tomorrow of my fmf muffler since its off a 89 cr500 and you can see how it mounts..
i will say tho a new muffler would look awsome on that bike, the stock muffler looks huge but seeing those pictures makes me giddy thinking about doing almost the same thing this winter to the quad.. did you by chance look the frame over and fix any rust spots to keep the cancer from spreading ?
__________________
200cc beast replica,carsoli cdi,performance coil,fmf powercore 2,uni air filter,hour/tach meter,jetted mikuni carb,msr bars,moose racing grips,yz250f clutch perch,D.I.D chain |
|
|
|
10-18-2010, 06:09 AM
|
#6 |
|
Join Date: Jun 2009
Location: orbital platform
Posts: 741
|
I'm irritated that there are 2 yellow wires.
The 2 yellow wires are electrically the same (AC volts), so, with no polarity (or difference) why would you require different colours? It is only on the far side of the regulator/rectifier, that these two wires hook to, that there is a polarity, and the use of different colours becomes important. You could hook those two yellow wires to a rectifier bridge: http://en.wikipedia.org/wiki/Diode_bridge (converting AC to DC) Bleed of the excess voltage with a Zener diode (rated for 12.8v): http://en.wikipedia.org/wiki/Zener_diode And you would have a battery charging system (old style), not as efficient as the newer stuff (the excess voltage is bled off as heat energy in the Zener), but a "basic charging system" costing less than $10. |
|
|
|
10-18-2010, 11:29 AM
|
#7 |

Join Date: Jul 2008
Location: Idaho
Posts: 25,054
|
Thank you for posting the photos; you have made excellent progress.
 I always love it when I see parts compatibility between the Chinese, and Japanese bikes. I always love it when I see parts compatibility between the Chinese, and Japanese bikes. Spud
__________________
Spud "Never argue with an idiot. He will drag you down to his level, and beat you with experience."  Mark Twain Mark Twain2015 Zongshen ZS250GY-3 (RX3) 2006 Zongshen ZS200GY-2 (Sierra 200) 2005 Honda XR650L 2004 Honda CRF250X 1998 Kawasaki KDX220 Mods made to my Zongshen ZS200GY-2: http://www.chinariders.net/showthread.php?t=6894 |
|
|
|
10-18-2010, 11:41 AM
|
#8 | |
|
Join Date: Mar 2009
Location: Southeastern Washington desert
Posts: 14,761
|
Quote:
No rust anywhere. The bike was stored outside for God knows how many years. The prior owner bragged 'It was under a tree' like that somehow does not imply neglect. This guy was cruel to motorcycles. I felt like CPS taking his bikes away. No rust. 7.5 inches rain annually here on average. Sun faded though.
__________________
Happy to serve. |
|
|
|
|
10-18-2010, 11:42 AM
|
#9 | |
|
Join Date: Mar 2009
Location: Southeastern Washington desert
Posts: 14,761
|
Quote:
Do I have to do any of that if I use the regulator/rectifier included in the kit?
__________________
Happy to serve. |
|
|
|
|
10-18-2010, 03:29 PM
|
#10 |
|
Join Date: Jun 2009
Location: orbital platform
Posts: 741
|
Do I have to do any of that if I use the regulator/rectifier included in the kit?
No, just use the stuff in your kit, I posted that stuff to illustrate basically what goes on inside the rectifier/regulator box. What you have is a bit more sophisticated and efficient, though probably not as "idiot proof", as in installing the battery backwards for just a "second", doing that IS guaranteed to "let the evil smoke monster" out of your Chinese rectifier/regulator. |
|
|
|
10-18-2010, 03:37 PM
|
#11 |
|
Join Date: Jun 2009
Location: orbital platform
Posts: 741
|
Here is what is inside your Chinese rectifier/regulator:
http://s397.photobucket.com/albums/p...regulator2.jpg (thanks to Lynn Edwards) Noting: D4 to D7 (rectifier bridge) and D1 (Zener) |
|
|
|
10-20-2010, 01:05 AM
|
#12 |
|
Join Date: Apr 2007
Location: Show Low Arizona
Posts: 2,889
|
Good project, Can't wait to see more pics.
__________________
<br />2001 Suzuki DR200SE<br />1997 Suzuki RM250 YIKES<br />1995 Yamaha Breeze 125 daughters<br />1991 Honda XR80r Restored<br />maybe a 2003 Yamaha TTR90 |
|
|
|
|

|
 |
|
|


 Linear Mode

