|
|
#1 |
|
Join Date: Mar 2009
Location: Sardis, BC, Canada
Posts: 25,977
|
Hillbilly XL250s Resto
Not meant to imply a factory-correct resto, just trying to clean up a nasty old bike. A while back, Son of Weldangrind and I traded our '78 MX175 for an '81 XL250S (plus cash
Here's the ugly bike when we brought it home: 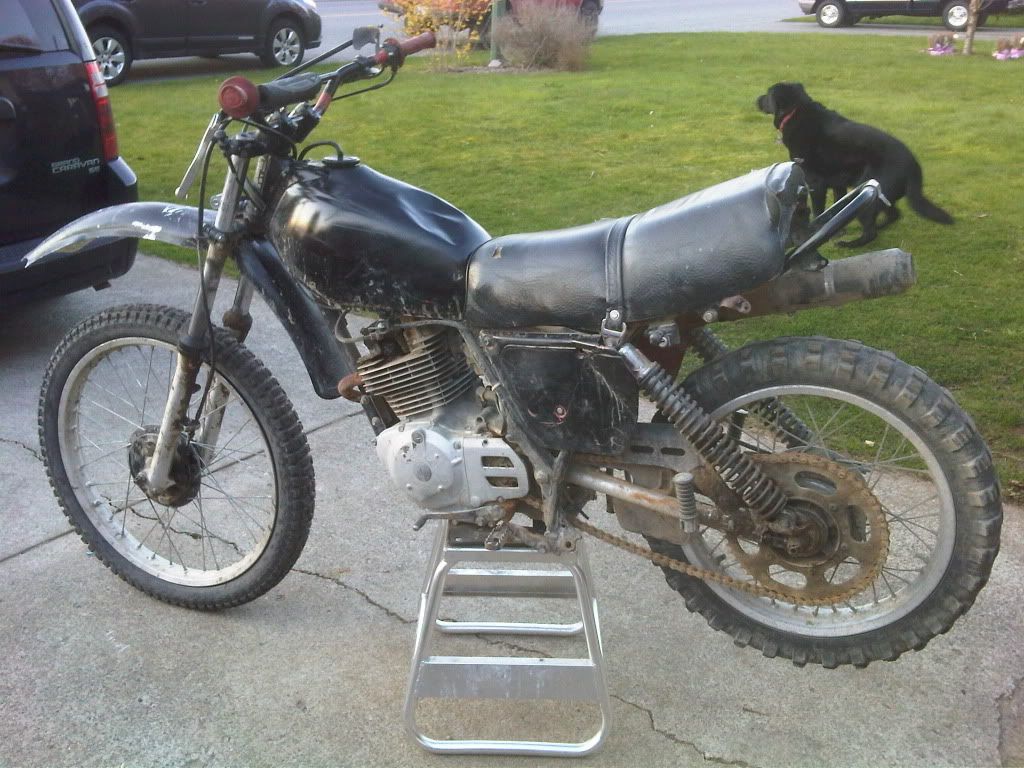 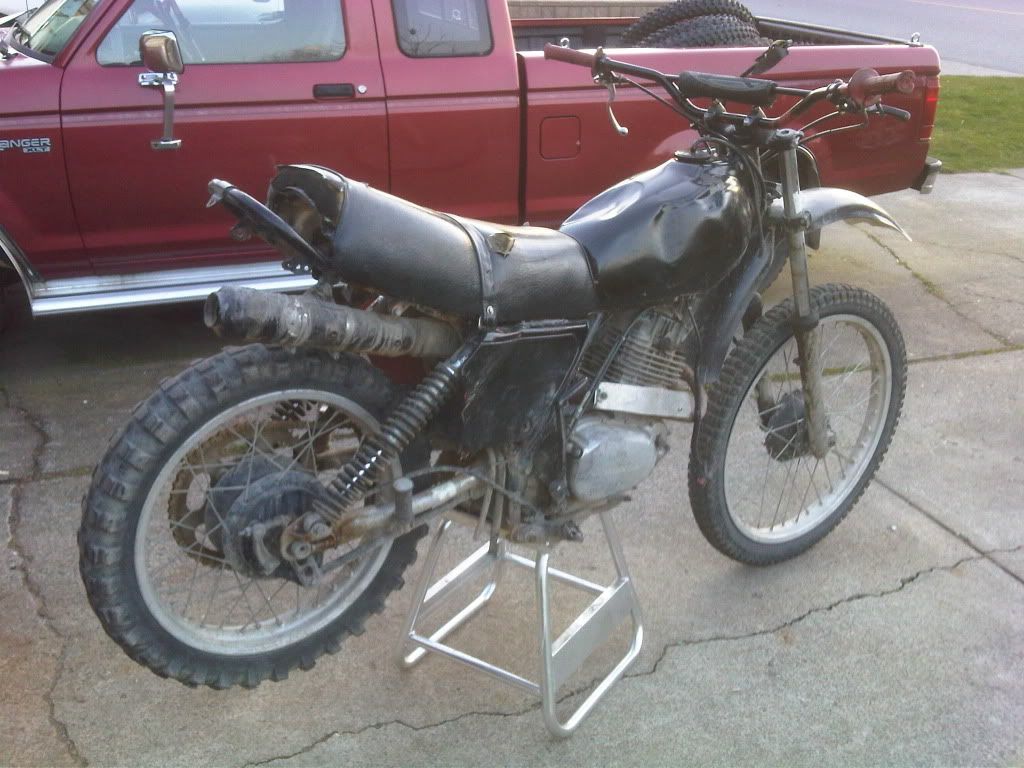 I picked up antother XL250S a couple of weeks later in even worse shape, but it was nearly free and had some good parts. The tank was not quite as bad as the one pictured, but it was rusted through in one spot. I ground out the rust, hammered it in and filled it with Permatex Cold Weld. I didn't use JB weld because it doesn't actually say that it resists gasoline. I picked the best exhaust header out of the two (which was still very rusty) and tried the electrolytic de-rusting trick on it. Wow! It really works. for those who aren't familiar, you fill a large plastic container with warm water, add some Arm & Hammer washing soda and stir it up. Place a large piece of clean steel (ideally larger than your rusty part) in the water and connect the positive clamp from your battery charger to it. Connect the negative clamp to the rusty piece, put it in the water and plug the battery charger in. Ten minutes later, this was the result: 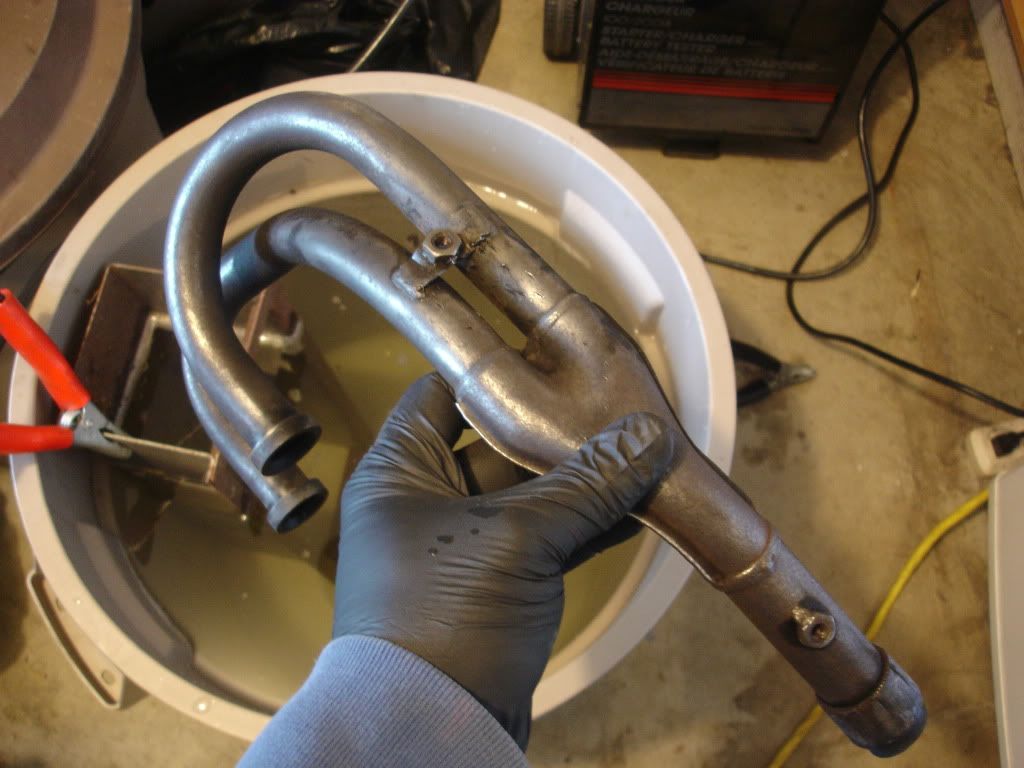 One shock bushing was beat to death, so I popped the metal sleeve out and removed what was left of the rubber. A quick measurement revealed that 5/8" heater hose is a good match. 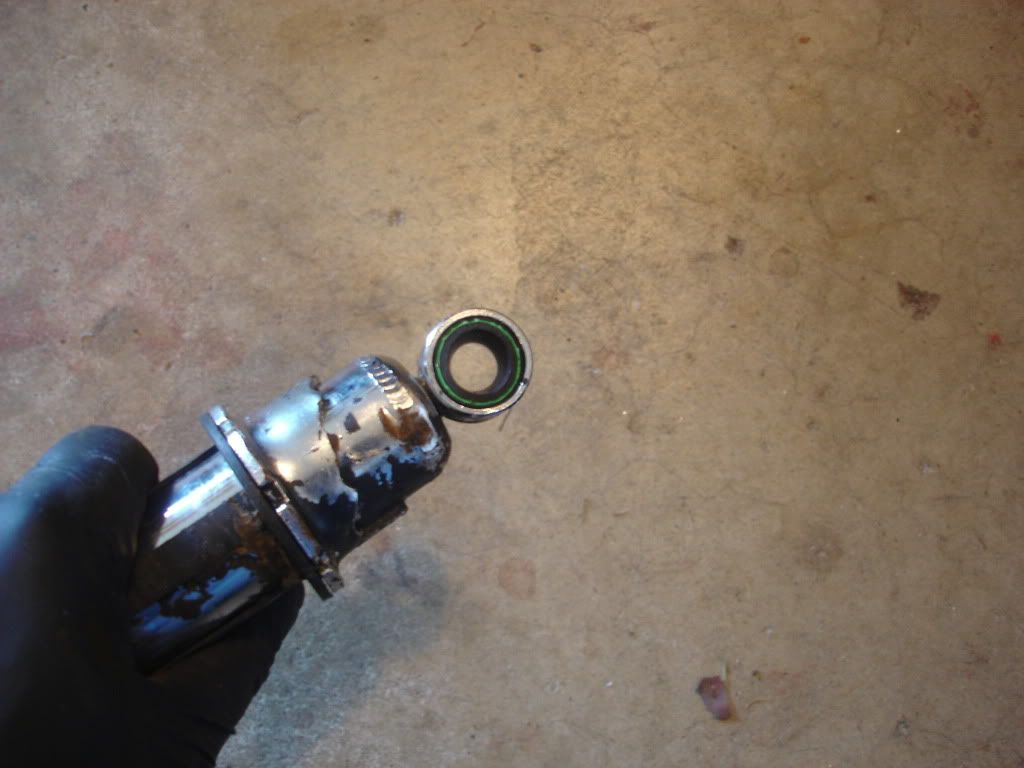 I pressed the metal sleeve into the heater hose and called it done. 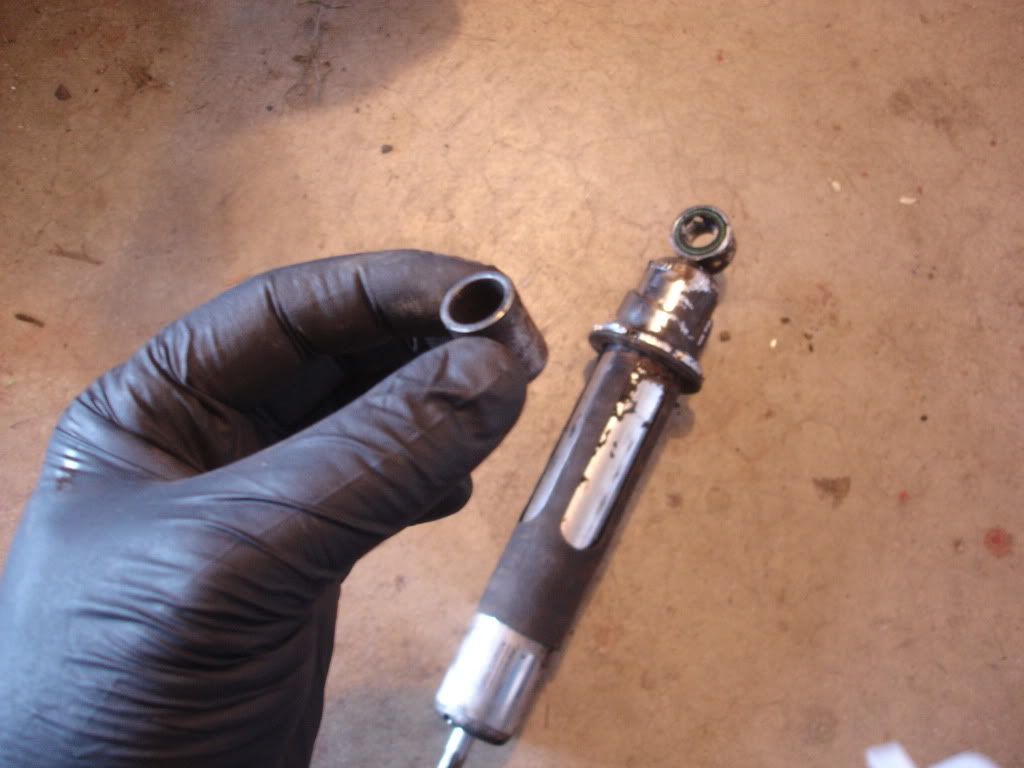 This is the assembled bushing next to the wasted one: 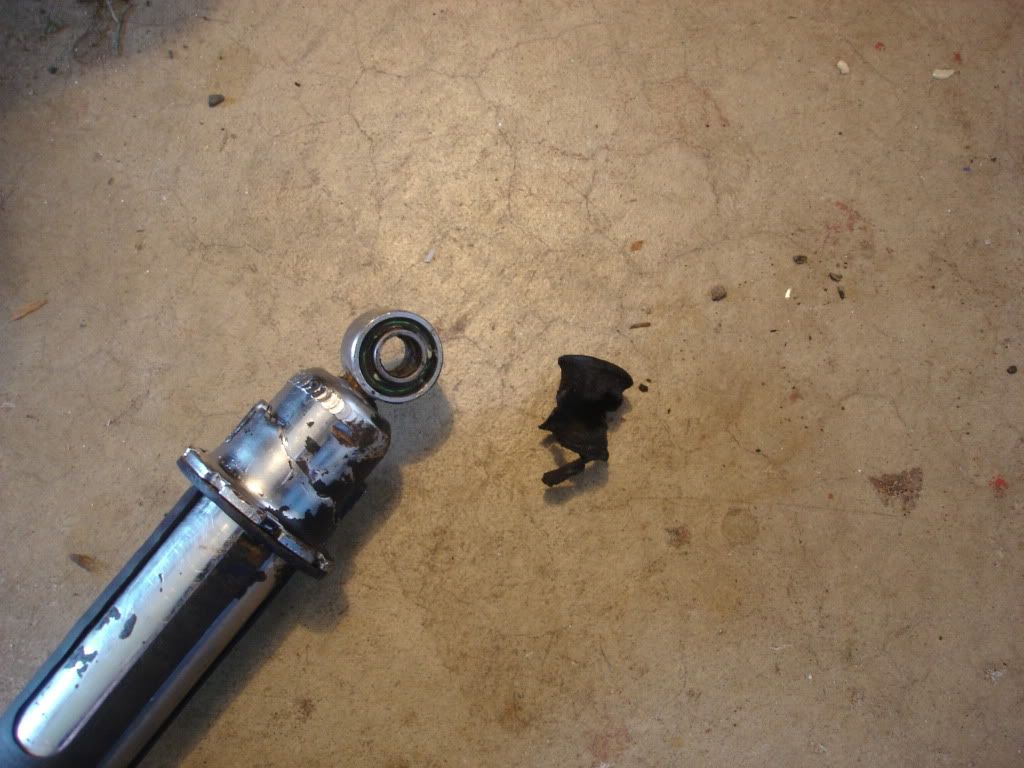 The muffler was a rotten mess. I cut off the offending garbage and bought a piece of exhaust tubing to weld on. Welding rusty metal is no fun, but it stuck. Here's the mock-up: 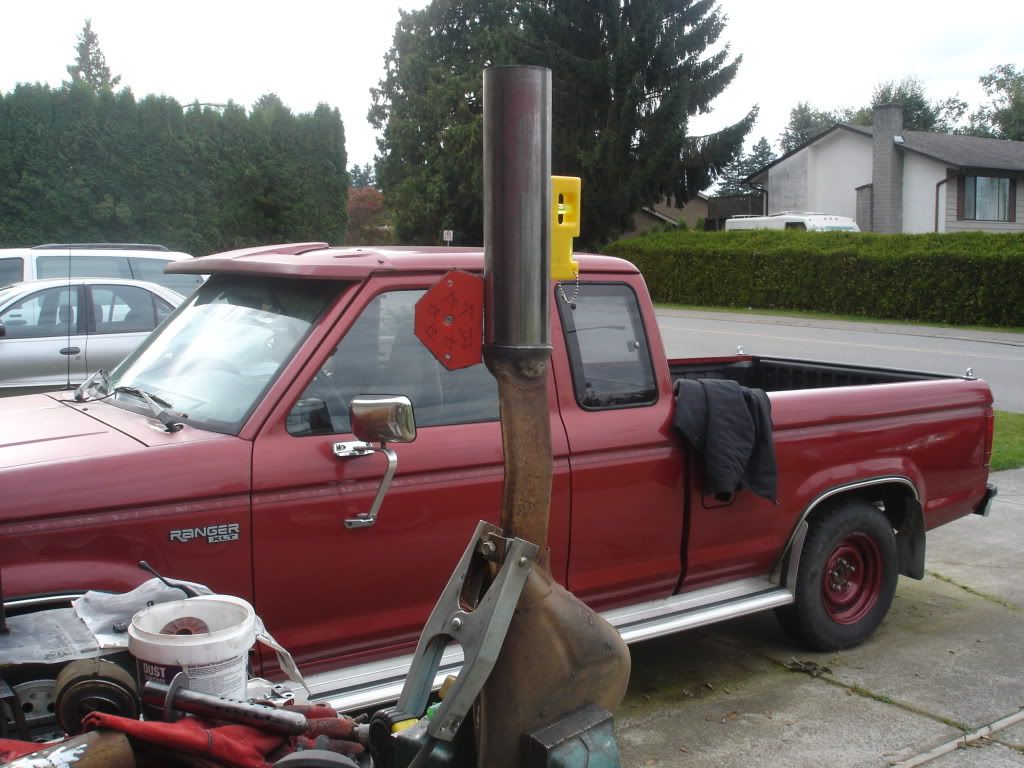 I used a leftover from a Beast ATV muffler for the exit pipe, because it will act as a spark arrestor without compromising flow too badly. I cut a disc out of some plate and ground a hole in the middle to match the exit pipe: 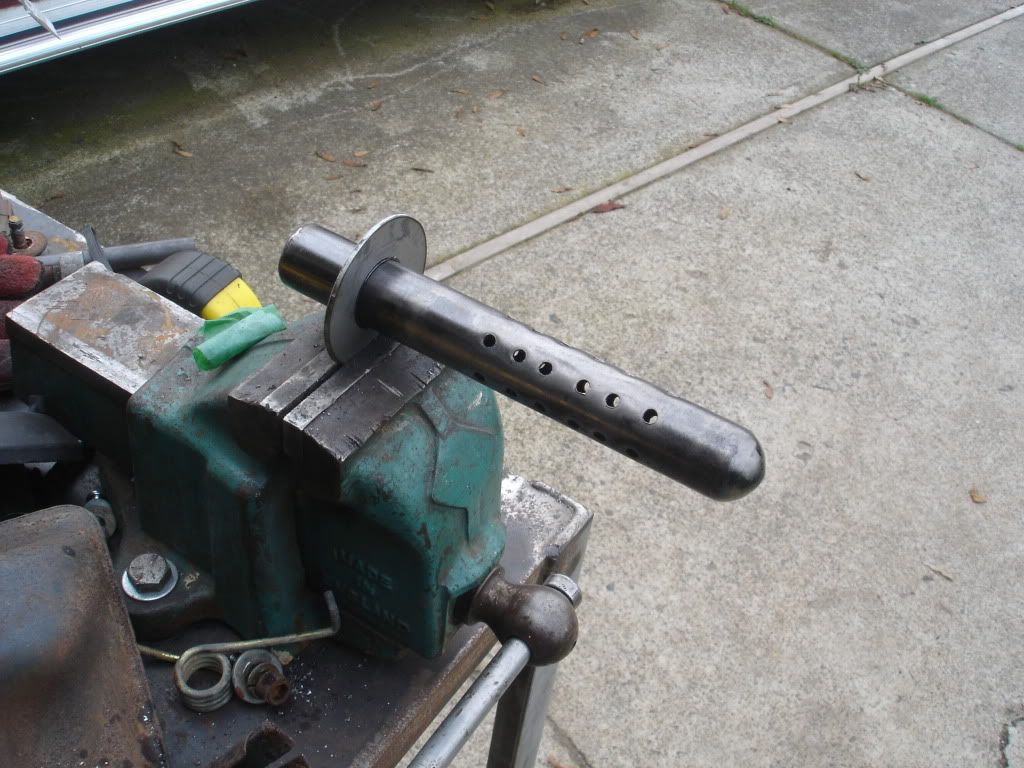 I then welded the disc into the exhaust tubing and then welded the original bracket in place: 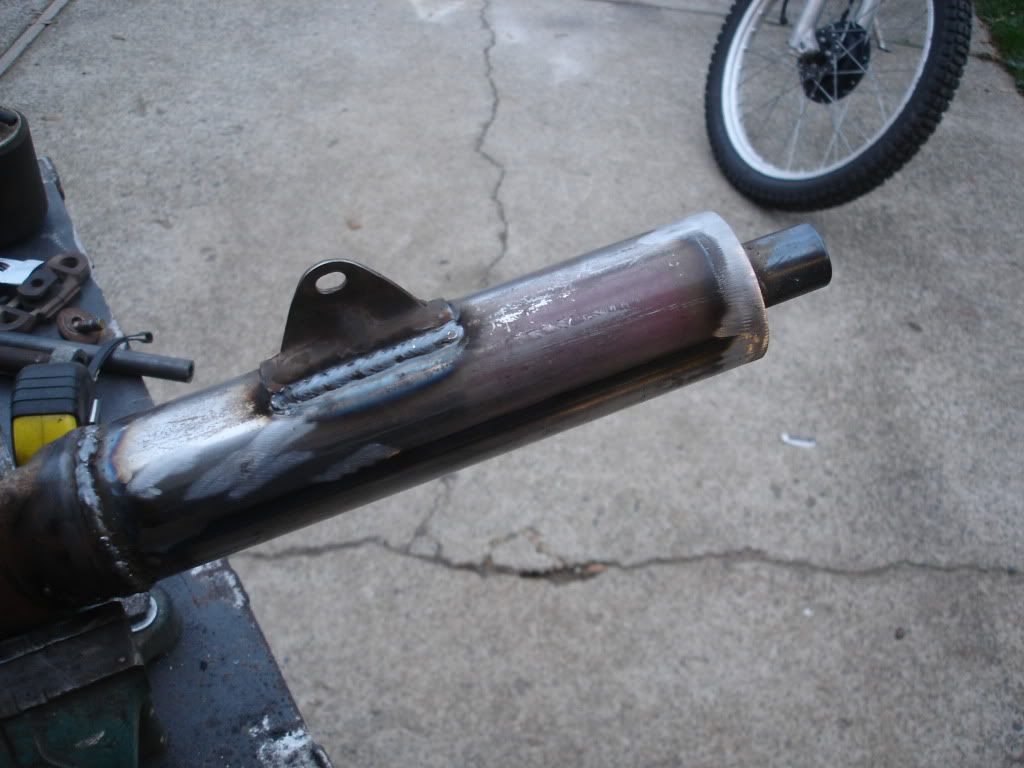 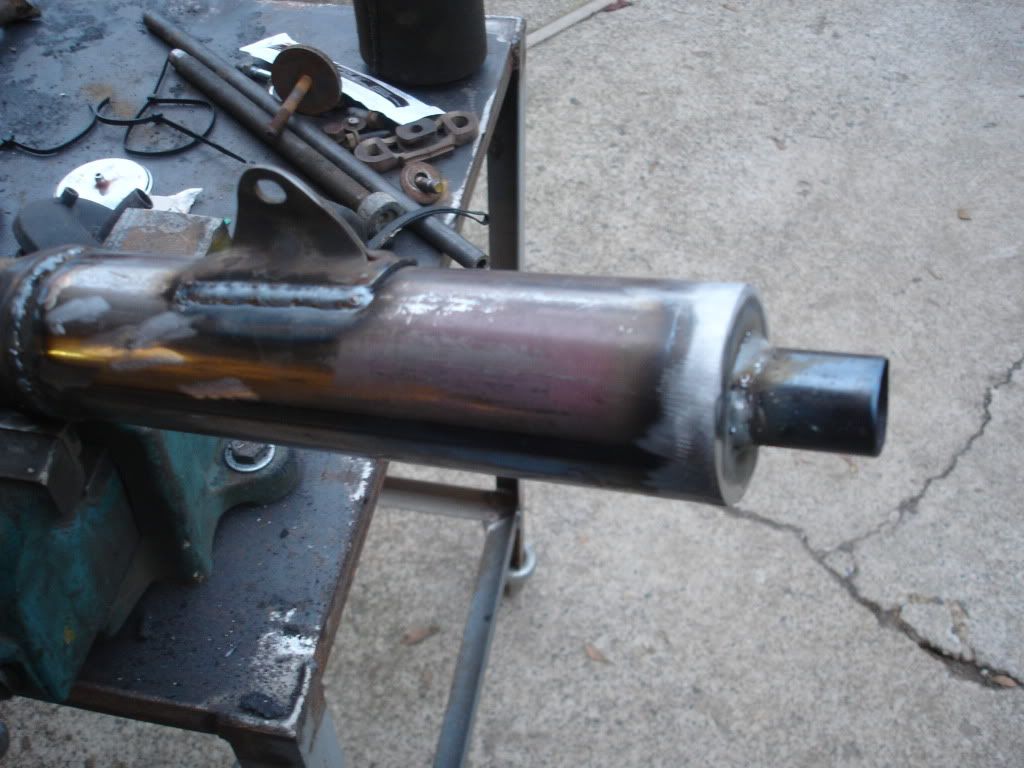 This is the muffler after some heat paint: 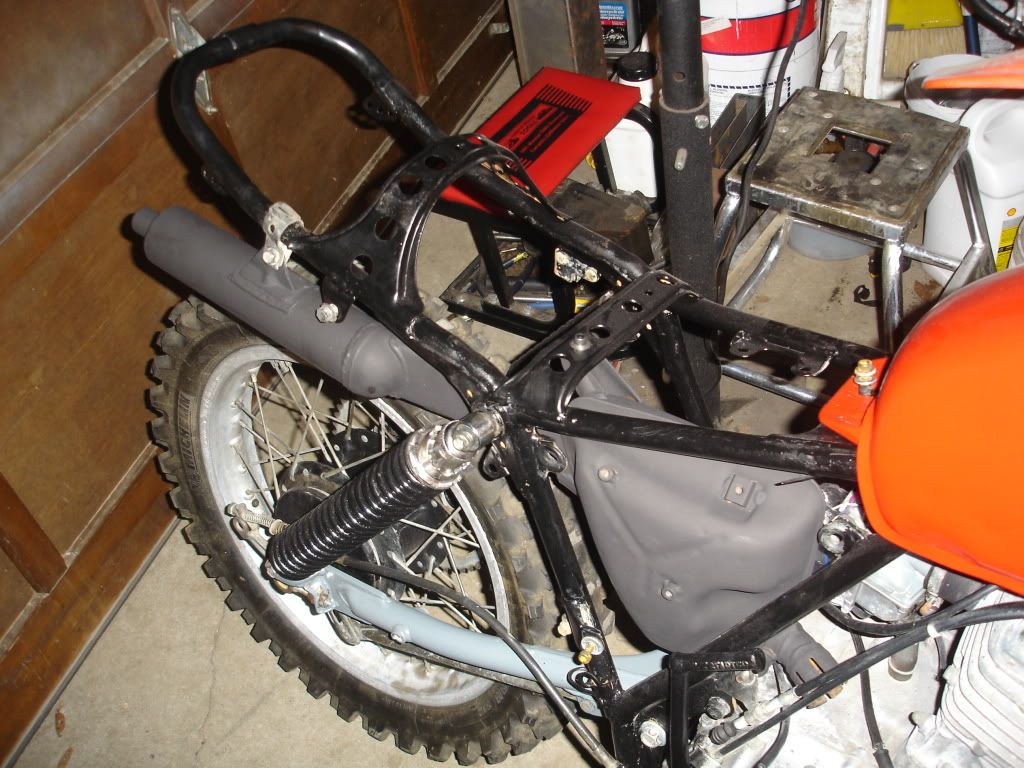 I filled the dents in the tank, painted it with Krylon Fusion Red Pepper (might as well be called Honda Red), recovered the seat with an eBay score and painted the fenders and side panels with Krylon Fusion. This is the result so far, with many parts left to reassemble: 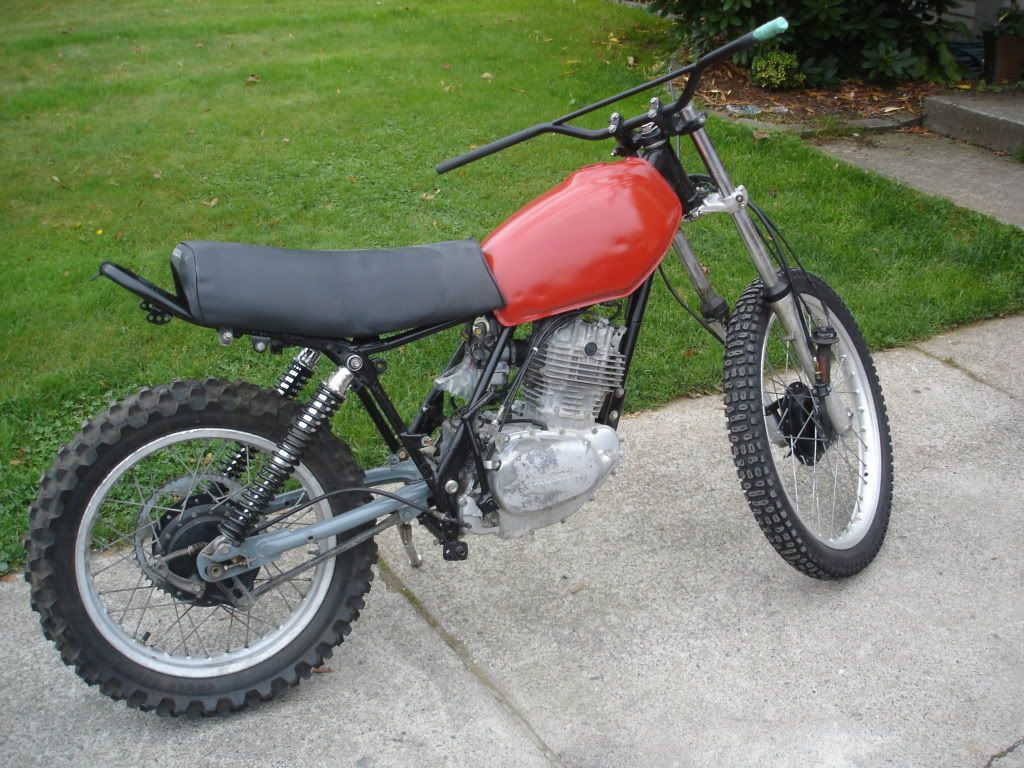 The brake pedal and footpeg assembly was terribly bent, as were the handlebars. After much heating and bending, those parts are looking more respectable and will go on the bike after some paint. More to follow as I find time.
__________________
Weldangrind "I figure I'm well-prepared for coping with a bike that comes from the factory with unresolved issues and that rewards the self-reliant owner." - Buccaneer |

|
|
|
#2 |
|
Join Date: Mar 2009
Location: Sardis, BC, Canada
Posts: 25,977
|
Forgot to mention that I also painted the rusty coil springs and swingarm. The swingarm is now battleship grey, because that's what I had laying around. It'll do. I put a used 18" rear tire on to replace the rubber band that came with the bike. The 30 year old (!) front tire is in remarkably good shape, and I'm not buying a new one. They're oddball at 23".
__________________
Weldangrind "I figure I'm well-prepared for coping with a bike that comes from the factory with unresolved issues and that rewards the self-reliant owner." - Buccaneer |

|
|
|
#3 |
|
Join Date: Mar 2009
Location: Southeastern Washington desert
Posts: 14,761
|
You impress me to no end, Weld. I am envious of your project! Will it be street legal? Have you picked out a name yet? :P
__________________
Happy to serve. |

|
|
|
#4 |
|
Join Date: Oct 2009
Location: Alberta, Canada
Posts: 3,274
|
I like it! Nice to see another old Honda coming back from the dead
 . I'm really interested in the electrolytic metal cleaning process... Did it remove all the old paint as well as the rust? It almost looks sandblasted! Also, what do you set your charger at? 12volt 10 amps? The clean piece of steel, you just mean a piece with no rust on it? Carbon steel? Thanky for the info, I'd heard of this before but this was the first time I'd seen the results, very impressed! . I'm really interested in the electrolytic metal cleaning process... Did it remove all the old paint as well as the rust? It almost looks sandblasted! Also, what do you set your charger at? 12volt 10 amps? The clean piece of steel, you just mean a piece with no rust on it? Carbon steel? Thanky for the info, I'd heard of this before but this was the first time I'd seen the results, very impressed! |

|
|
|
#5 |
|
Join Date: May 2007
Location: Altamont, Kansas
Posts: 15,103
|
I think that DogofWeld is getting ready to do some business.
Thanks for the info on the electro process. |

|
|
|
#6 | |
|
Join Date: Mar 2009
Location: Sardis, BC, Canada
Posts: 25,977
|
Quote:
 I have my eye on another bike right now, and the XL is an '81 with twin shocks and a 6 volt system. From everything I've read online, the 6 volt headlight has all the lumen quality of a candle, and I'm not going to spend the time / money to convert it. If I was to ride an old XL on the street, I would prefer an '82 or later. Haven't thought of a name. Perhaps Polished Turd?
__________________
Weldangrind "I figure I'm well-prepared for coping with a bike that comes from the factory with unresolved issues and that rewards the self-reliant owner." - Buccaneer |
|

|
|
|
#7 | |
|
Join Date: Mar 2009
Location: Sardis, BC, Canada
Posts: 25,977
|
Quote:
There wasn't any paint on the part to remove, but I don't think that paint would be removed if the metal under it is sound. Anywhere that rust exists will be converted to what I presume to be a phosphate coating. It simply wipes / brushes off. I happened to have the charger set to 12 / 10, but I don't think it needs more than one amp. I just used a piece of steel plate that wasn't terribly rusty, and it becomes the sacrificial anode (perhaps cathode in this case?). I intend to grind the new rust off of it and use it again. I searched all over for Arm & Hammer washing soda, but it's not common in Canada. I bought a box at Walmart in Washington State, but I've since heard that it's available at London Drugs.
__________________
Weldangrind "I figure I'm well-prepared for coping with a bike that comes from the factory with unresolved issues and that rewards the self-reliant owner." - Buccaneer |
|

|
|
|
#8 | |
|
Join Date: Mar 2009
Location: Sardis, BC, Canada
Posts: 25,977
|
Quote:
 You're welcome. Let me know if you need any other details about the process. I'll add that the mix ratio was 1 tbsp per gallon of warm water; apparently any more than that is a waste.
__________________
Weldangrind "I figure I'm well-prepared for coping with a bike that comes from the factory with unresolved issues and that rewards the self-reliant owner." - Buccaneer |
|

|
|
|
#9 |
|
Join Date: May 2007
Location: Altamont, Kansas
Posts: 15,103
|
Thanks. I am going to have to give is try on some tractor parts. Looks alot easier than sanding off rust.
|

|
|
|
#10 |
|
Join Date: Mar 2007
Location: Abbotsford, BC, Canada
Posts: 4,880
|
Cool project, I quite like how the de-rusting worked out

|

|
|
|
#11 |
|
Join Date: Jul 2008
Location: Idaho
Posts: 25,054
|
Wow! You did a superb job on the muffler; it looks great!
 Thanks for the information on the derusting! Thanks for the information on the derusting!Spud 
__________________
Spud "Never argue with an idiot. He will drag you down to his level, and beat you with experience."  Mark Twain Mark Twain2015 Zongshen ZS250GY-3 (RX3) 2006 Zongshen ZS200GY-2 (Sierra 200) 2005 Honda XR650L 2004 Honda CRF250X 1998 Kawasaki KDX220 Mods made to my Zongshen ZS200GY-2: http://www.chinariders.net/showthread.php?t=6894 |

|
|
|
#12 |
|
Join Date: Mar 2009
Location: Sardis, BC, Canada
Posts: 25,977
|
Thanks guys! I'm interested to hear how the hillbilly muffler sounds.
__________________
Weldangrind "I figure I'm well-prepared for coping with a bike that comes from the factory with unresolved issues and that rewards the self-reliant owner." - Buccaneer |

|
|
|
#13 |
|
Join Date: Mar 2009
Location: Sardis, BC, Canada
Posts: 25,977
|
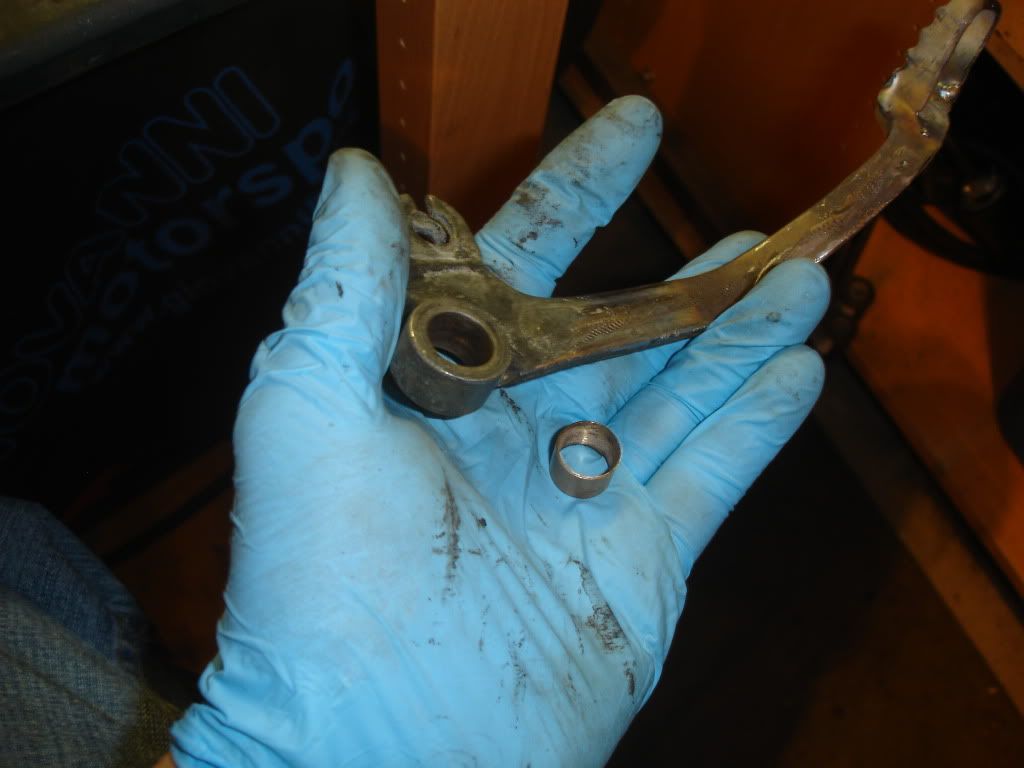
More to report tonight. I straightened the terribly bent brake pedal and modified a bushing for it. A 5/8" OD bushing is a perfect fit into the pedal, but the ID won't slip over the unique bolt. I ground the ID of the bushing with a Dremel and an abrasive bit, per TurboT's instructions. It worked perfectly. This is the pedal and bushing:
 See the bent lever on the right? The one on the left was even worse, but it straightened out nicely with some heat, bending, pounding and intimidation. I had to weld the toe piece where it cracked, but it'll be fine. 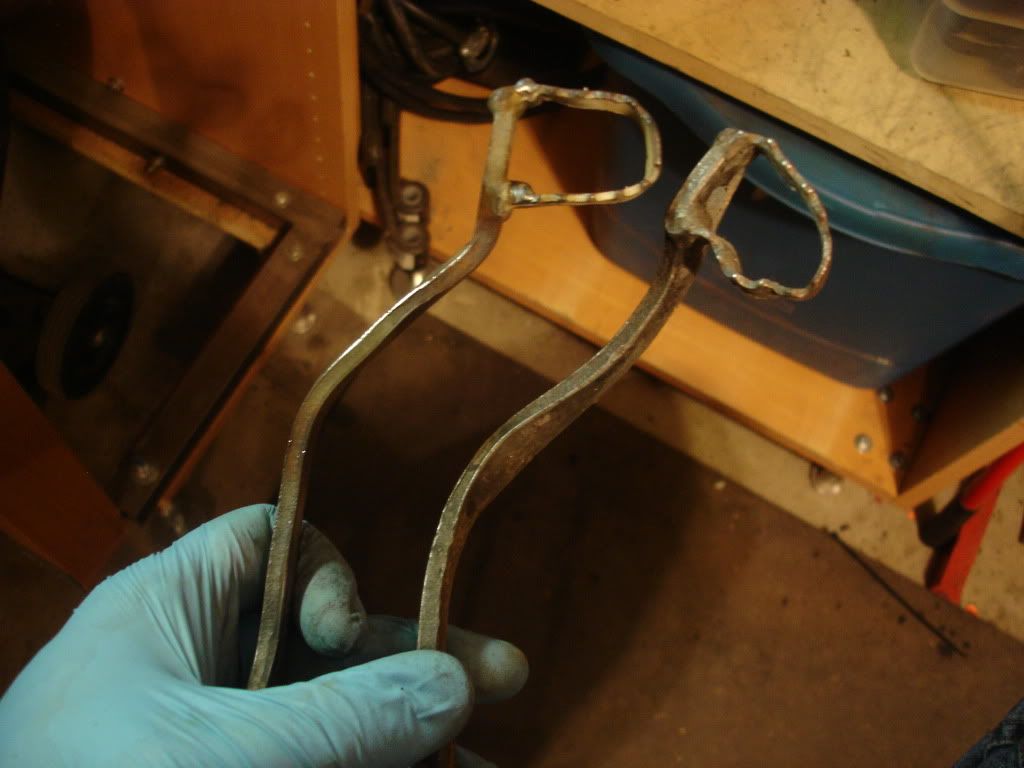 Since I had drained the oil, I decided to remove the right side cover to gain access to the oil filter. I'm really glad that Honda came to their senses and redesigned the filter with easier access. This is the side cover: 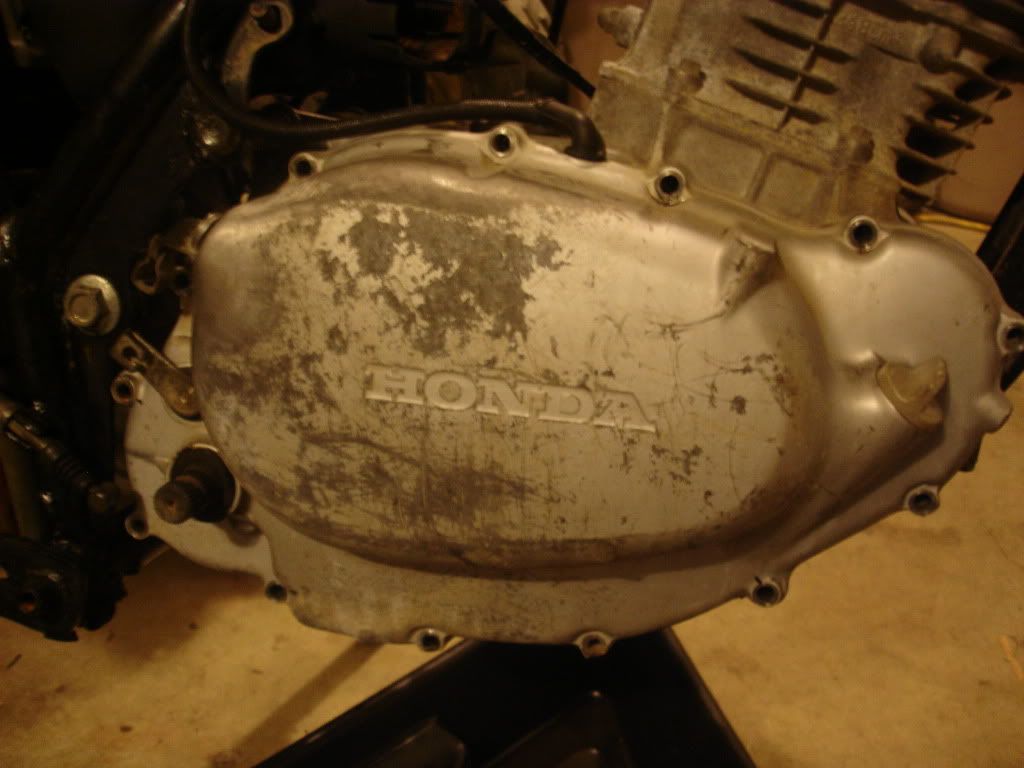 This is the inside of the cover upon removal. I'm pleased with how clean it is. 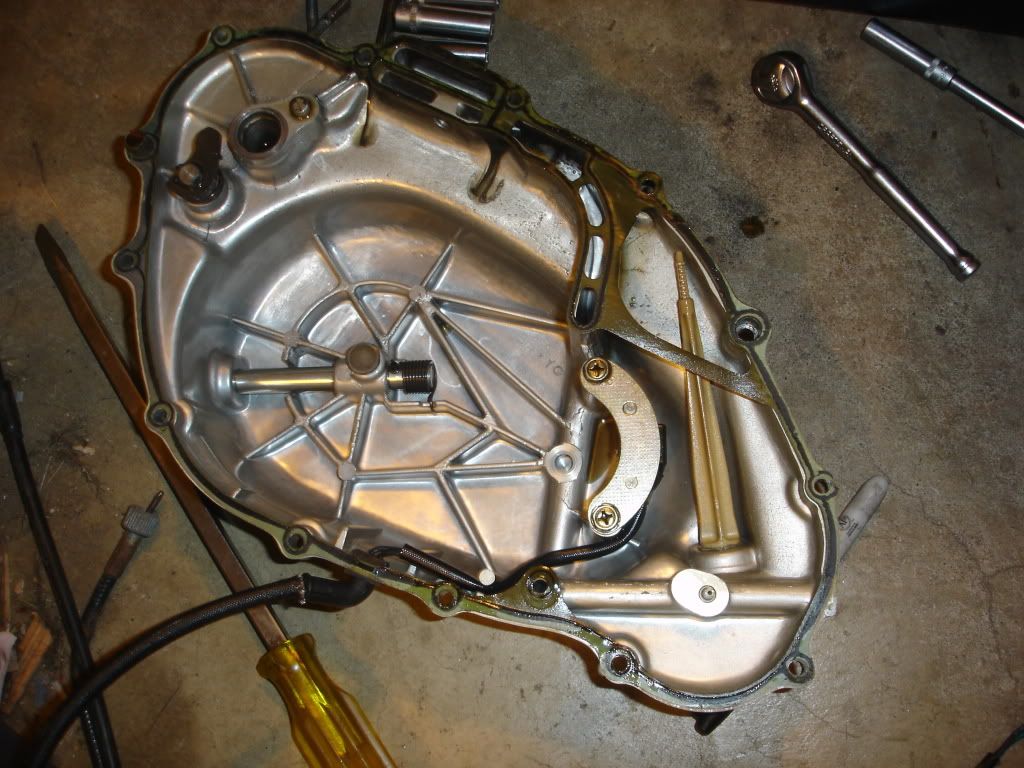 Here's what hides behind the cover. You have to go this far to remove the oil filter. :roll: 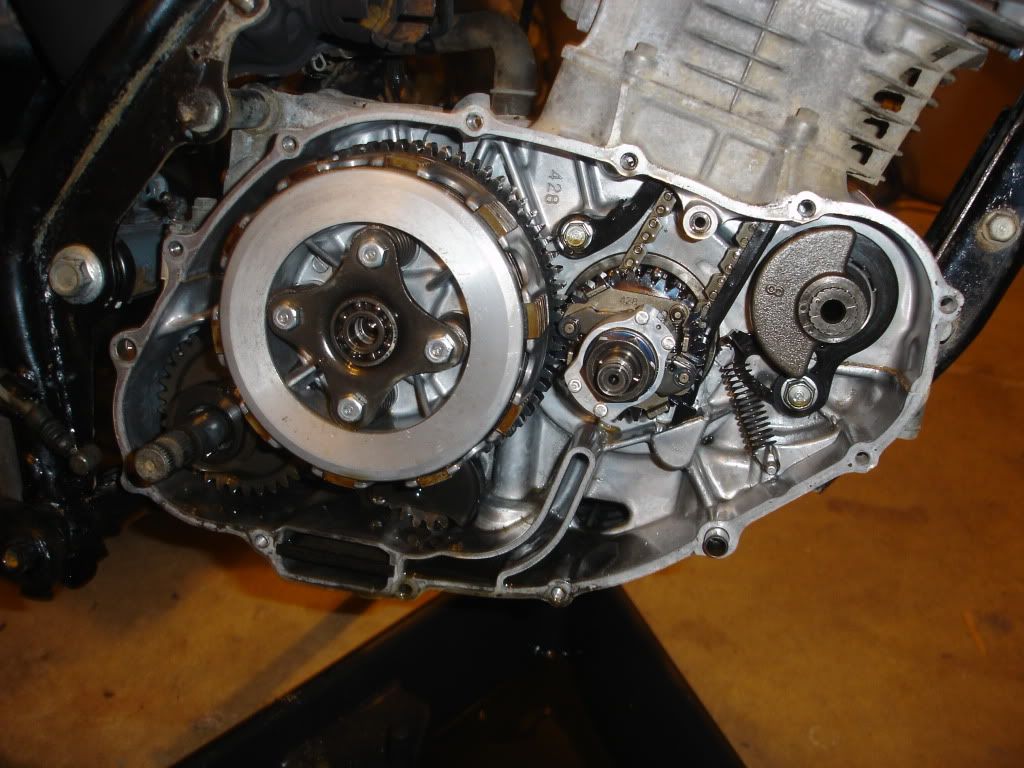 This is where the filter lives. 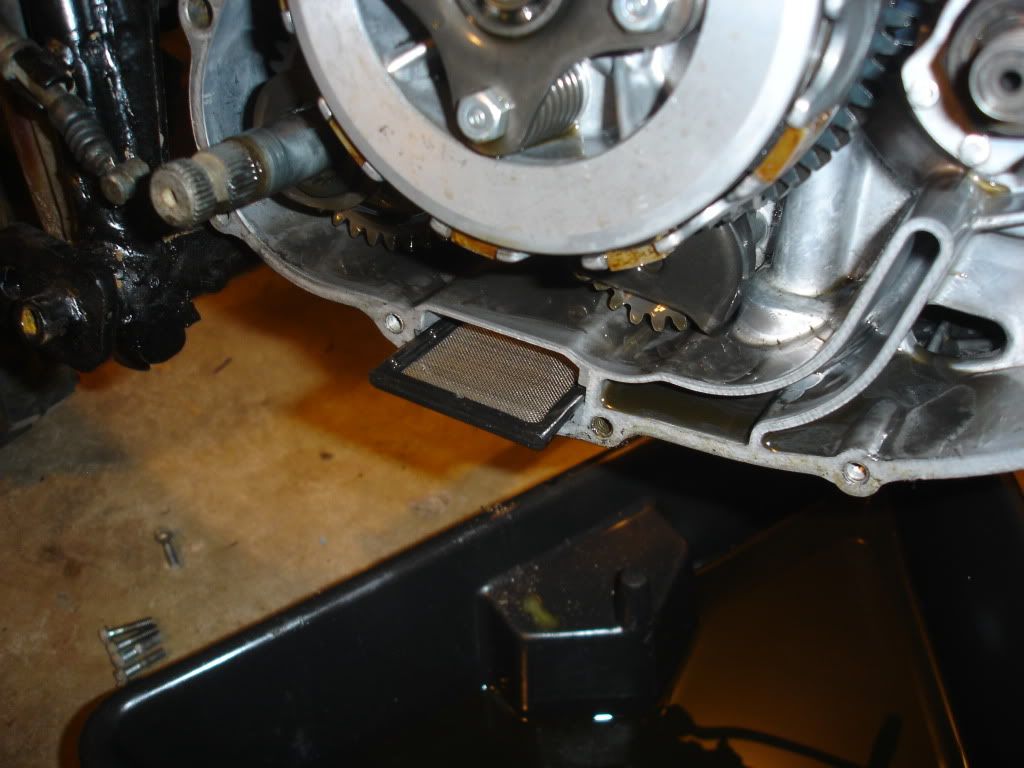 It looks really good. 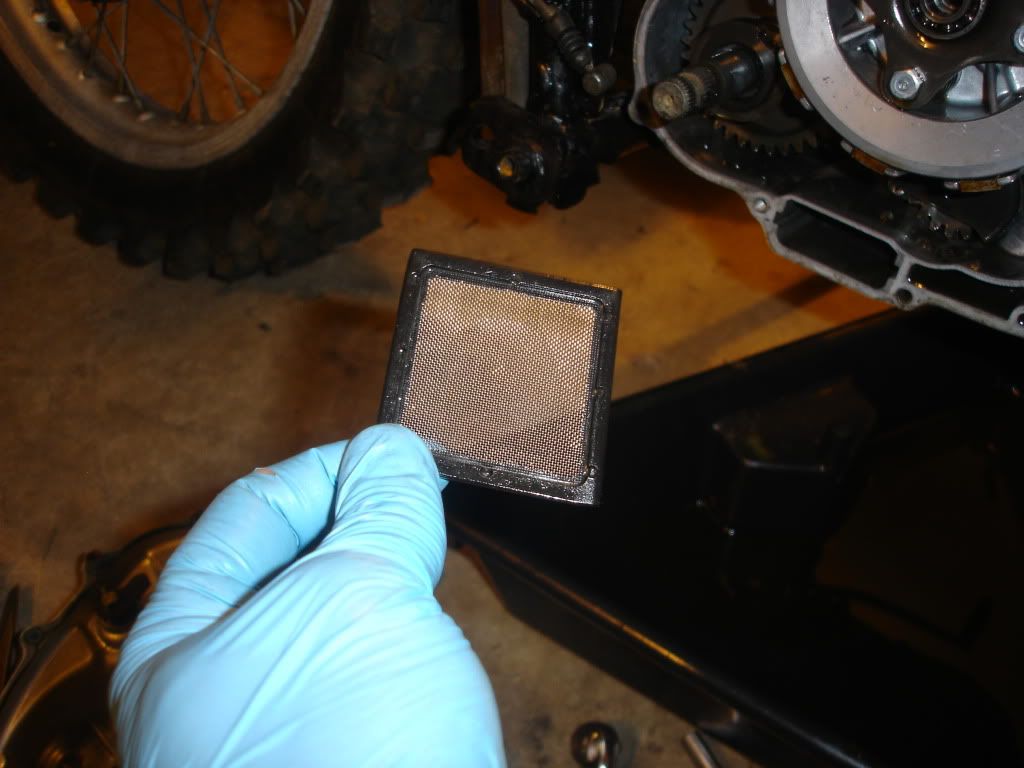 While you have the cover off, it's an excellent opportunity to adjust the counterweight chain tension. This shot shows the tensioner before adjustment: 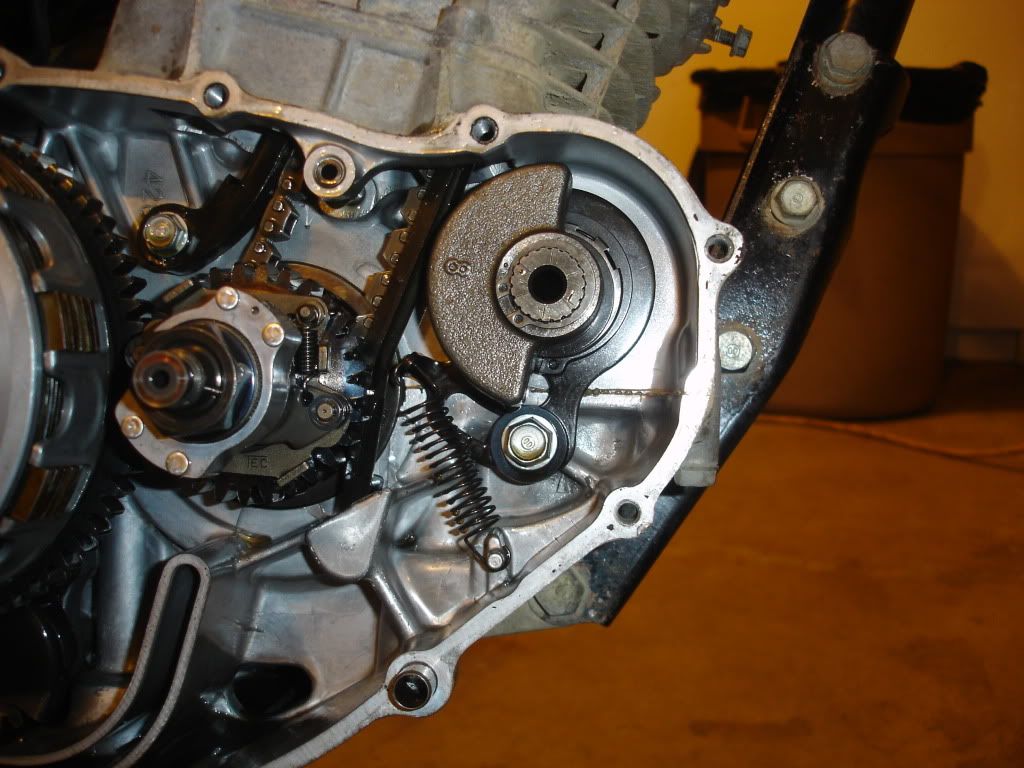 Once you loosen the bolt, the flange is pulled by the spring to this position: 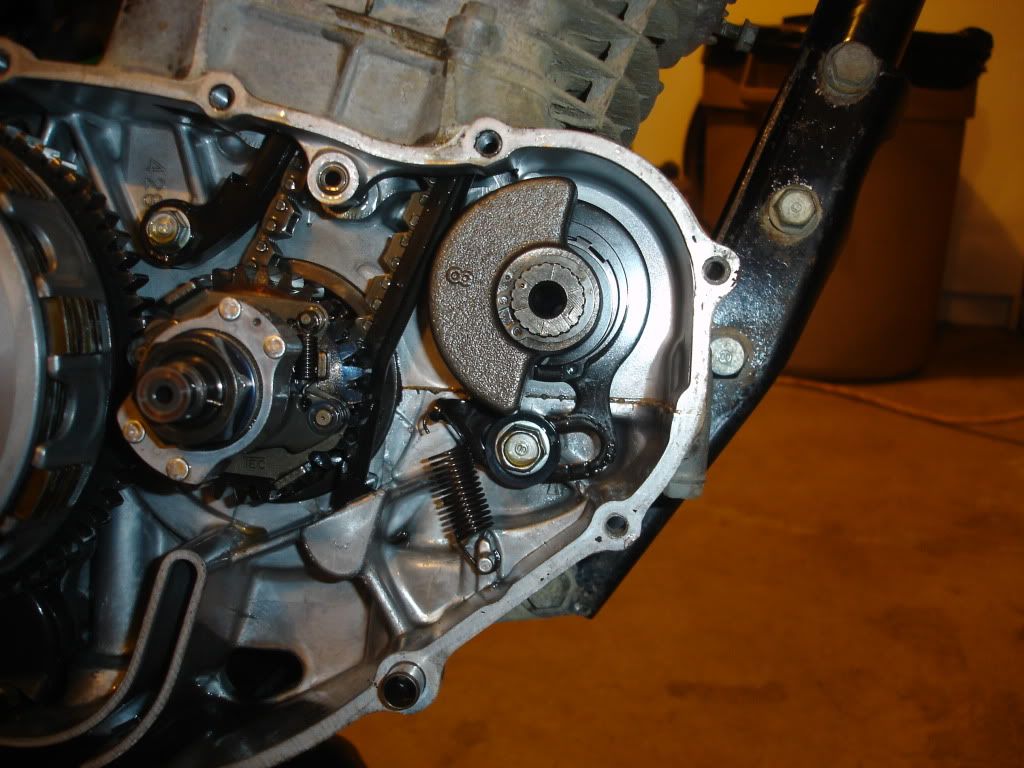 The manual then directs you to move the flange one notch in a clockwise direction and tighten the bolt to 22 ft/lbs. Here's the final adjustment: 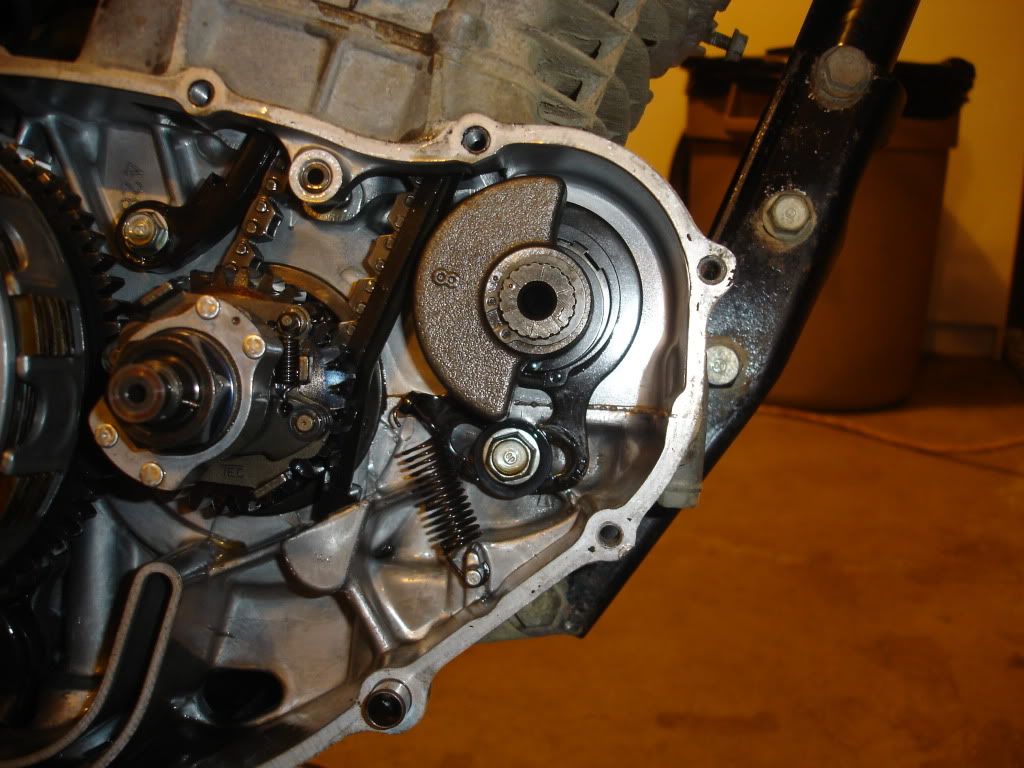 I don't think that cover has ever been off, but the inside looks really good. Somebody will get many happy miles from this bike. I also mounted the air box and rear fenders and I painted the footpeg mounts. More to come!
__________________
Weldangrind "I figure I'm well-prepared for coping with a bike that comes from the factory with unresolved issues and that rewards the self-reliant owner." - Buccaneer |

|
|
|
#14 |
|
Join Date: Jul 2008
Location: Idaho
Posts: 25,054
|
What a great thread! The engine looks very clean.
 Was the oil screen that clean also, or did you clean it up a bit before you took the photograph? Was the oil screen that clean also, or did you clean it up a bit before you took the photograph?Spud 
__________________
Spud "Never argue with an idiot. He will drag you down to his level, and beat you with experience."  Mark Twain Mark Twain2015 Zongshen ZS250GY-3 (RX3) 2006 Zongshen ZS200GY-2 (Sierra 200) 2005 Honda XR650L 2004 Honda CRF250X 1998 Kawasaki KDX220 Mods made to my Zongshen ZS200GY-2: http://www.chinariders.net/showthread.php?t=6894 |

|
|
|
#15 |
|
Join Date: Mar 2007
Location: Abbotsford, BC, Canada
Posts: 4,880
|
Great project
 Definitely cleaner inside then my Honda Definitely cleaner inside then my Honda 
|

|
|
|

|
 |
|
|