|
|||||||

|
|
 |
|
|
Thread Tools | Search this Thread | Display Modes |
|
|||||||

|
|
 |
|
|
Thread Tools | Search this Thread | Display Modes |
|
|
#1 |
|
Join Date: Sep 2008
Location: Surrey, B.C., Canada
Posts: 2,185
|
Giovanni 50cc Mini ATV Assembly Guide/Report - Tons of Pics
Hi Guys,
This will be a long post with a lot of pictures. I noticed when reading the Giobikes.com Q&A's there are a lot of questions regarding what needs to be done assembly wise when getting these quads, so I thought I would post a pictorial of how I've put the two together I have been involved with. Perhaps directing them here will bring us some new members to share knowledge and experiences with their chinese atv's. I'm also all ears and eyes if anyone picks up something I could do better or change, as I'm here to learn as well. If you have haven't noticed, Gio has been selling a lot of these of late, and the deals are pretty hot. I couldn't pass up the price on this unit, so purchased it with the mind of re-selling it for a minor profit...however my wife ended up selling it to her friend in Calgary for the price we paid before I even had it at my door. As usual, Giobikes is Johnny on the spot for delivery, and I had the unit 1.5 business days from sending the payment. Now I know I'm close to him so that helps. Here's what comes in the big brown UPS truck:  The larger box is the actual atv and the smaller is the wheels and parts box. Here is what the quad looks like packaged inside the box.  The 50 cc Gio is much less assembly than the 110cc I initially took on. Here is a pic of the hardware it comes with for assembly. Missing from the shot are the wheels and the battery.  After removing all packing materials other than the bottom support crate, here's what you have:  The first thing I do is install the handlebars. Loctite is used here to ensure the bolts don't loosen up and the bars don't dissapear on you on a heavy bump or panic stop. Ouch! 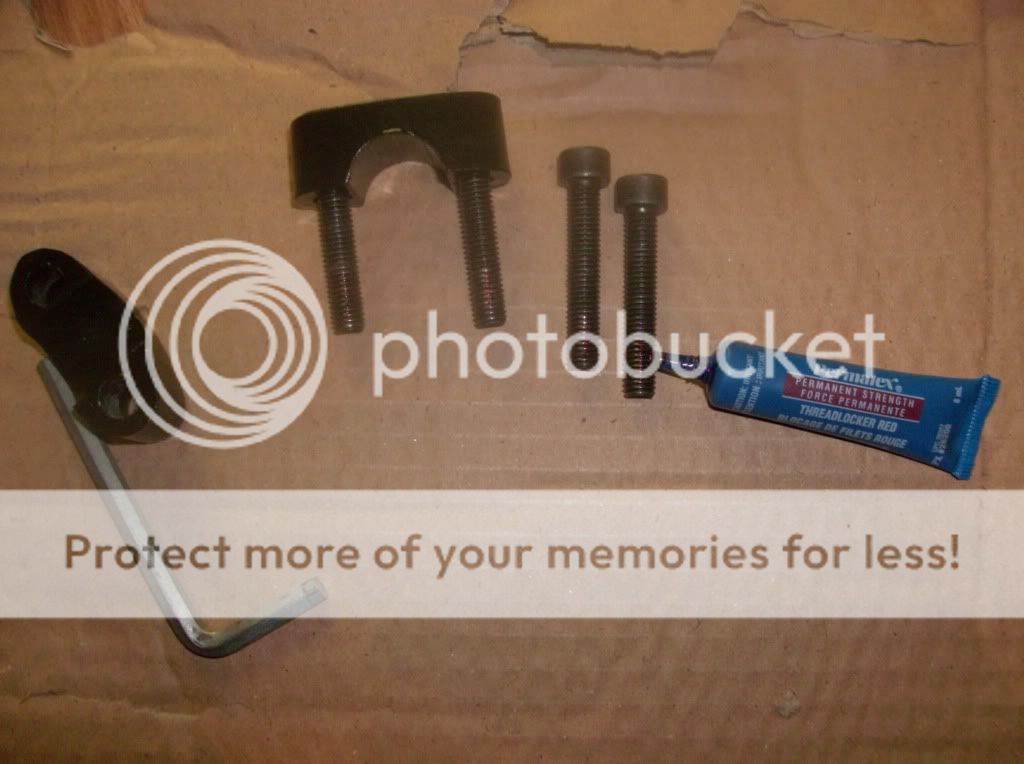 The clamps go around the bars where there is a machined area for better grab and bolt into the holes here. 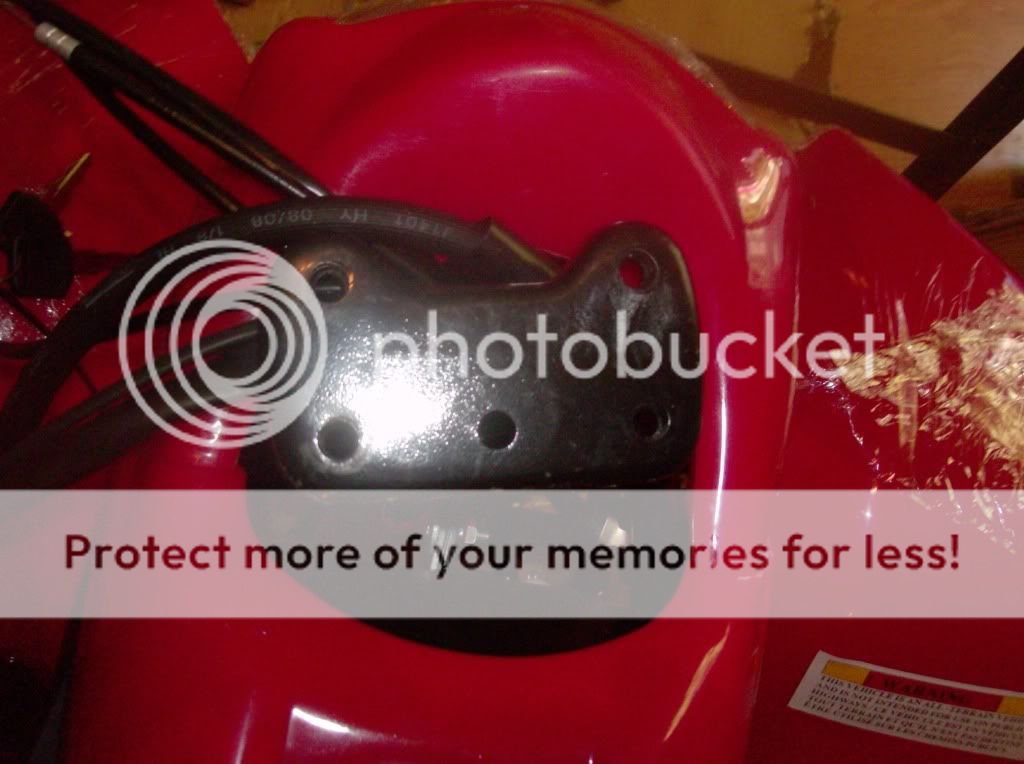 Tighten the bolts down well to ensure the previously mentioned condition doesn't occur. (Don't be envious gang of my shiny MAC ratchet)  Once I have the handlebars tightened down I make sure all the cables have room to move between the body and the bars, and nothing will get snagged or pinched. I then remove the packing crate completely and jack up the unit in order to install the wheels. This is the point I start checking all the bolts and re-tightening/thread locking much of what I can get at. Most of the bolts on this one were pretty snug. If you don't have jacks, you can make due like me with little stools. I put the rear wheels on first, I don't think this matters. To install the rear wheels you need to slide the long tubes over the axel bar, rule of thumb is long one on the left. Here is me doing the right side tube.  Then the wheel butts up against the tube.  You then install the small washer, then the big concaved washer. Keep the concaved washer with the curved edge toward the wheel. If you don't, you won't be able to get the rubber cab over it. 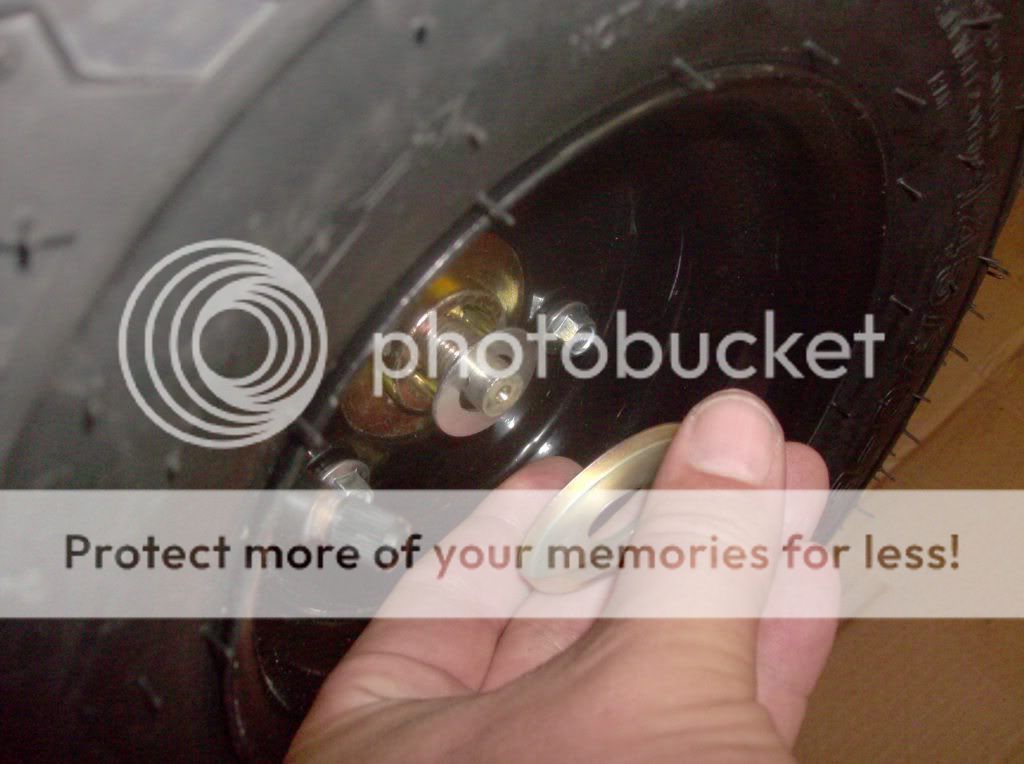 Loctite, then twist the nut on.  Then install the cotter pin. Your cotter pin should slide through so the thick end fits inside the castelated nut to ensure it does not loosen off. Then bend the ends of the pin, back and around so it doesn't fall out. 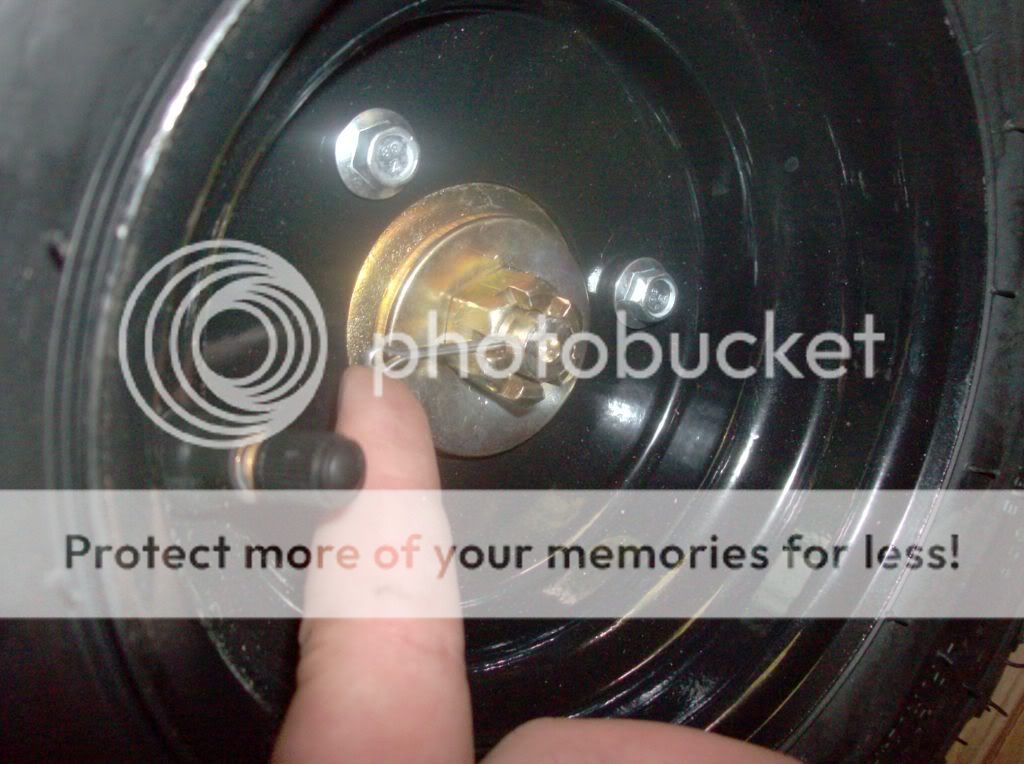 Repeat these steps for the other side and you now have back wheels installed. This is a good time to inspect your back axel alignment, to make sure the front and rear sprockets are running true, and the chain is not too tight. Mine came with the chain extremely tight, so I needed to loosen it off some. You now move to the front wheels. My ATV came with front brakes, I'm not sure if all the 50cc units do, but this is the second one I have ordered that came with them. The first one I did I had some trouble figuring out the order of the pieces, which was mainly due to some burrs or uneven grinding on the front spindles which was grabbing some of the washers and brake assemblies and not sliding on all the way. This unit was better for that, and everything slid on as supposed to. (Apart from some thread problems which is an entirely different matter) Here is the order I installed the front wheels with brake assemblies: Slide the front brake drum right back on spindle, and insert stud through the frame mount. Should be a nut here to tighten but mine was missing on both sides. You then slide the longer bushing/tube up against the brake drum assembly.  Then push the wheel up against the bushing. I should mention that my wheel bearings were falling out of my front tires. I put a dab of loctite on the outside edge before installing them into the hubs. Insert the smaller bushing up against the bearing, then the small washer and the concaved washer like the back.  I would be careful tightening these too much as it will push the bushing into the wheel bearing. I made them snug, so there was room for the cotter pin to sit in correctly, using loctite again of course.  You repeat this process on the other side and you now have a rolling atv with four wheels! Next comes the battery. The battery sits under the seat. The seat has a latch at the back you reach under and pull and the seat pops off. I find these fun to put back on but I digress. Once you remove the seat, you need to fish the battery cables out from wherever they wiggled to during shipping. 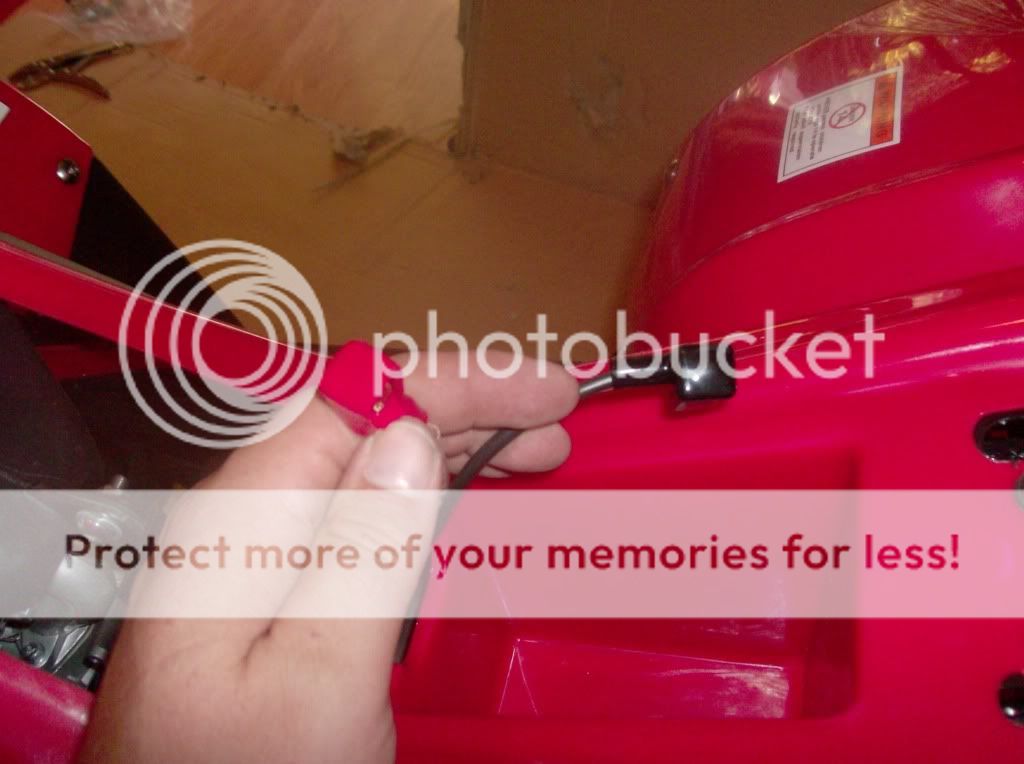 The battery should be ready to go out of the box. There is no acid filling needed on these they are sealed and I have yet to find one not charged and this is my fourth Gio in the extended family. The hardware is taped to it and I would suggest strongly you don't lose them! The connectors on the battery are very small, and it is hard to find replacements for these. I used a dab of loctite on the rectangular clamp piece for this one, as I already have seen two rattle the connections loose and lose the hardware. This is a good item to check for snug bolts regularly. This is pretty straight forward, red to red, black to black, slide into it's hole, make sure the wires aren't going to bind anywhere and plop the seat back on. (Have fun with that)  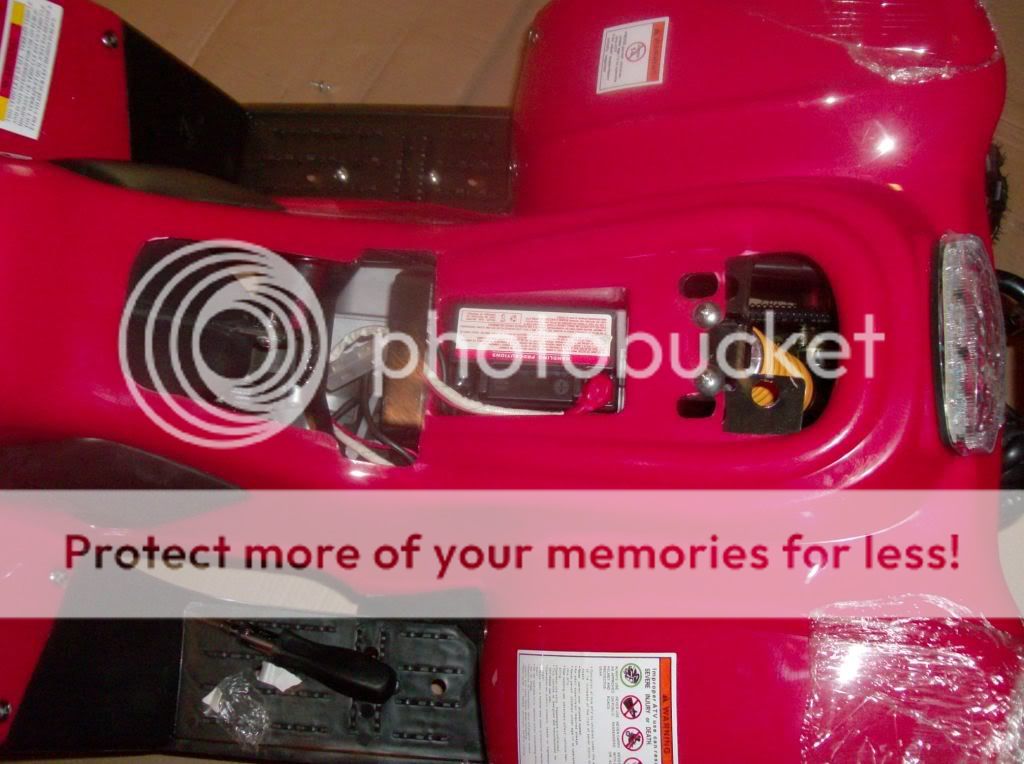 Can't stress this part enough. Now it is time to drain the oil from the motor and replace it. The manual specifies 10/40 for this unit, however I have a hard time finding that weight oil, so I used 15/40 Diesel oil. I have run this in both my 110cc and 50cc. I did not take a picture of the drain plug, but probably should have. It is in a bad spot, with the frame and a frame bolt right below it. There is another bolt that works, but be careful if removing this, as it is spring loaded and the spring will launch out at you when you take it off. Drain oil completely, then refill. I would start with .5 litres and keep checking the dipstick until it's at the safe level. You won't need more than .9 litres, probably less. Oil filling is tricky without a funnel due to the placement of dipstick.  Now for the obvious, put some fuel in it, and put the gas cap on with the rubber hose for venting. 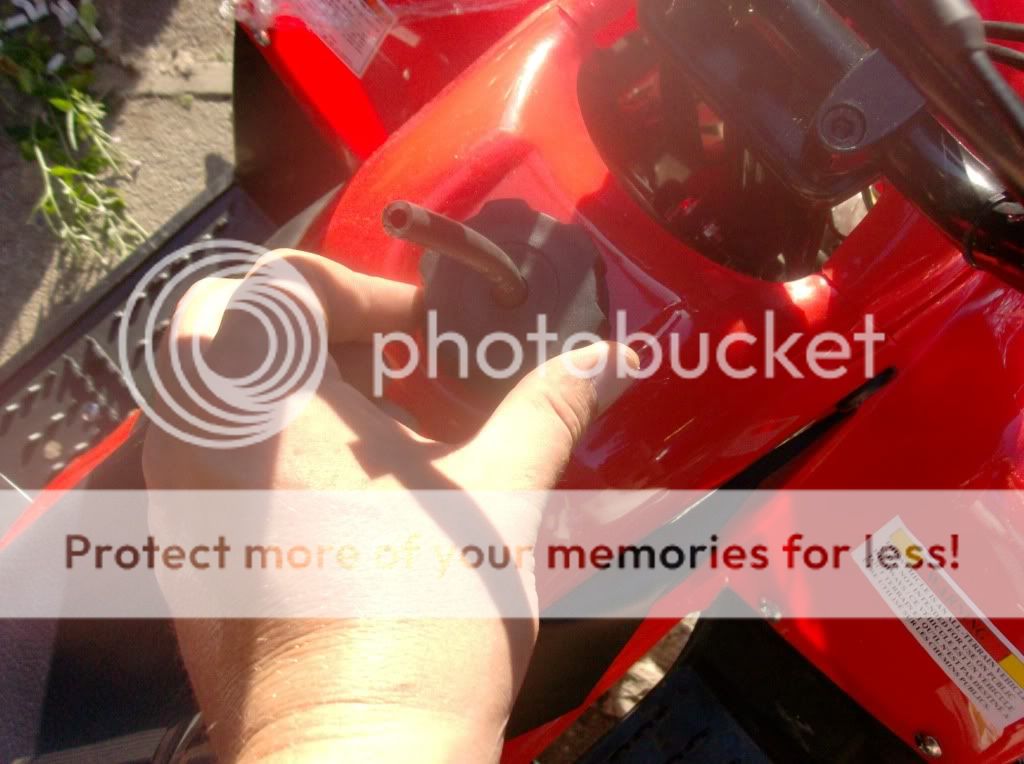 Now it is time to try to kick it over. The 50cc ATV has a manual choke lever on the left side of the carb, which is tucked up under the body. The black 'vent' plastic comes off to provide you easier access to the carb. 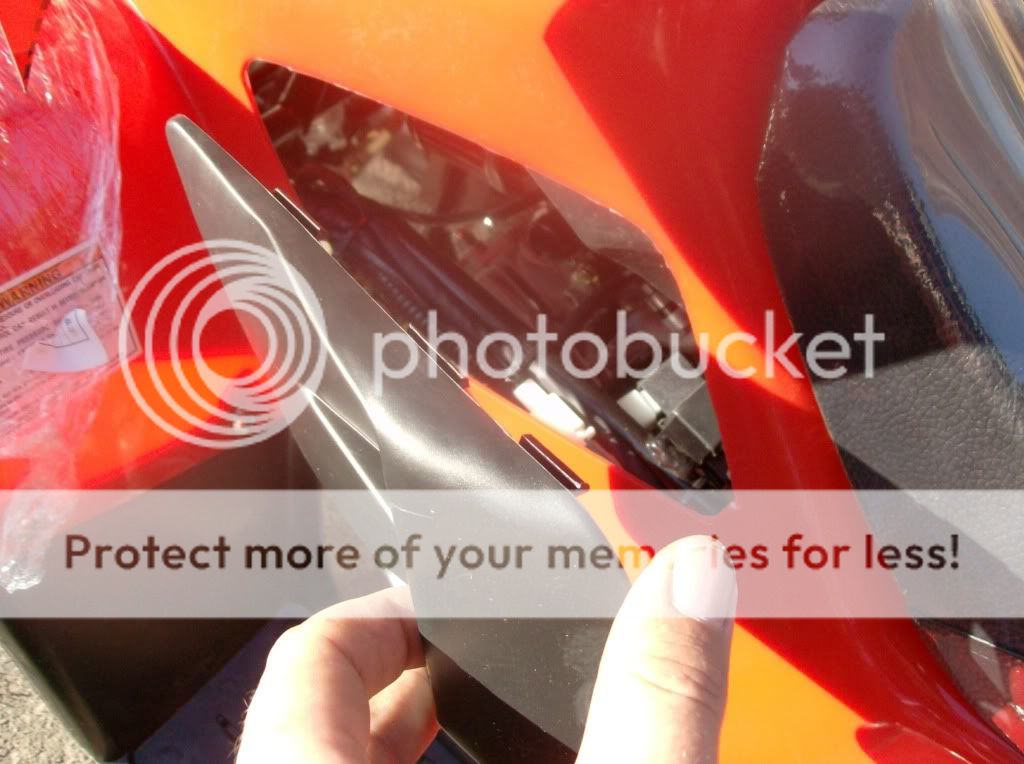 Hard to see in this picture, but I am pointing at the choke lever. You pull it up to fully open, then it pushes down and clicks closed, and then you can push it down to open it again. I find it is easier to start by pushing it all the way down. 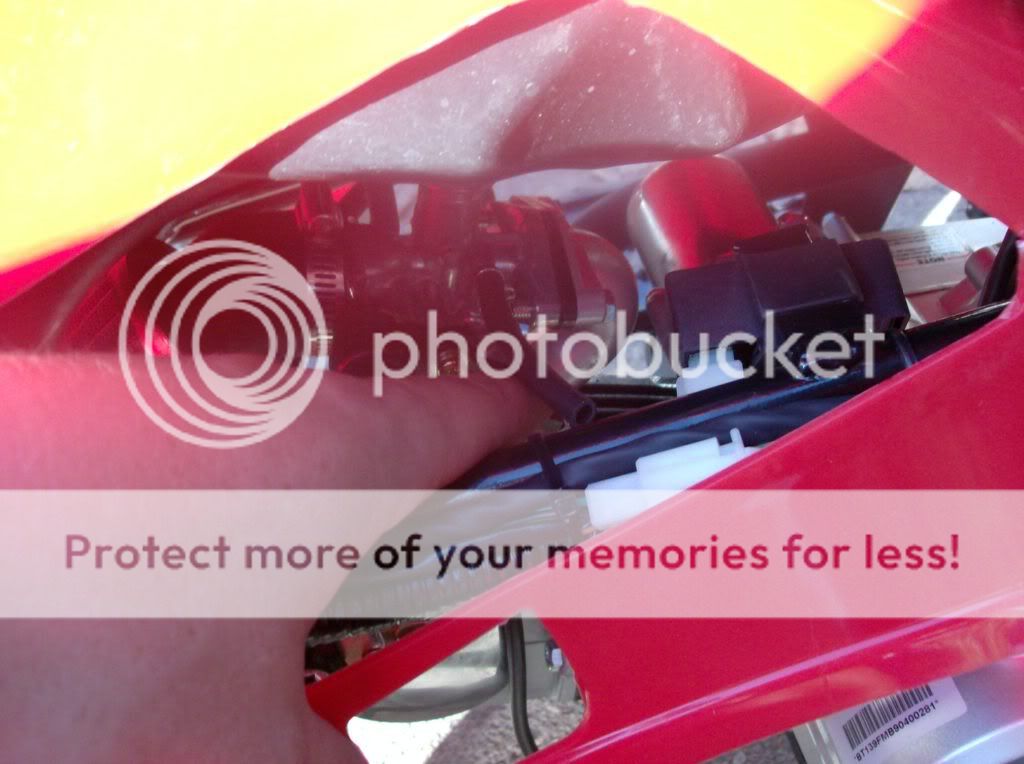 Don't forget to squeeze the brake lever to start. If you get no spark, ensure the kill switch/tether boot is on correctly as it's easy to bump it. At this point you'll need to do some carb tuning I'm sure, and the mixture and idle screw are on the other side of the carb. Impossible to get at without removing the black plastic on the other side and having a long carb screwdriver. Overall this quad is pretty easy to assemble, and they are fun little machines.  The only thing left would be to attach the front brake cables. There are instructions on how to do this included with the unit. With all of that out of the way, I did have some issues assembling this that I haven't mentioned, and was mainly due to some really damaged threads in a few places. I know this is a rare issue, as it's the only Gio I have had with a few of these problems. The right front spindle had such bad thread damage I could not get the nut on. I think this is a very rare occurance. The top cap for the carb was cross threaded and crooked. I didn't notice it right away (it's a long way down) and when I started it the thing damn near took off on me as the needle was not seating due to this. Because of this I had a really hard time getting the top cap to go back on straight, and virtually had to remove the carb from the motor to put it back on properly. This of course fixed the overspeed issue. The carb was really tricky to adjust. Now, I'm not sure why. It is very hot and humid here and once it warmed it would run just peachy. Once it sat for a while it was difficult to keep running until it warmed up again. A couple of the handlebar bolts were trashed. Not a big deal I have a lot of these and they send spares, but makes me wonder why the guy in the factory wouldn't just toss them into the scrap metal bin and give you better ones, they weren't even close to salvageable. I would like to point out to everyone reading that John at Giobikes is such a good guy to deal with that when these issues come up you can feel comfortable he'll look after it. When selling something out of a box you never know what will come up, or what you will get. There are bound to be some issues somewhere amongst 10,000 units. I don't have a problem recommending Gio products for this reason alone, but I also have three others that keep three kids extremely happy. Happy kids means a happy dad. I hope someone finds this post useful. |

|
|
|
#2 |
|
Join Date: May 2007
Location: Altamont, Kansas
Posts: 15,103
|
That is a great post. I am sure alot of new buyers will find it helpful.
Going to sticky it.
__________________
You meet the nicest people on a Honda Clone. |

|
|
|
#3 |
|
Join Date: Mar 2009
Location: Sardis, BC, Canada
Posts: 25,977
|
Nice job TurboT!
Some comments regarding Loctite: 1. You are using Permatex Permanent Strength Red Threadlocker, which is the equivalent to Loctite Red 262. Either of these products usually require heat for removal. If you want to service the item in the future, Loctite Blue 242 is more user-friendly. 2. Rather than threadlocking compound on the bearings, Loctite also makes 640 Retaining Compound. It is also an excellent choice when faced with worn bushings or sleeves that can't be immediately repaired. Other comments: How are you determining the proper tightness of the rear wheel castle nuts? On our Beast, I place the rear axle on a jackstand and tighten the nut until there is no wiggle between the wheel mount flange and the axle. With the wheel mounted on the flange, it's easy to tell if there's any slop. On our Beast, I chose to delete the spacer tubes, because they actually interfered with proper tightness (they also looked wobbly). I would recommend a much longer fuel vent hose, and one that is actual fuel hose quality. You don't want fuel to splash out of the hose at Junior while they're riding. A longer hose allows you to tuck the excess in front of the handlebars. While on the fuel topic, I'd also replace the stock fuel hose with something from the local bike shop for safety. Cheers!
__________________
Weldangrind "I figure I'm well-prepared for coping with a bike that comes from the factory with unresolved issues and that rewards the self-reliant owner." - Buccaneer |

|
|
|
#4 |
|
Join Date: Feb 2008
Location: Terrell and Grapevine Tx.
Posts: 1,585
|
I second the thoughts on the loctite.
Great looking quad for the little ones! |

|
|
|
#5 |
|
Join Date: Sep 2008
Location: Surrey, B.C., Canada
Posts: 2,185
|
A sticky! I feel so special.
 W&G I knew someone was going to bring up the loctite issue!  I think it's important that it's mentioned in the thread for any newbies. I used the red thread locker only because that's what I'm used to using in my previous career. For me when I hear the word Loctite it's the sweet smelling red stuff. I don't think blue loctite ever set foot in the shop. With that in mind I have experience with it and I think the newbies would be best to stick with the blue, I may edit the post to point that out. Even with red thread locker on my other units, I can still move the bolts without heat, although you can tell it's there as it doesn't 'break free' if that makes sense. As for the spacer tubes. I think this is a bit of strange design. Obviously there are no torque specs to be found for the wheel nuts, so I think this is a feel issue. I held on to the tube and tighten the nuts. The washers tend to push in some it mainly feels like you are just bending the washers if you crank on it. I know my 110cc MIni beast those things rattle all the time, and I do need to tighten the nut occasionally. My biggest concern is making sure the cotter pin fits properly, as if so, there really should be no worry as the wheel won't fall off then. If I had a shop still I would probably come up with a better way than with those tubes, but alas, I don't even have a garage anymore so I need to make due. This post was more of a how to out of the box than how to make it better which I think holds strong merit too! ..but not all of us have a fab shop in the garage! (although believe me I'm wanting one, can I borrow yours??  ) )Noted on the fuel lines and hose. I need to do some of that as my other 50cc the vent hose got knocked off somewhere and is now missing. |

|
|
|
#6 |
|
Join Date: Sep 2008
Location: Surrey, B.C., Canada
Posts: 2,185
|
Carb Hosr
I do have a question for you all. If you look at the picture where I am pointing to the choke lever you will see there is a rubber hose coming out of the carb. I would expect this is just a breather hose.
I ask about this hose because it is quite clearly easy to knock off and not notice when poking around for the choke lever. I have already knocked it off this unit, and when I check my other 50cc, it was gone too. Is the hose necessary?? It is obviously an air line but will the unit run normally without it? |

|
|
|
#7 |
|
Join Date: Feb 2008
Location: Terrell and Grapevine Tx.
Posts: 1,585
|
I too am comfortable using the red loctite but blue was used most of the time on my bike. I was thinking that many of the fasteners would be removed on occasion.
Loctite is one of the first things mentioned to new owners and not everyone has a history working with it. I think everyone with a china bike needs to know the different types. That vent hose is a new one on me. |

|
|
|
#8 | |
|
Join Date: Sep 2008
Location: Surrey, B.C., Canada
Posts: 2,185
|
Quote:
The hose is just something I noticed, because when I was reaching in to take the picture of the choke lever, I knocked it off pretty easily. I put it back on, but then not thinking about it while reaching under the body to get at the choke again I must've knocked it off and not noticed. When I was under again saw it was gone and don't know where it went. This made me look at my other one and it wasn't there either. |
|

|
|
|
#9 |
|
Join Date: Mar 2009
Location: Sardis, BC, Canada
Posts: 25,977
|
I've never bothered to figure out what the upper hose is for, but I suspect it's a vent hose so that the float bowl can operate properly. I can't imagine that fuel can fill the bowl if air can't escape.
I'd probably swap to a longer and better quality vaccuum hose; you could then secure it with a zip-tie. I say vaccuum hose because it is fuel rated, and because it won't collapse if the hose is ever under vaccuum while the engine is running. Sound reasonable? :roll:
__________________
Weldangrind "I figure I'm well-prepared for coping with a bike that comes from the factory with unresolved issues and that rewards the self-reliant owner." - Buccaneer |

|
|
|
#10 |
|
Join Date: Sep 2008
Location: Surrey, B.C., Canada
Posts: 2,185
|
Sounds reasonable but why does it need a hose sucking air from further out than just sitting with an empty hole? Cooler air?
|

|
|
|
#11 |
|
Join Date: Jun 2009
Posts: 39
|
[quote="TurboT"]A sticky! I feel so special.
 For me when I hear the word Loctite it's the sweet smelling red stuff. I don't think blue loctite ever set foot in the shop. With that in mind I have experience with it and I think the newbies would be best to stick with the blue, quote] Hi I am no newbie but have been using using blue loctite on my R/C helicopters for the last 30 years. Failure could result in death and I have never had an issue with it. Red is only used sparingly for some clutch to engine installs. Just becasue it's stronger doesn't make it more appropriate for the rest of us so called newbies. |

|
|
|
#12 | |
|
Join Date: Jun 2009
Posts: 39
|
Quote:
|
|

|
|
|
#13 | |
|
Join Date: Mar 2009
Location: Sardis, BC, Canada
Posts: 25,977
|
Quote:
__________________
Weldangrind "I figure I'm well-prepared for coping with a bike that comes from the factory with unresolved issues and that rewards the self-reliant owner." - Buccaneer |
|

|
|
|
#14 | ||
|
Join Date: Sep 2008
Location: Surrey, B.C., Canada
Posts: 2,185
|
Quote:
|
||

|
|
|
#15 |
|
Join Date: Aug 2009
Posts: 1
|
I followed your steps here but I seem to be getting a lot of binding. I can barley turn the front wheels. If let off on the big nut then tire wobbles, Am I missing something?
Thanks |

|
|
|

|
 |
|
|