 08-21-2011, 01:23 AM
|
#17 |
|
Join Date: Jul 2011
Posts: 36
|
Nice work
Nice job on the Swing arm Streetfighter... Now I'm gonna have to build me one after seeing your fine job!!!!
|

|
|
08-21-2011, 02:43 AM
|
#18 |

Join Date: Mar 2009
Location: Sardis, BC, Canada
Posts: 25,977
|
Mad fab skills! Did you extend the length as well?
__________________
Weldangrind "I figure I'm well-prepared for coping with a bike that comes from the factory with unresolved issues and that rewards the self-reliant owner." - Buccaneer |
|
|
|
08-21-2011, 03:42 AM
|
#19 |
|
Join Date: Nov 2009
Location: montreal
Posts: 242
|
sick
 i want one for my 2008 beast i want one for my 2008 beast
__________________
2008 gio beast 200cc mod list YTX14-BS battery mod,gy6 carb 250cc,custom intake,125cc cf dirtbike muffler,MPR filter/intake,performance cdi,ngk iridium xi dpr8eix-9,performance coil pack and wire, pro taper handle bar, Gio air shocks, yam swing arm bus |
|
|
|
08-22-2011, 12:52 AM
|
#21 |
|
Join Date: Aug 2011
Location: Brampton Ontario Canada
Posts: 3
|
The length is 6" longer than than stock. It's made of regular off the shelf 2" X 1" X 5/32 wall rec. tube (A36 steel). The carrier for the axle is made of seamed tube, the i.d. is 3.5" and the wall thickness is 7/32 (beefier than the stock as this is where the cracks developed). I cut the seamed part out to avoid any potential issues. I used DOM tube to make the carrier clamp lugs. That part was fabricated using a jig I developed to ensure the lugs aligned properly. The pivot axle gave me the most trouble as the measurements were difficult to attain but in the end I only ended up scrapping one before getting it right.
I finished it a little while ago but diddn't get too far on the skid plate, I ran out of argon and need to pick up a bottle in the morning. I'll post the pics of the bike some time later in the day. Took a few pics while putting it together, looks pretty sweet! My son and I were thinking of putting a video up on youtube, I'll post the link when it's done. Here is the older link to one of the first videos we took http://m.youtube.com/#/watch?v=jDHxGhHn4vI |
|
|
|
08-22-2011, 07:58 PM
|
#22 | |
|
Join Date: Nov 2009
Location: montreal
Posts: 242
|
Quote:
__________________
2008 gio beast 200cc mod list YTX14-BS battery mod,gy6 carb 250cc,custom intake,125cc cf dirtbike muffler,MPR filter/intake,performance cdi,ngk iridium xi dpr8eix-9,performance coil pack and wire, pro taper handle bar, Gio air shocks, yam swing arm bus |
|
|
|
|
09-03-2011, 06:46 PM
|
#23 |
|
Join Date: Jul 2011
Posts: 36
|
Streetfighter... You have inspired me to build a swing arm of my own.. I have the rear end apart and headed down to my neighbors machine shop to fabricate one up... Wish me luck!!!
Here is a pic of the rear end apart!!! 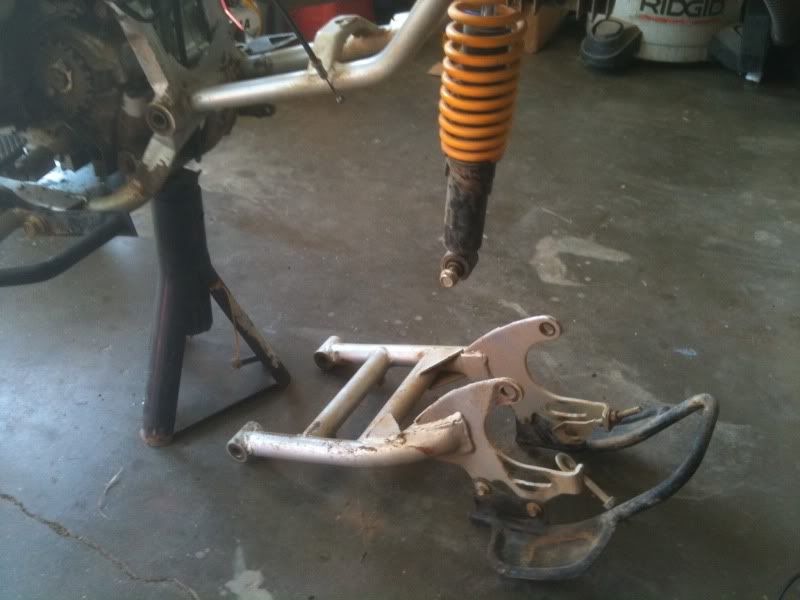
|
|
|
|
09-03-2011, 09:11 PM
|
#24 |
|
Join Date: Mar 2009
Location: Sardis, BC, Canada
Posts: 25,977
|
I was going to build a new swingarm, but I plated it instead: New Jimplate on my Beast Yours is the same setup as mine.
__________________
Weldangrind "I figure I'm well-prepared for coping with a bike that comes from the factory with unresolved issues and that rewards the self-reliant owner." - Buccaneer |
|
|
|
09-03-2011, 10:54 PM
|
#25 |
|
Join Date: Jul 2011
Posts: 36
|
WeldnGrind,
Nice job on the plate install!!! So your swing arm is the same as mine huh...Should I make two instead? I'm gonna make mine about 6" over stock in length... Give it that stretched look... |
|
|
|
09-04-2011, 01:02 AM
|
#26 |
|
Join Date: Mar 2009
Location: Sardis, BC, Canada
Posts: 25,977
|
To me, the best improvement would be to lengthen the swingarm enough that the rear shock is mounted to the swingarm, rather than the axle housing. That would allow the axle housing to have one common bolt across the top as a pivot, which would make chain adjustment much easier.
The key to good articulation (IMHO), is to ensure that the top and bottom shock mounting points are equidistant from the swingarm pivot bolt. That would create one radius, rather than two.
__________________
Weldangrind "I figure I'm well-prepared for coping with a bike that comes from the factory with unresolved issues and that rewards the self-reliant owner." - Buccaneer |
|
|
|
09-04-2011, 12:51 PM
|
#27 |
|
Join Date: Jul 2011
Posts: 36
|
I agree "weld" that why I opted for the 6" over length. I think it should keep the shock pivot bolt on the swing arm in lieu of the axle housing...
|
|
|
|
09-04-2011, 04:42 PM
|
#28 |
|
Join Date: Jul 2011
Posts: 36
|
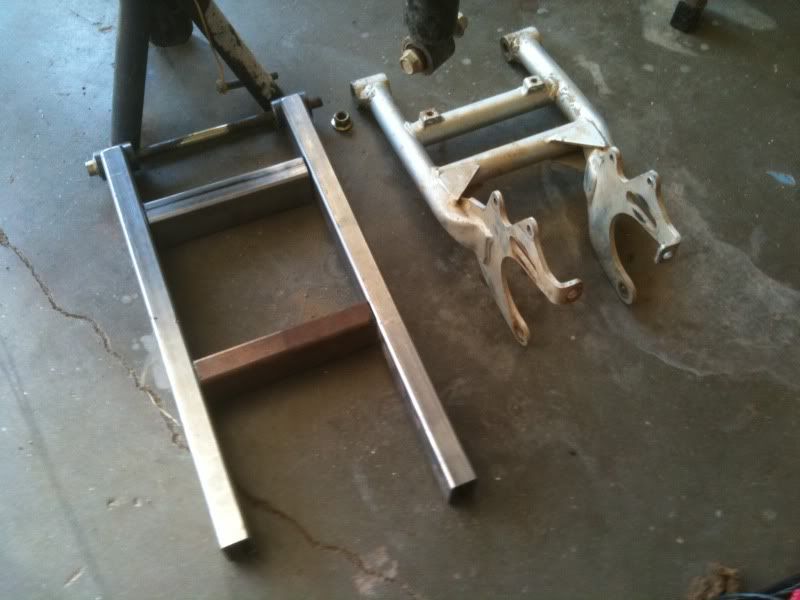
Ok here we go, I got most of the pieces cut today. All cut and machined but the side plates, I'll do them tommorrow.
|
|
|
|
09-04-2011, 11:50 PM
|
#29 |
|
Join Date: Mar 2009
Location: Sardis, BC, Canada
Posts: 25,977
|
If you haven't already done so, now is the time to replace the crummy stock swingarm bushings with Yamaha pieces.
__________________
Weldangrind "I figure I'm well-prepared for coping with a bike that comes from the factory with unresolved issues and that rewards the self-reliant owner." - Buccaneer |
|
|
|
09-05-2011, 12:52 AM
|
#30 |
|
Join Date: Jul 2011
Posts: 36
|
good idea, you dont have the part number for those do you?
|
|
|
|
|

|
 |
|
|


 Linear Mode

