 05-18-2010, 01:32 AM
|
#1 |
|
Join Date: Mar 2010
Posts: 10
|
HI-BIRD Tail Light MOD Instructions
Are you tired of looking at that FAT rear end?
Disgusted by what looks like a Loaded Diaper? Well then... This is the MOD for YOU!  NO NOT THAT REAR END! This One! 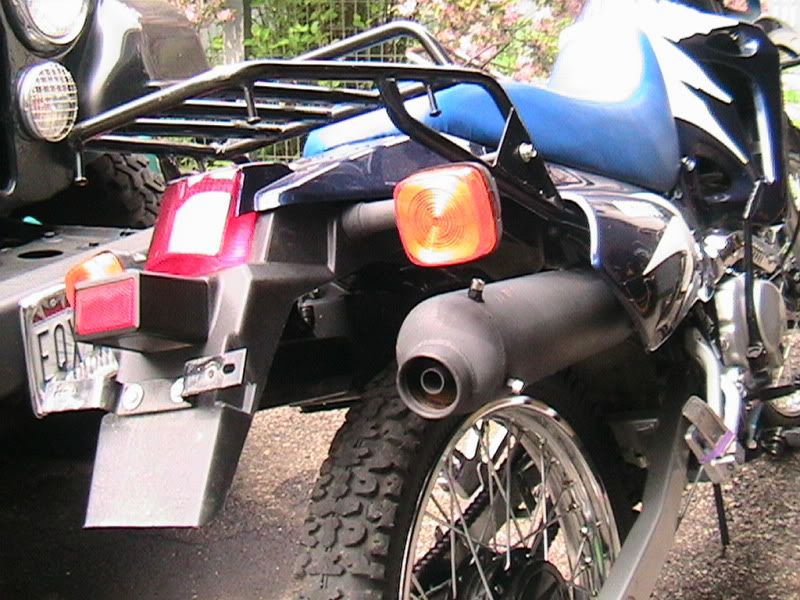 What I am installing is the EDGE 2 Tail Light Assembly. Note the hole in the top center, I will be using that soon. 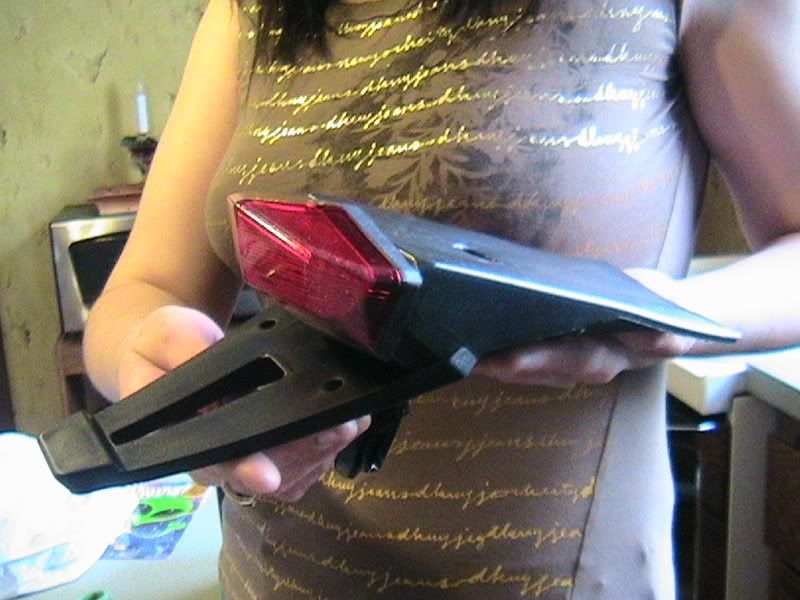 Lets get right to it! 1st remove the 4 side cover bolts. 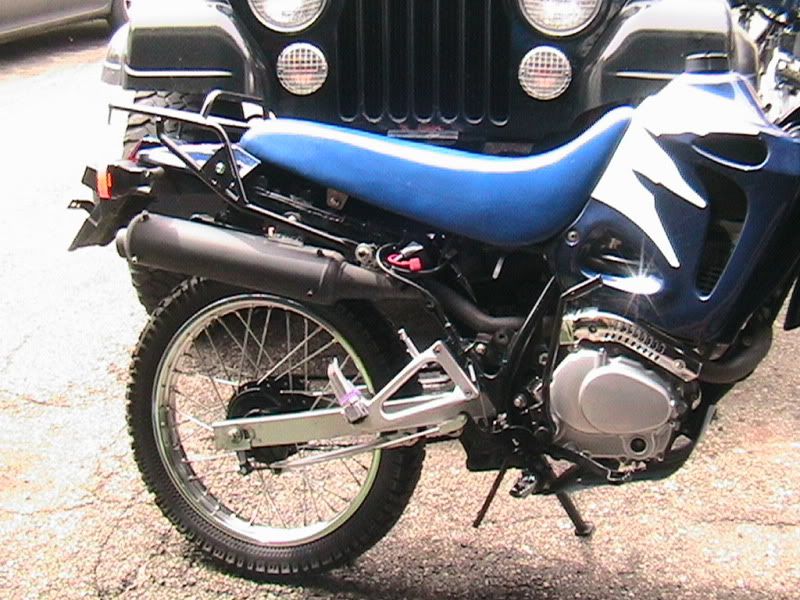 Remove the 2 seat bolts. 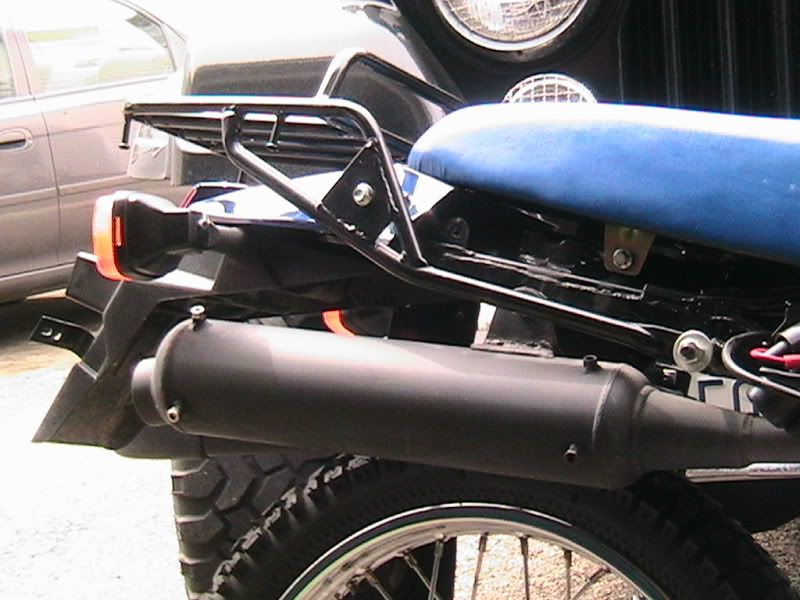 Now carefully remove the wiring attached to the Tail Light Assembly. Note you do not need to remember the wires. 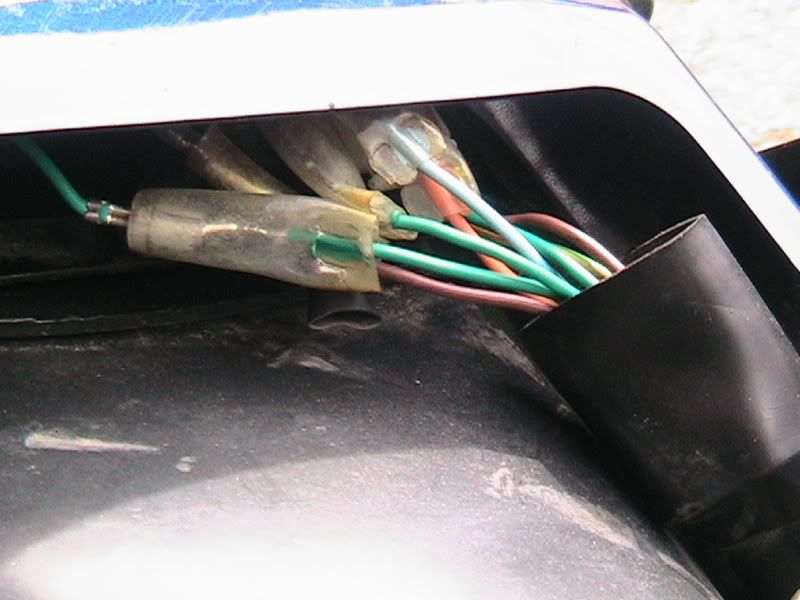 Then remove the 4 Tail Light Assembly bolts under the rear wheel. 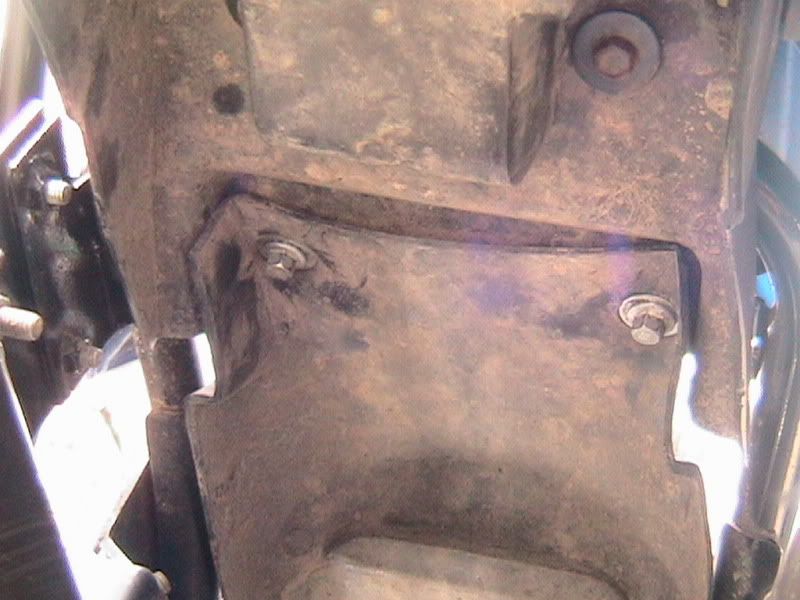 The whole thing comes off in one piece. 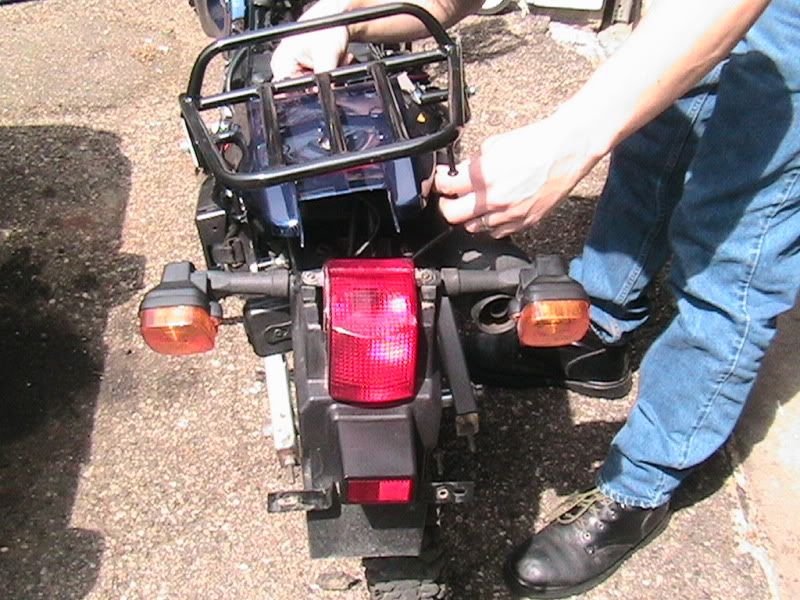 You will need the harness from the Tail Light. 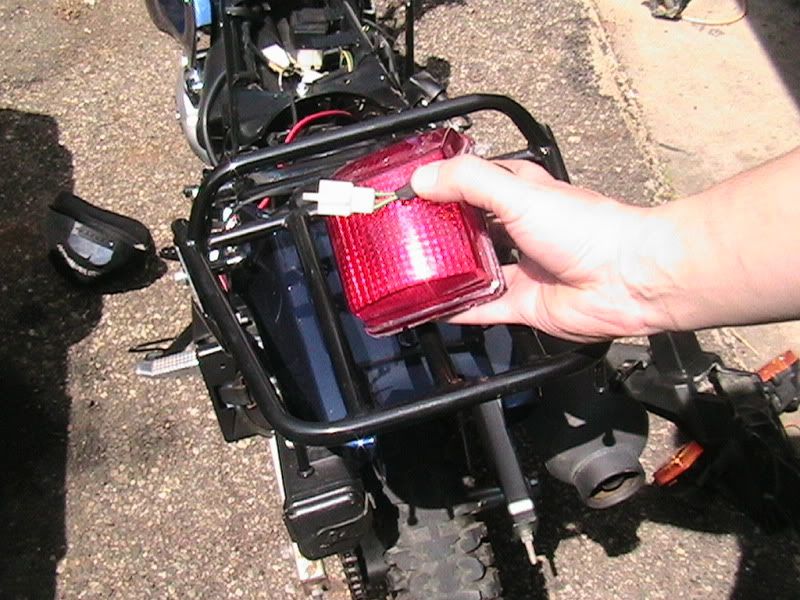 And that's it for the tear down. Easy HUH  Now you can use the removed tail piece for your wiring diagram. 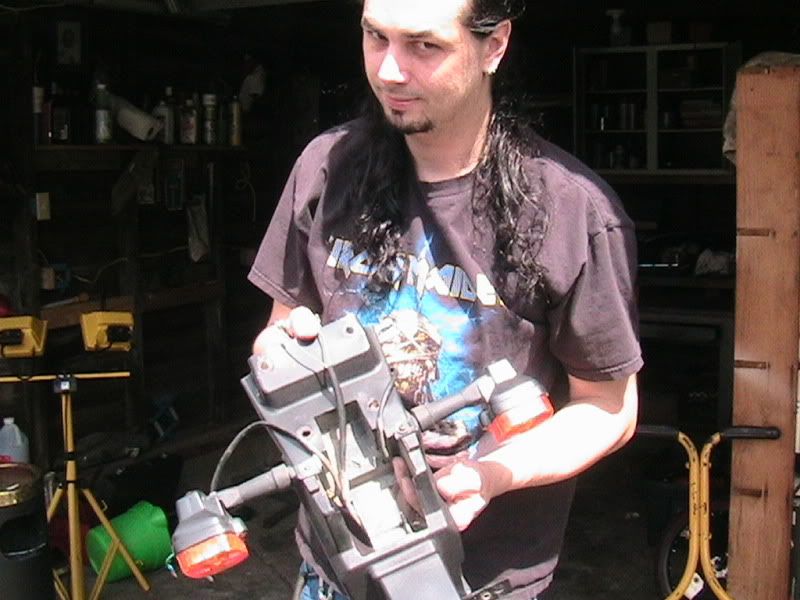 Assembly: Note the post in the center of the rear end. That's where the hole on the EDGE 2 will go. 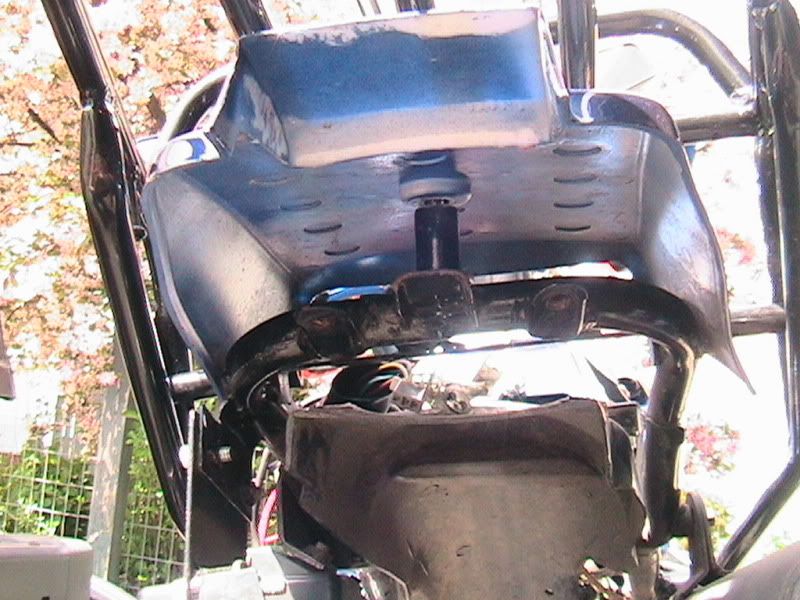 1st remove the bolt from the tail piece. 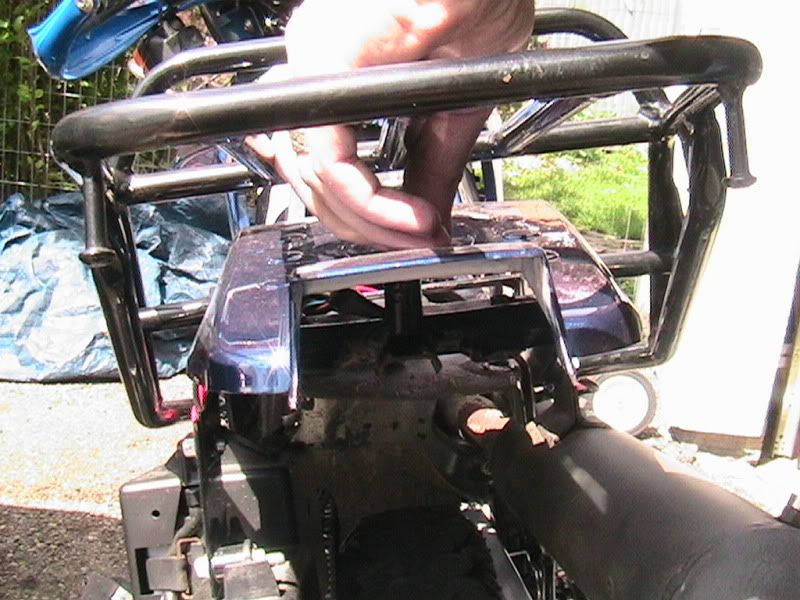 Then lead your wires from the EDGE 2 and slip it into place with the hole in the EDGE 2 over the bolt post. 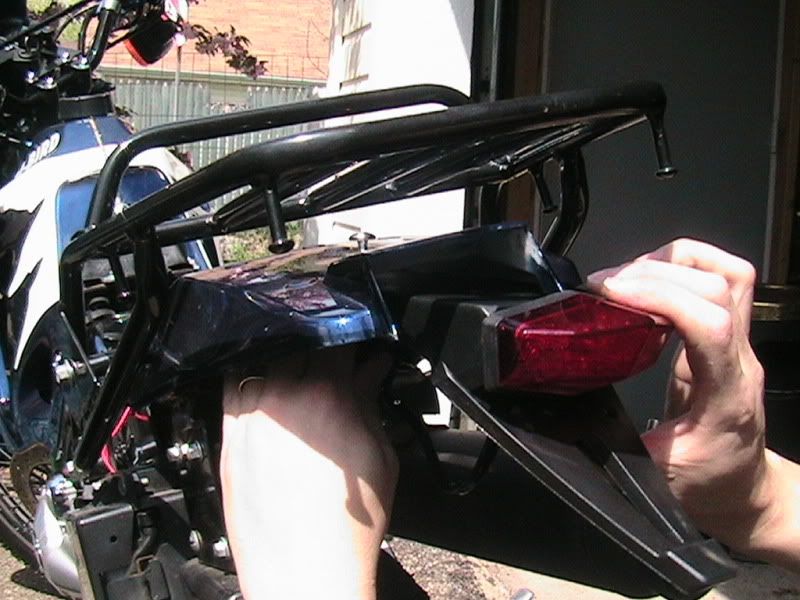 Re-tighten the tail piece bolt and the EDGE 2 is secure for the moment. 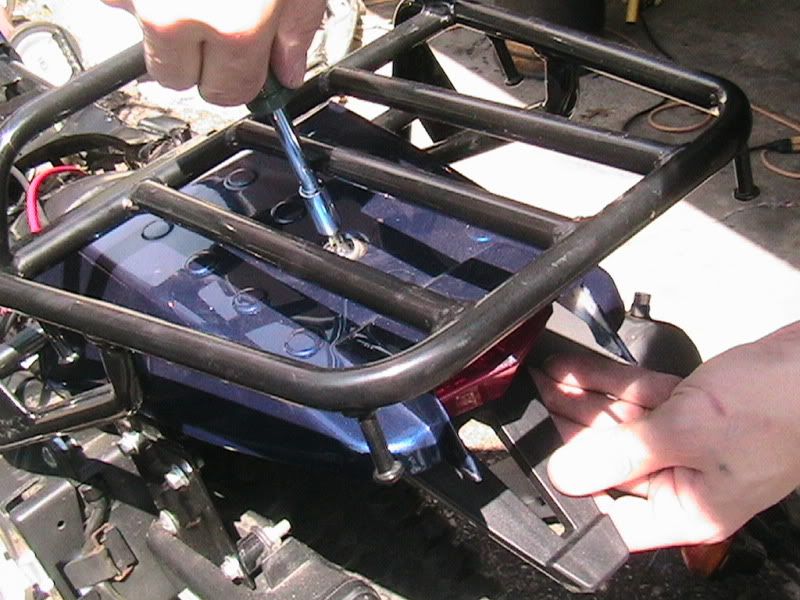 After careful inspection, I noticed that there was no place to use the existing turn signals.  So I picked these up for 17 BUX. Easy Fix 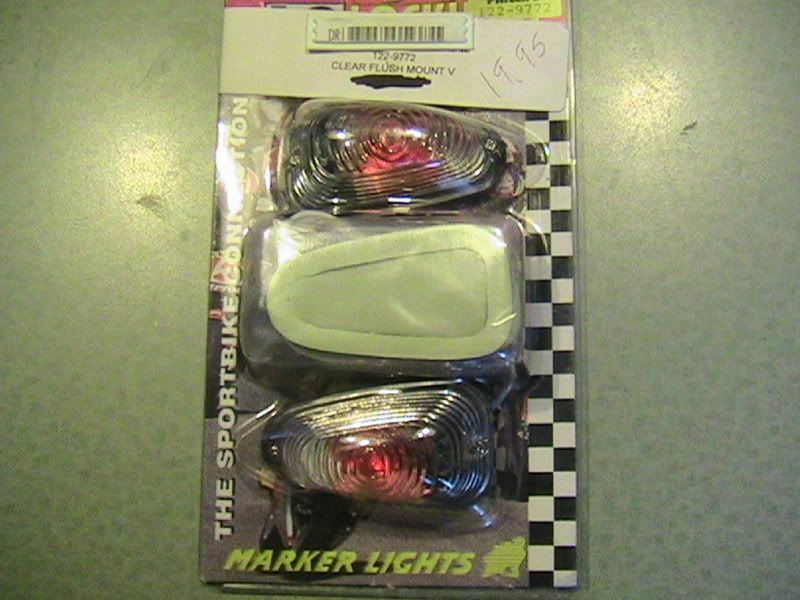 Installing Turn Signals: 1st decide where you want them. Note, remove the lenses and make sure bulbs are securely in place! :roll: 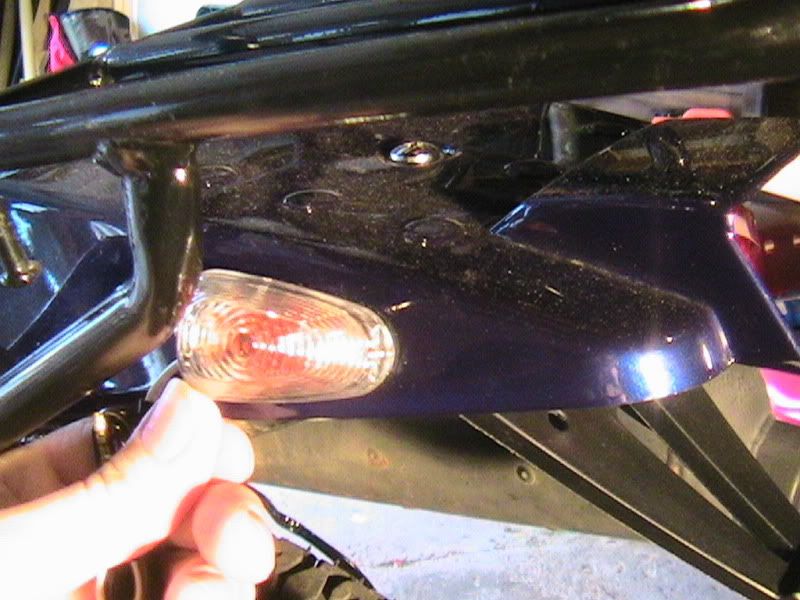 When making your mark with a pen to drill a hole for the wires, Note that they are off center just a bit. 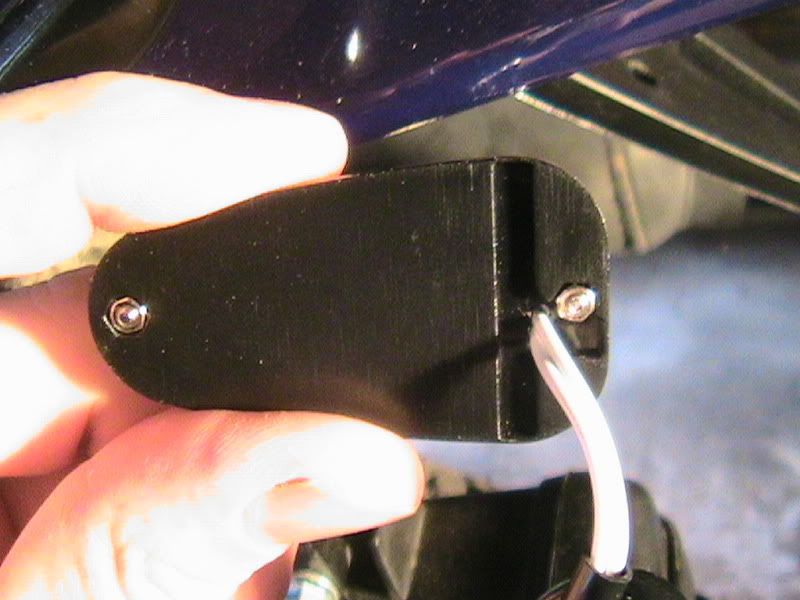 Check Twice, Drill Once! Or check 3, 4, 5 times.... :wink: 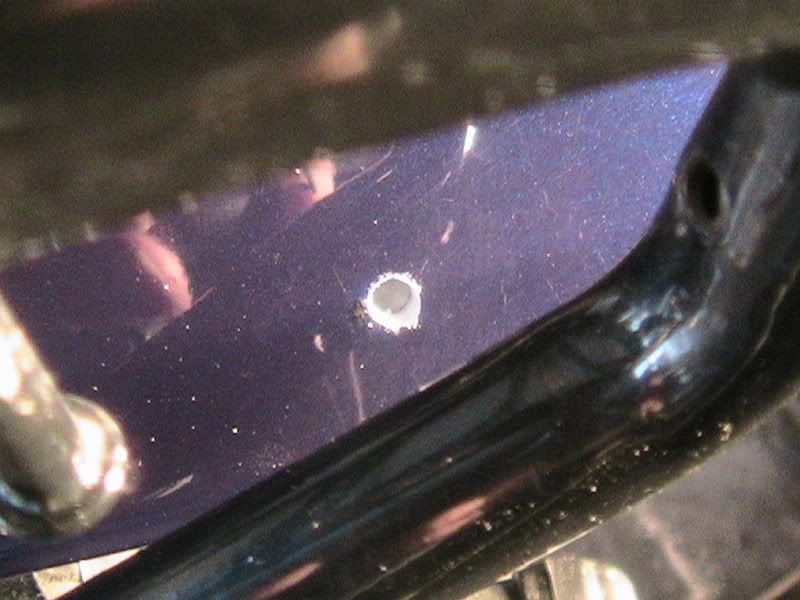 Now stick 2 sided tape to the turn signal. 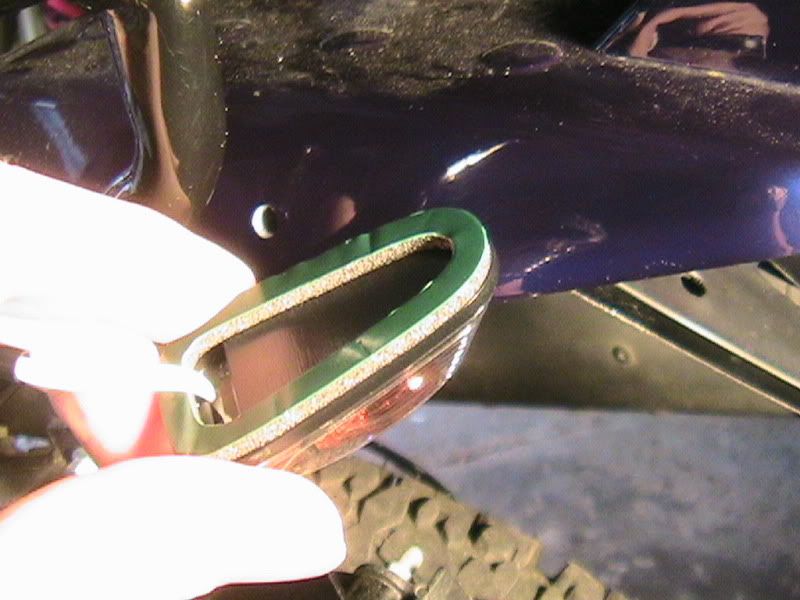 Lead the wires threw the hole. 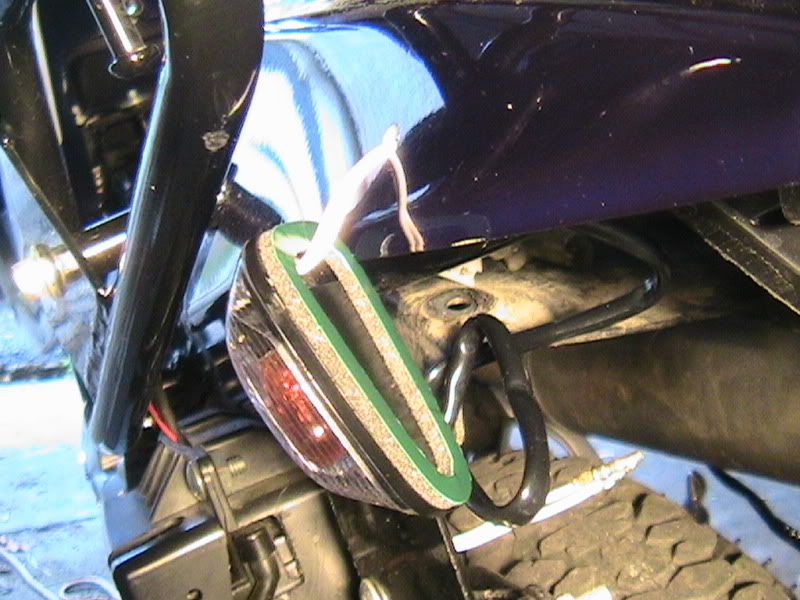 Check the Old Tail Piece for the turn signal wire colors and attach accordingly. 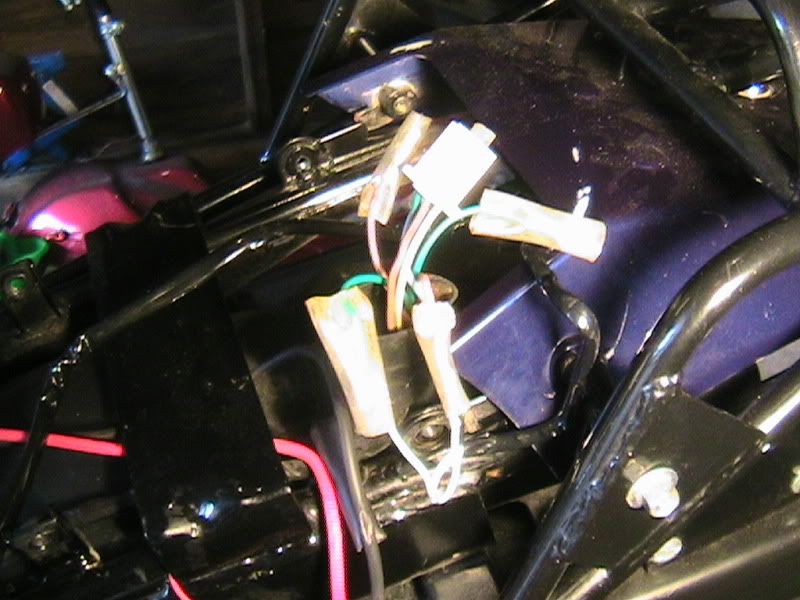 Check to make sure the light works, Remove the other side of the 2 sided tape and carefully attach to the bike like so. 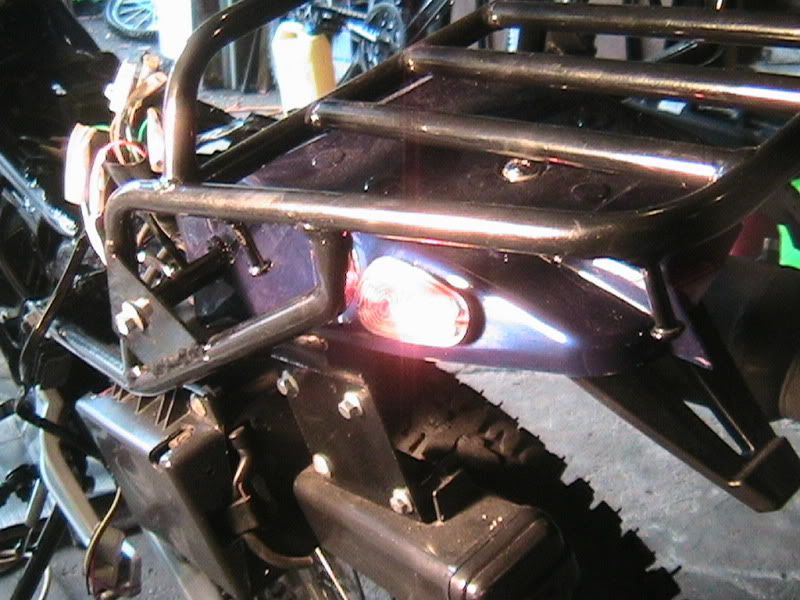 Use some kind of a guide when doing the other side. Remember that the other turn signal wires are not center either and will need to be compensated just a bit in the Other direction. Again measure TWICE drill ONCE! And repeat the process. 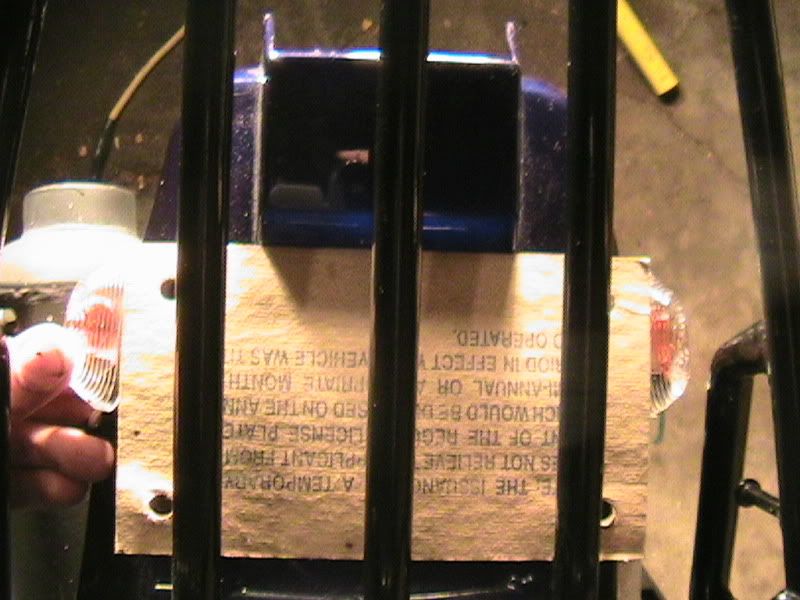 Back to the Tail Light!  Cut the Old Tail Light harness with allot of lead wire so you have plenty of room to play. 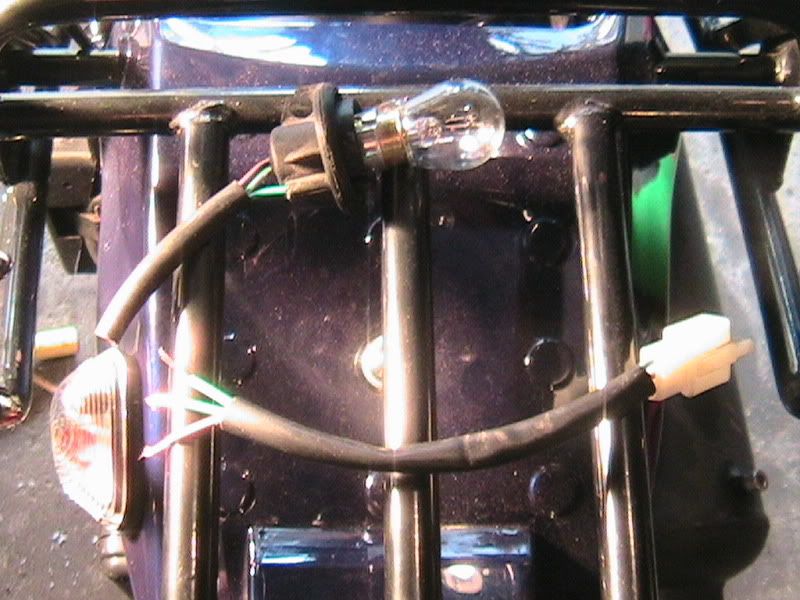 Attach the wires from the EDGE 2 to the harness you just cut and re connect like so. 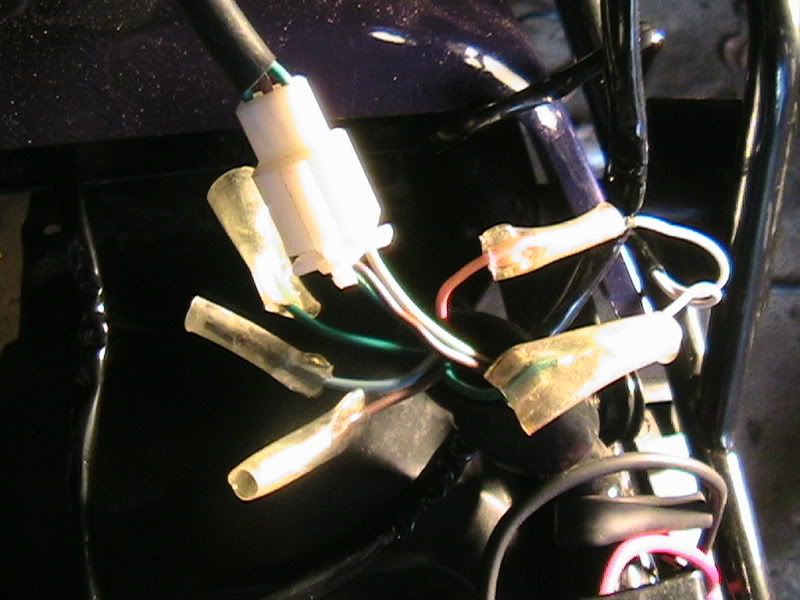 For the 07 HI-BIRD it is like this. If Not, it is Very easy to figure out... So Don't Worry! 8O 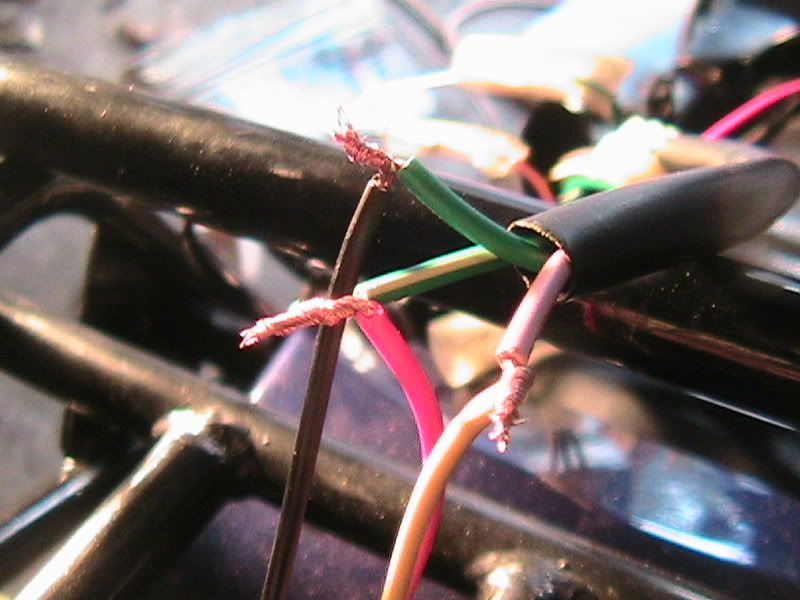 After Checking the lights, secure the wires properly. 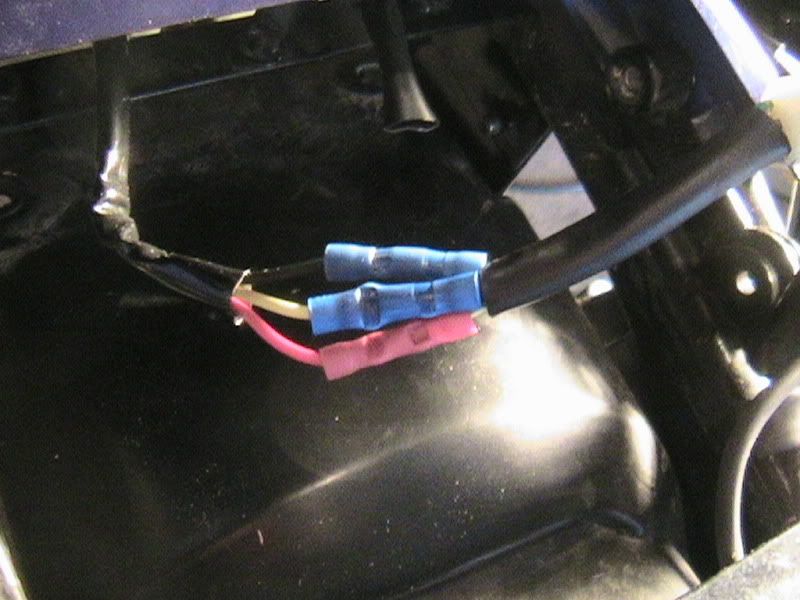 Almost Done! To secure the Edge 2, I decided to just secure it to the tail piece. Carefully mark 2 places to run 2 bolts.  Be sure to check to for clearance. 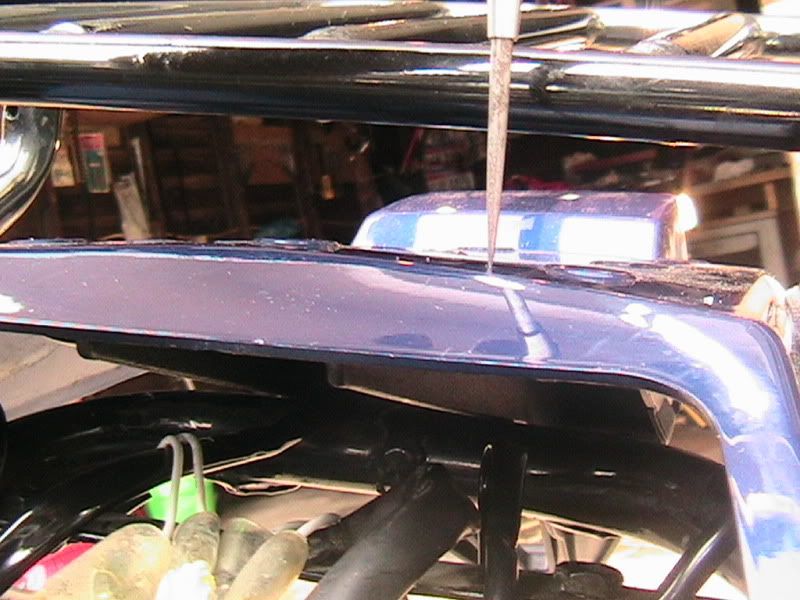 Drill one side at a time and insert bolt and washers. 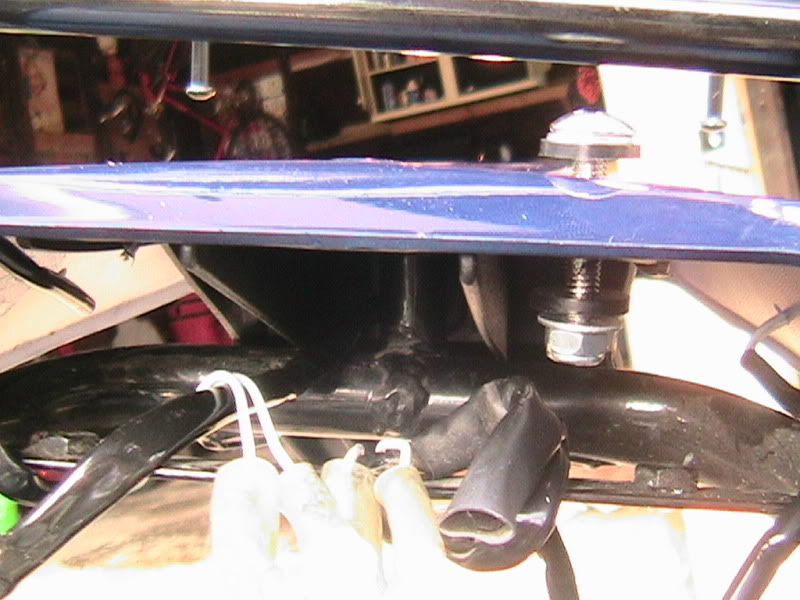 After securing, drill the other hole. 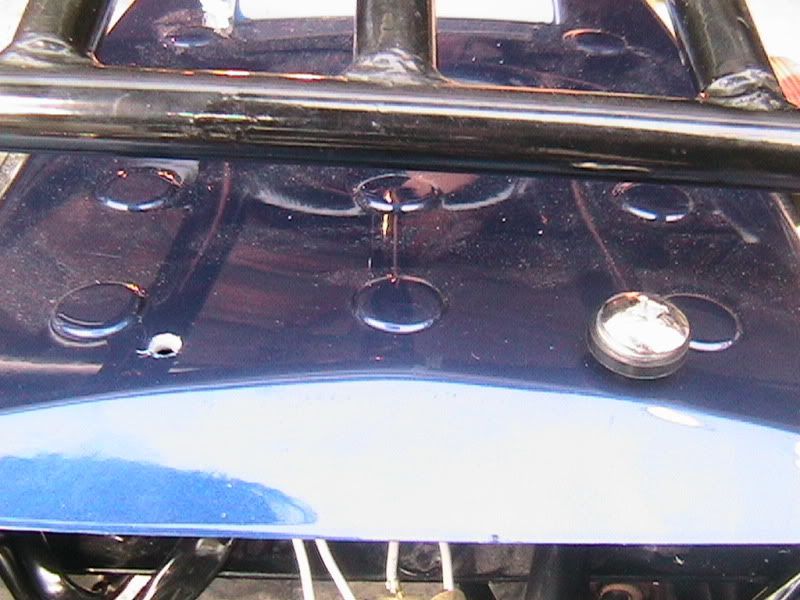 Wa Lah 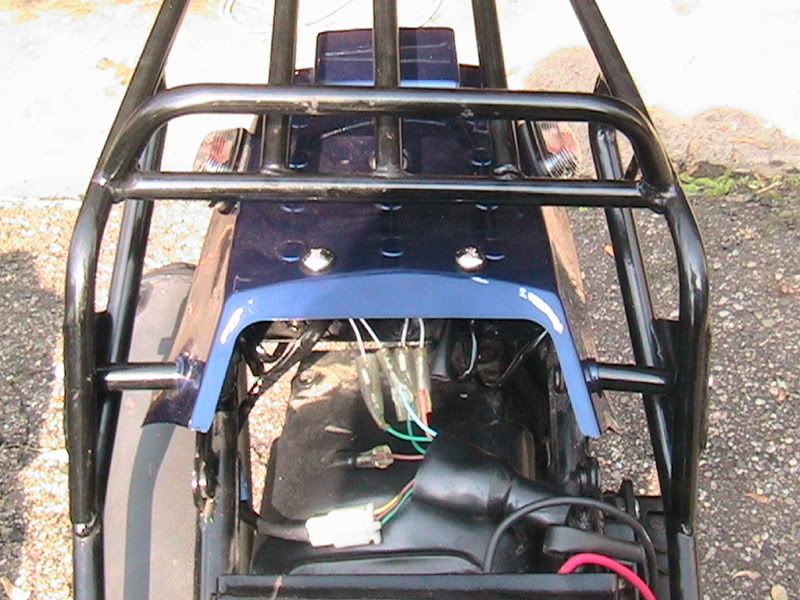 All that there is left to do is reassemble the bike! Now That's One Nice Rear End! :P 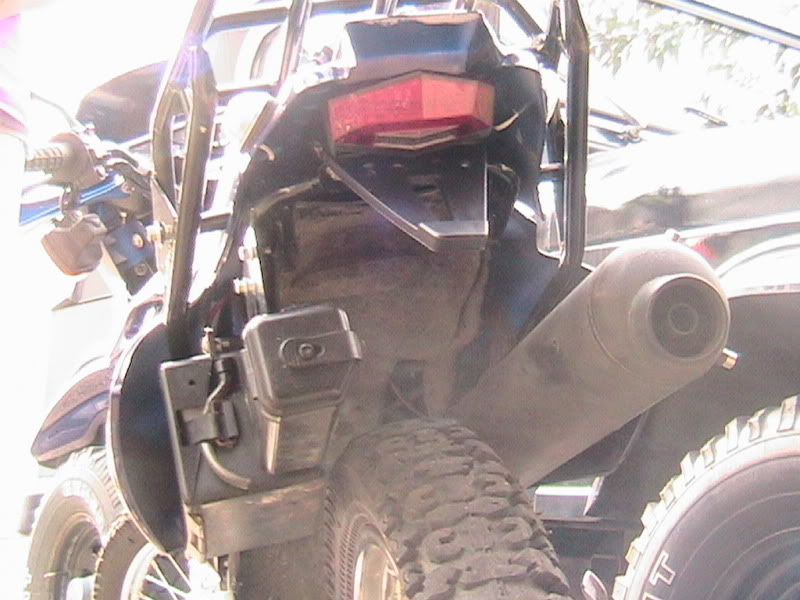 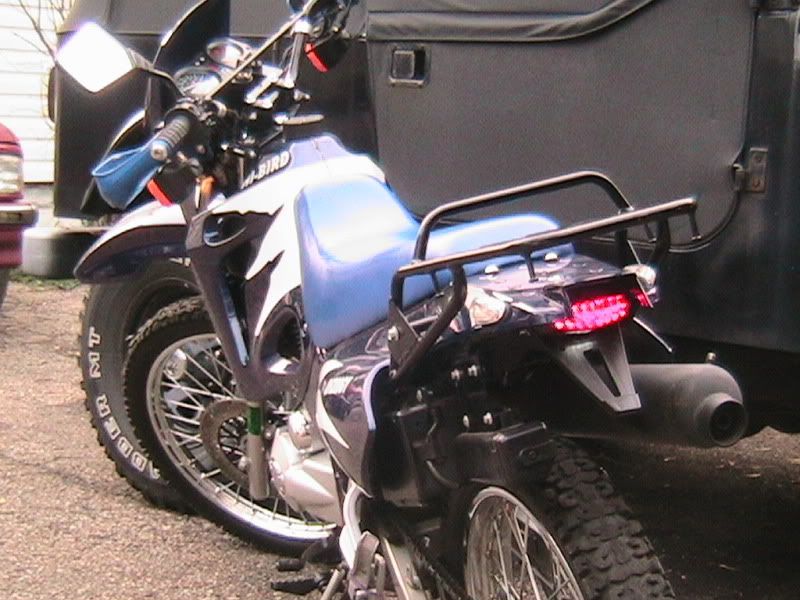 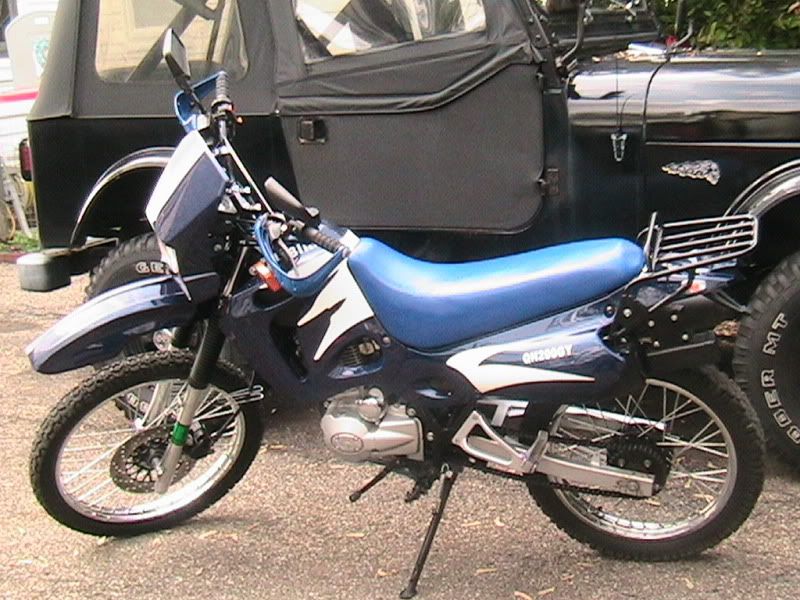 Final Notes: There are many ways you can MOD this rear end, My way may not be best suited for you, But it is the Easiest way I could think of. I do Hope that this was helpful in some way, Homacide :twisted: |

|
|
05-18-2010, 01:41 AM
|
#2 |

Join Date: Mar 2009
Location: Sardis, BC, Canada
Posts: 25,977
|
Thanks for taking the time to post photos; the new light looks great! So does your lovely assistant.
__________________
Weldangrind "I figure I'm well-prepared for coping with a bike that comes from the factory with unresolved issues and that rewards the self-reliant owner." - Buccaneer |
|
|
|
05-18-2010, 02:01 AM
|
#3 |

Join Date: Jul 2008
Location: Idaho
Posts: 25,054
|
Thank you for taking the great photos, and documenting your work to benefit others!
Your Edge II tail light looks great. Spud
__________________
Spud "Never argue with an idiot. He will drag you down to his level, and beat you with experience."  Mark Twain Mark Twain2015 Zongshen ZS250GY-3 (RX3) 2006 Zongshen ZS200GY-2 (Sierra 200) 2005 Honda XR650L 2004 Honda CRF250X 1998 Kawasaki KDX220 Mods made to my Zongshen ZS200GY-2: http://www.chinariders.net/showthread.php?t=6894 |
|
|
|
05-18-2010, 02:02 PM
|
#5 | |
|
Join Date: Jul 2008
Location: Idaho
Posts: 25,054
|
Quote:
 Spud
__________________
Spud "Never argue with an idiot. He will drag you down to his level, and beat you with experience." Mark Twain2015 Zongshen ZS250GY-3 (RX3) 2006 Zongshen ZS200GY-2 (Sierra 200) 2005 Honda XR650L 2004 Honda CRF250X 1998 Kawasaki KDX220 Mods made to my Zongshen ZS200GY-2: http://www.chinariders.net/showthread.php?t=6894 |
|
|
|
|
05-22-2010, 02:23 AM
|
#9 |
|
Join Date: Mar 2010
Posts: 10
|
Thanx for the input
I am unsure of the sprocket size... I will tell you that I am only going about 45 mph. Unsure of the exact speed due to a non working speedometer. Any one with info on where to find sprockets that will bolt up is welcome
|
|
|
|
06-07-2010, 12:33 AM
|
#11 | |
|
Join Date: Jul 2008
Location: Idaho
Posts: 25,054
|
Quote:
http://www.rockymountainatvmc.com/pr...FamilyId=25859 Spud
__________________
Spud "Never argue with an idiot. He will drag you down to his level, and beat you with experience." Mark Twain2015 Zongshen ZS250GY-3 (RX3) 2006 Zongshen ZS200GY-2 (Sierra 200) 2005 Honda XR650L 2004 Honda CRF250X 1998 Kawasaki KDX220 Mods made to my Zongshen ZS200GY-2: http://www.chinariders.net/showthread.php?t=6894 |
|
|
|
|
06-07-2010, 01:37 PM
|
#12 |
|
Join Date: Jul 2006
Location: Payson, AZ
Posts: 53
|
Me too. The fender is $36.99 shipped. Should have done it when I ordered the Tusk bark busters. I am setting this thing up for my grand daughter as I am way too heavy for it which is why my main toy is a KLR 650.
I will try to take a few pics when I install. Here it is: http://www.rockymountainatvmc.com/pr...FamilyId=25859 Got some good info from the customer reviews. John |
|
|
|
06-07-2010, 03:29 PM
|
#13 | |
|
Join Date: Jul 2008
Location: Idaho
Posts: 25,054
|
Quote:
Please do post photos of your installation; I would love to see the Tusk tail light assembly mounted on your bike. Spud
__________________
Spud "Never argue with an idiot. He will drag you down to his level, and beat you with experience." Mark Twain2015 Zongshen ZS250GY-3 (RX3) 2006 Zongshen ZS200GY-2 (Sierra 200) 2005 Honda XR650L 2004 Honda CRF250X 1998 Kawasaki KDX220 Mods made to my Zongshen ZS200GY-2: http://www.chinariders.net/showthread.php?t=6894 |
|
|
|
|
|

|
 |
|
|


 Linear Mode

