|
|
#1 |
|
Join Date: Mar 2009
Location: Sardis, BC, Canada
Posts: 25,977
|
Hillbilly Cylinder Head Rebuilding
I had to choose between using a nasty XR200R head that came with the latest parts bike, or using a freshly rebuilt head with a scored cam bearing journal. I decided to rebuild the nasty head and see what happened.
This is a pic of the nasty head. It looks like it was wet for a long time: 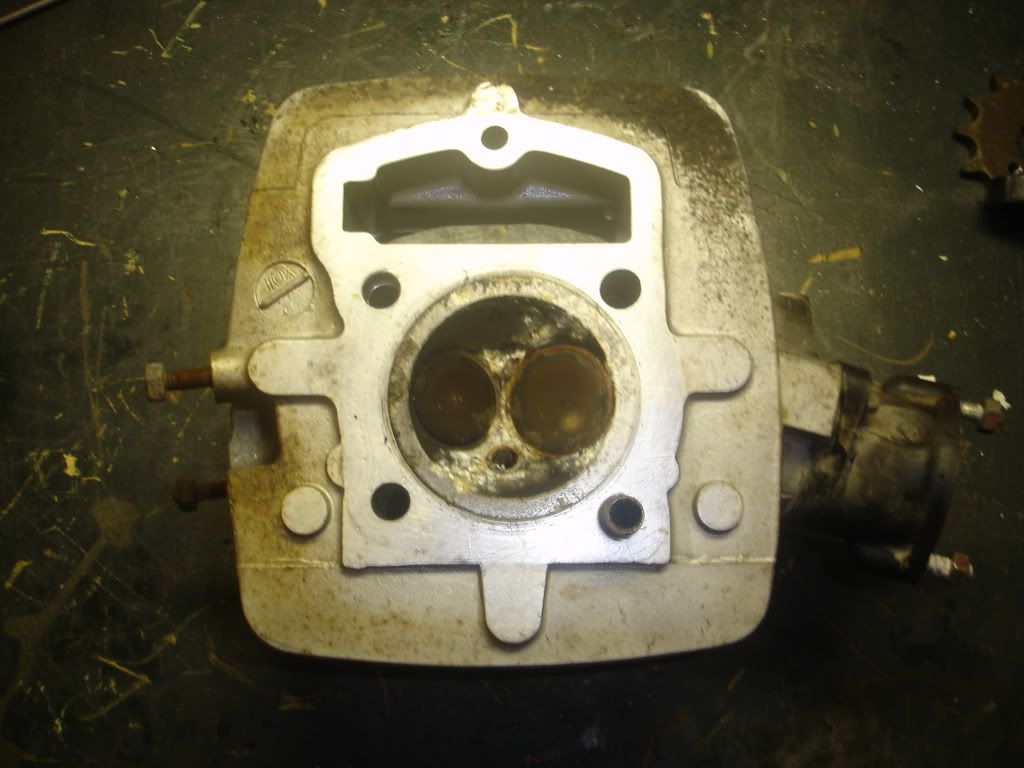 This is my preferred weapon for Hondas (or clones eventually). 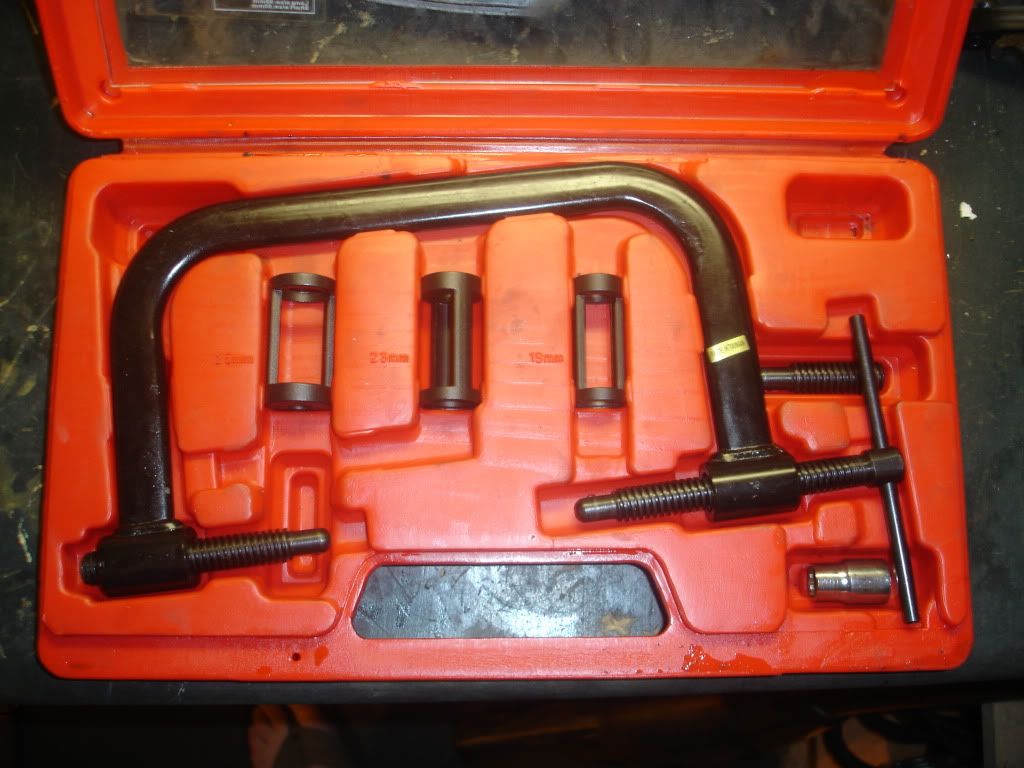 This is the valve spring compressor on the intake valve, top side: 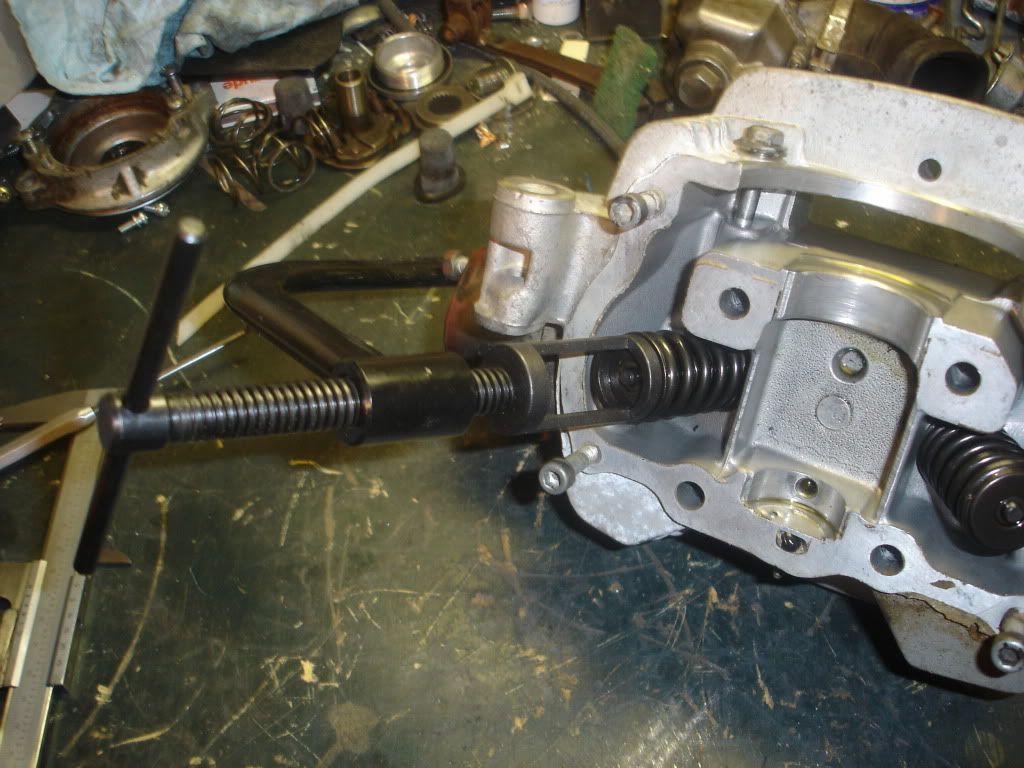 This is the bottom view: 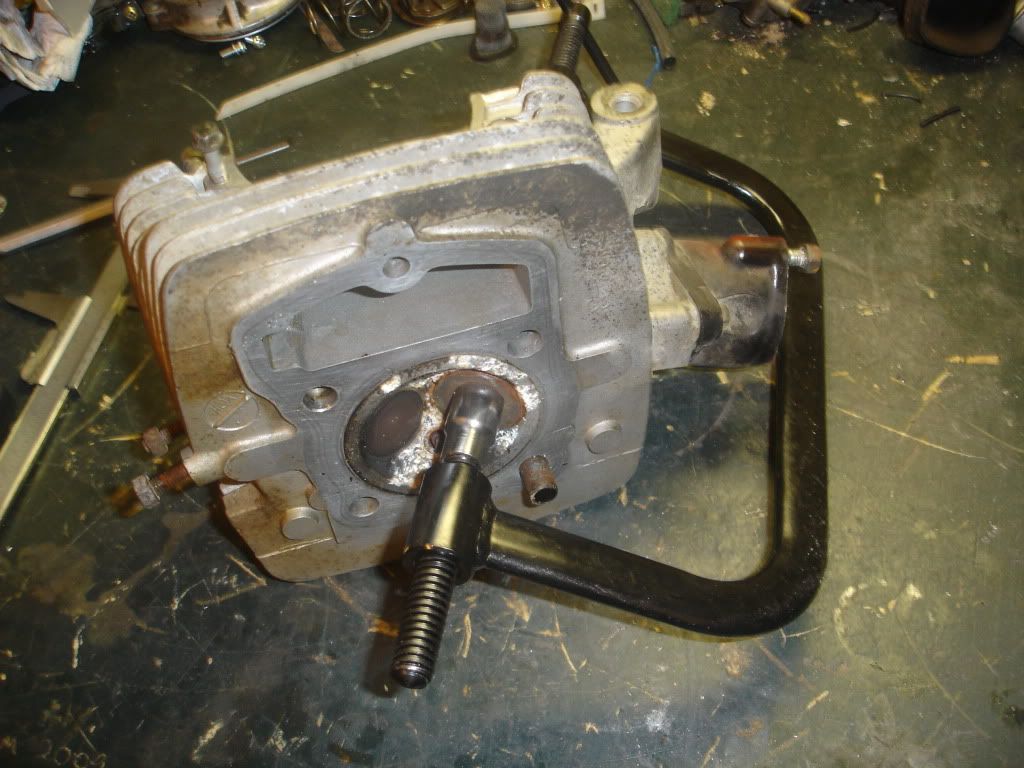 You can see how the springs and retainer are just compressed far enough to reveal the keepers. Don’t compress the springs any more than necessary. 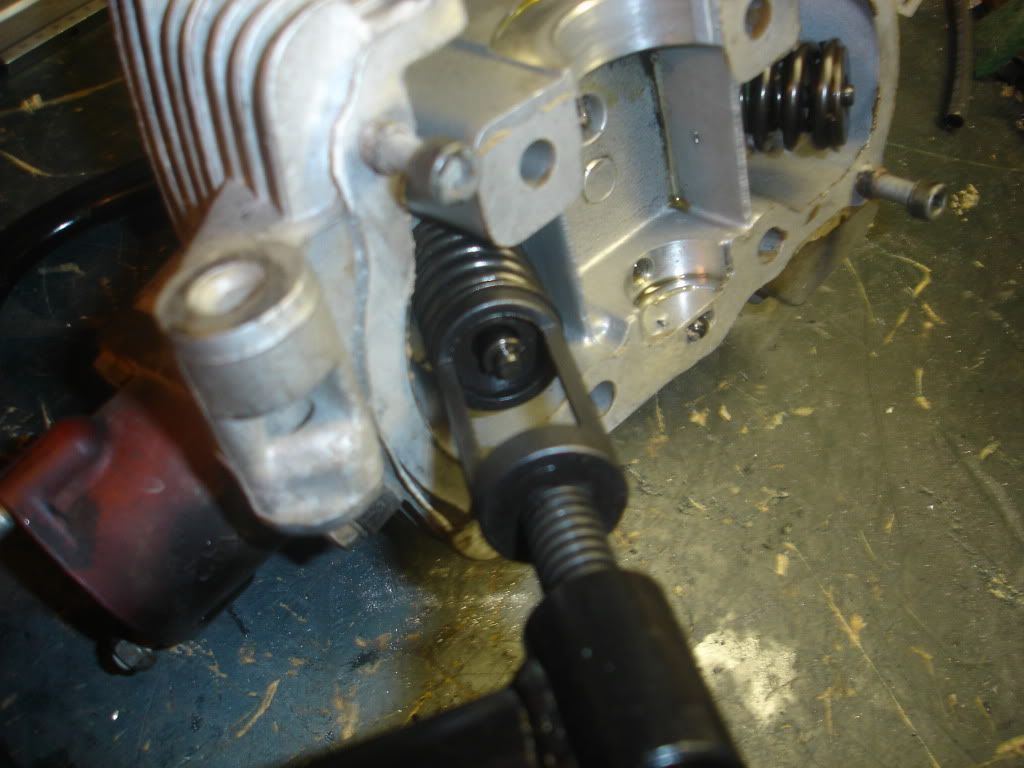 This is one of the keepers being extracted with a magnet: 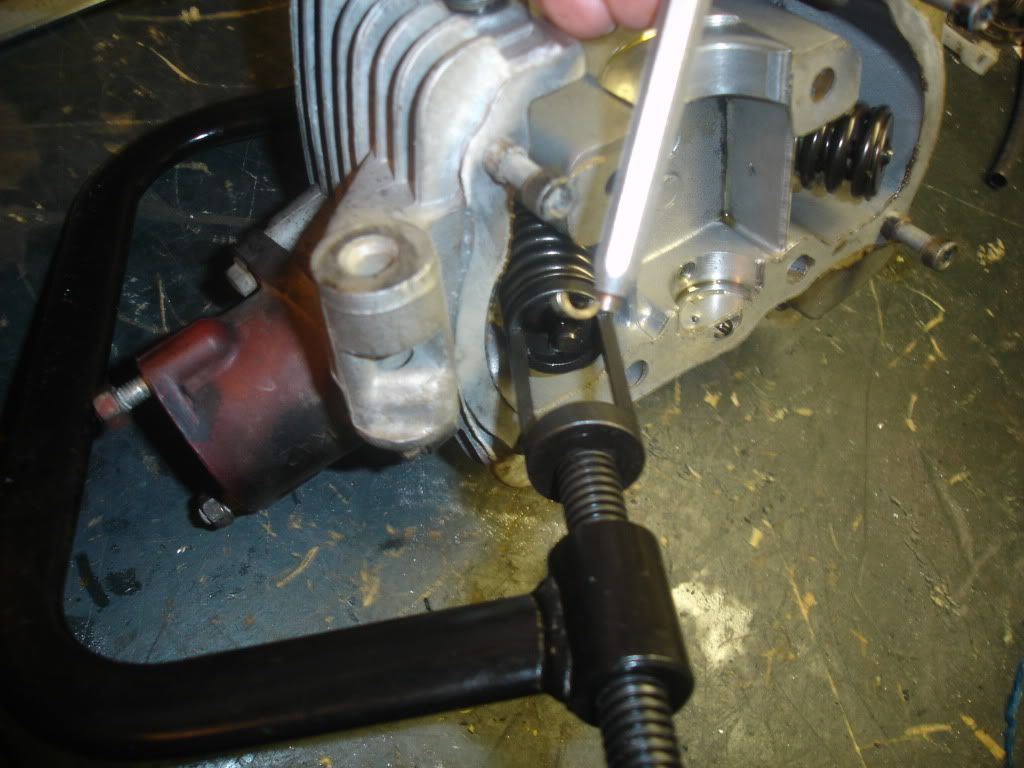 This shows the outer spring removed and the inner still sitting on the guide: 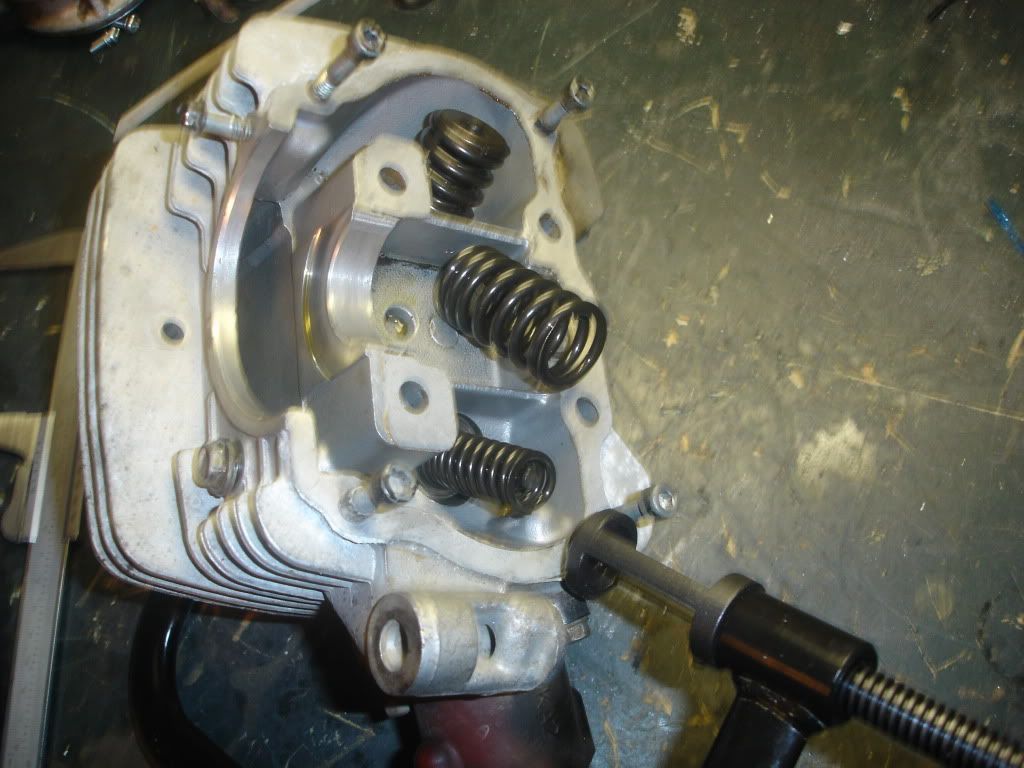 This is the guide with the springs and seal removed. The squished dead seal is sitting in the middle of the head. 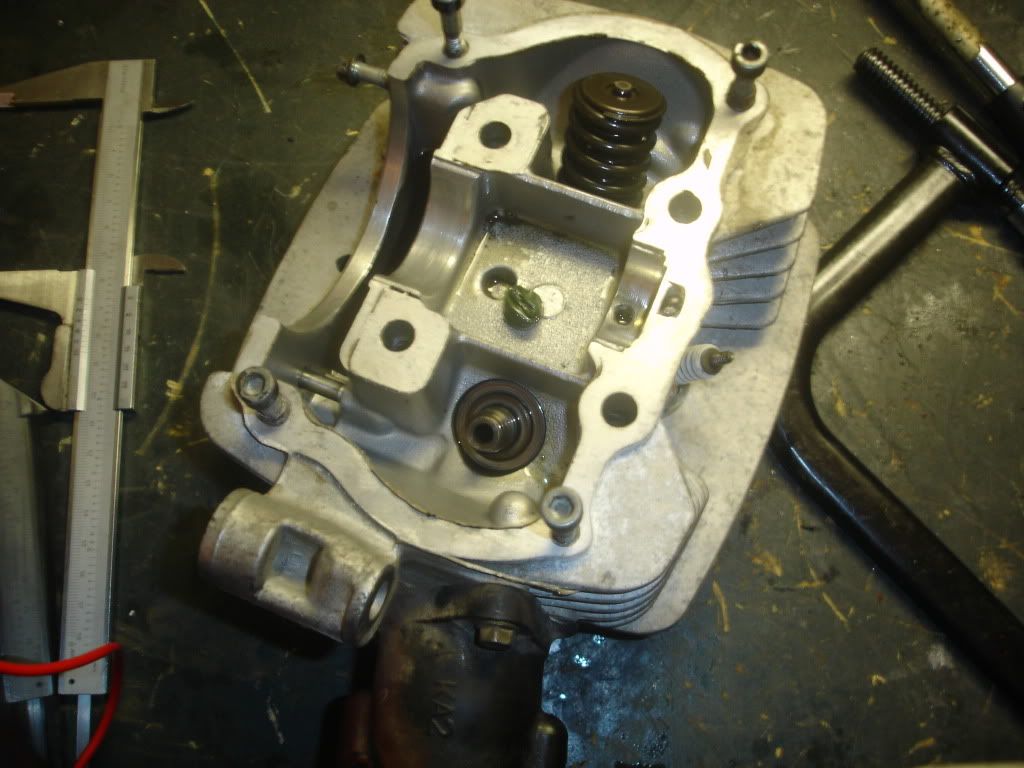 Gently tap the valve out of the guide. Yuck. 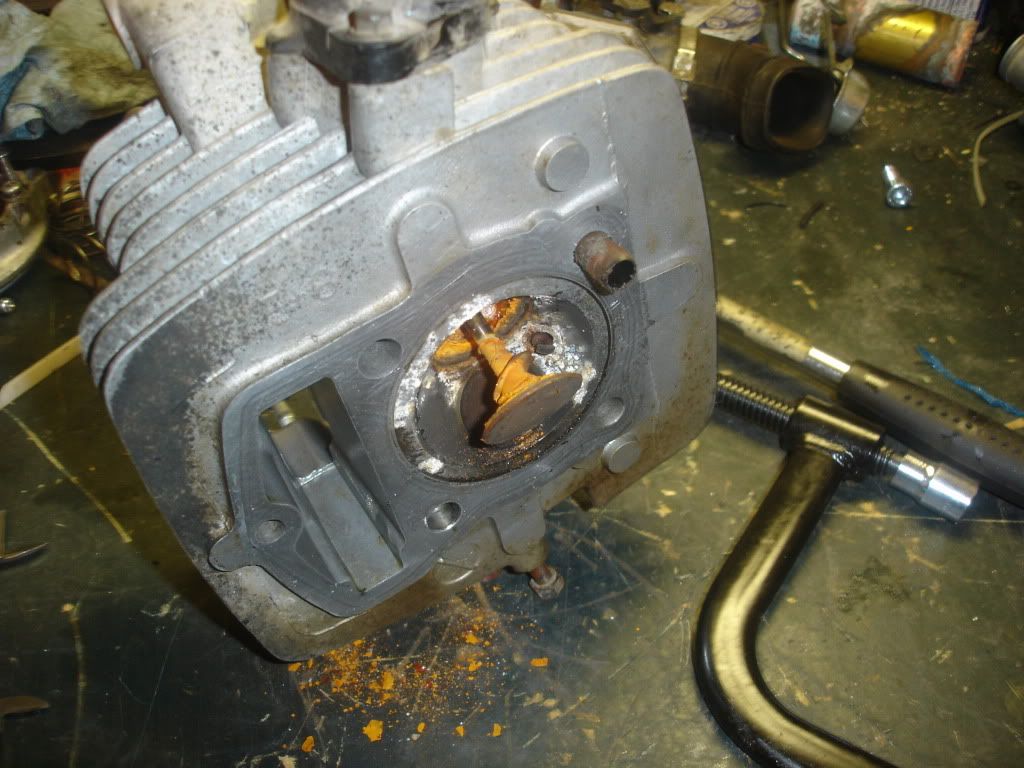 I cleaned up the valves on the wire wheel of my bench grinder. I know, the valves are coated and you’re not supposed to wire wheel or lap them, but I’m not about to buy new valves. The lapping tool is laying nearby. Once the valves are clean, I install them upside down in the guides to get a feel for the guide condition. There was no perceptible lateral movement, only smooth vertical movement. Looks good so far. 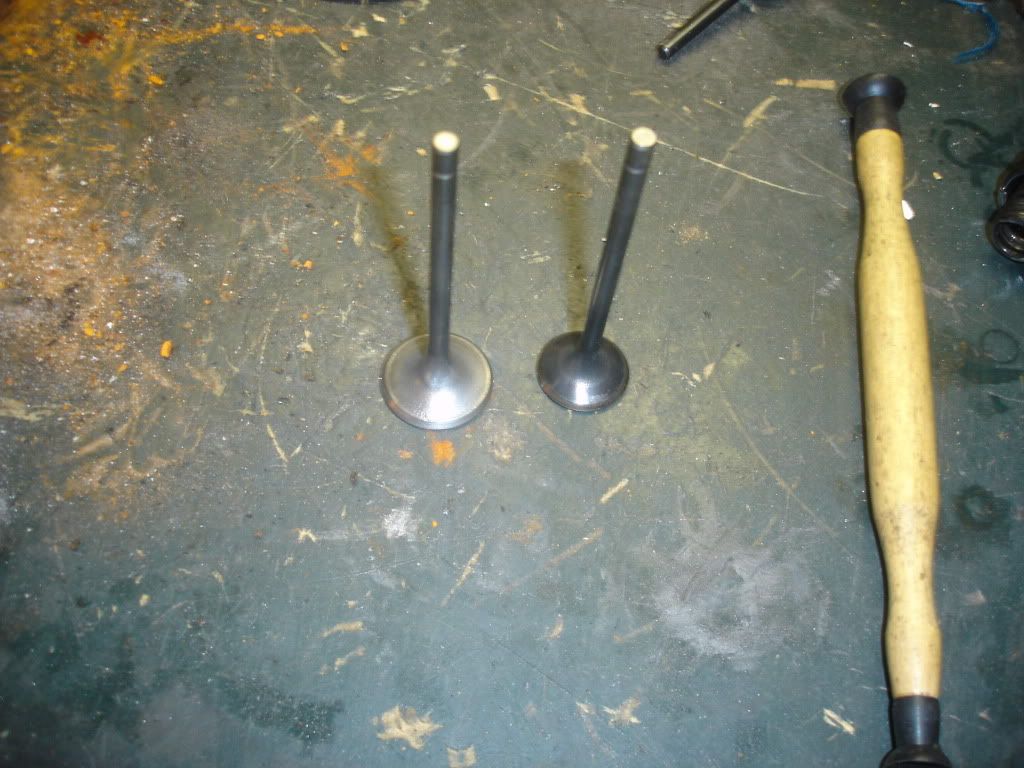 I prepped the head with a nylon bristle tool in the drill. I prepped the gasket surface with a Roloc disc on an angle grinder. 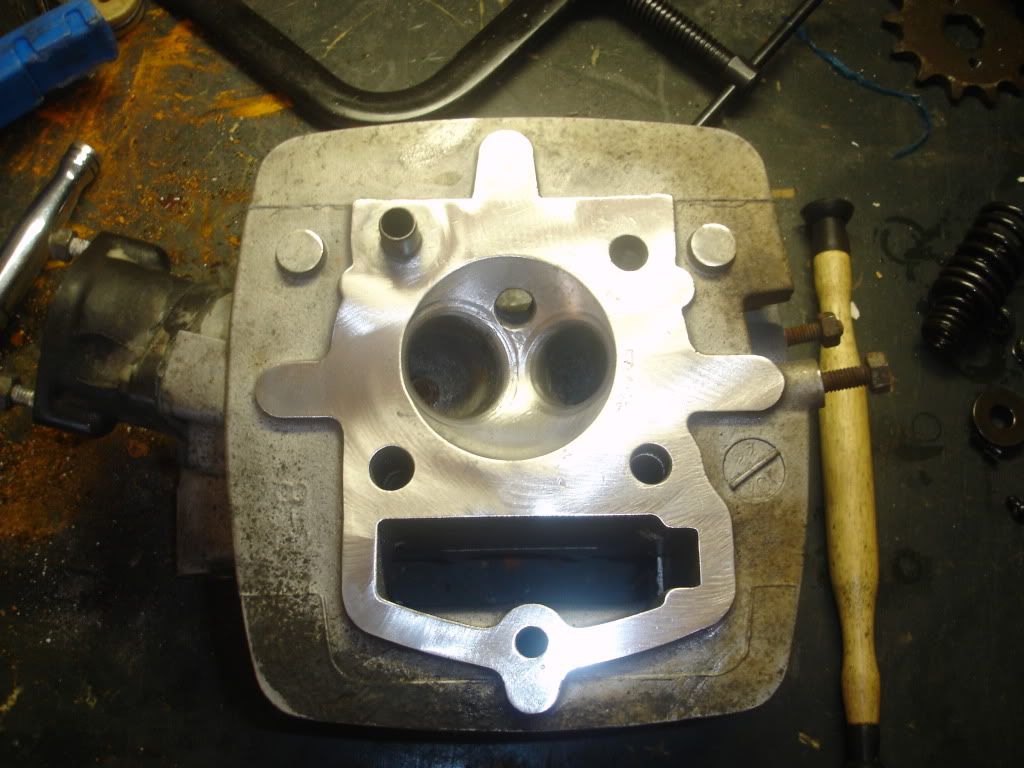 Moisten the suction cup on the lapping tool, apply a few dabs of grinding compound on the seat, and get ready to lap. 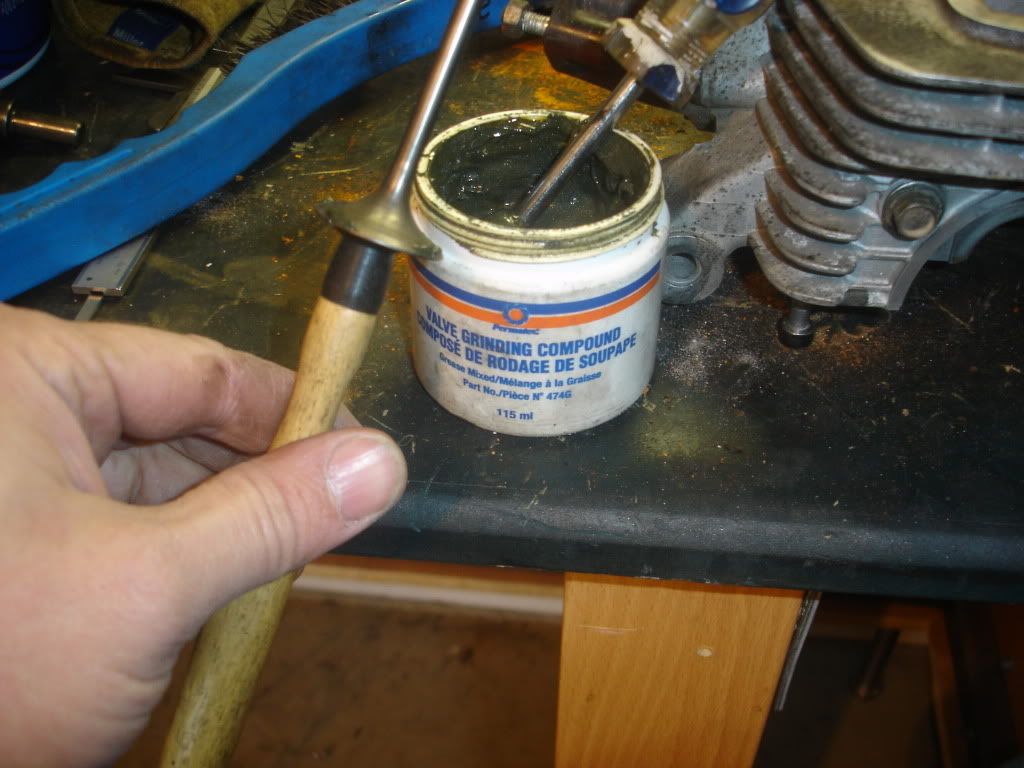 This is the lapping tool ready for action. You simply roll the lapping tool between your hands quickly until you don’t feel or hear it grinding anymore. Then lift the valve, rotate it a bit, drop it back in the seat and continue lapping. Repeat this process until it’s virtually silent. Once at that point, remove the valve and tool, wipe the valve and seat, apply more compound and continue lapping. I do this for three or four applications, checking the seat each time I apply more compound. 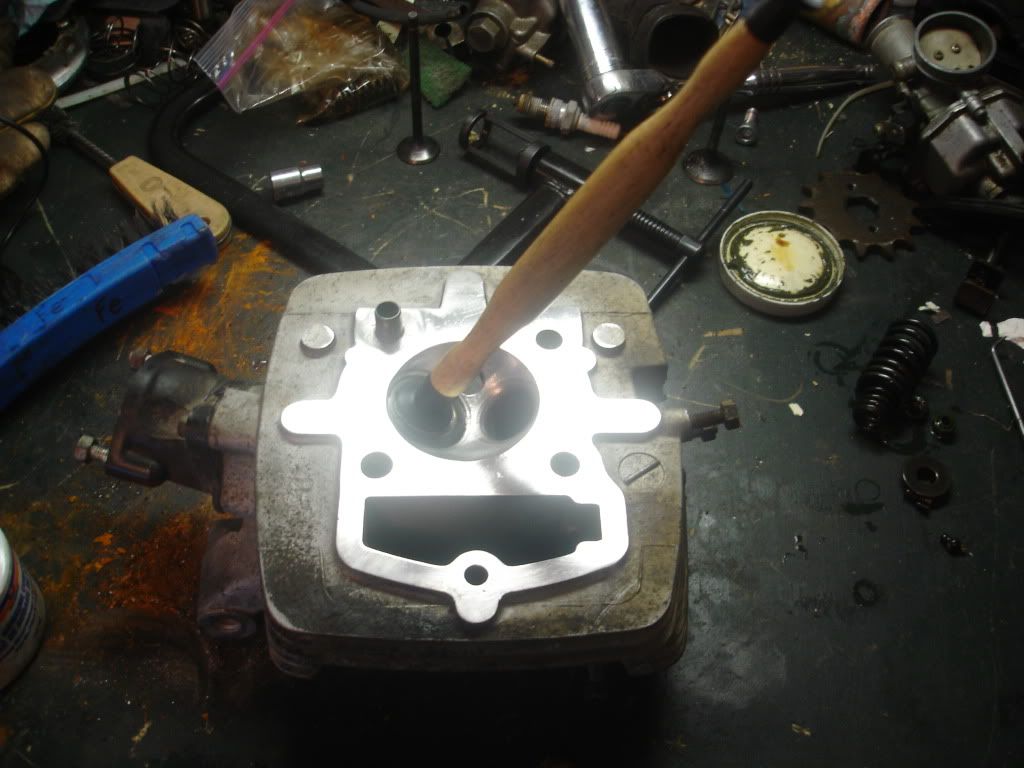 I couldn't get a close enough shot to show the valve margin, but ideally the center of the margin is smooth, not pitted but concentric. The valve seat in the head should look similar. Here's the valve in the guide with a new valve stem seal installed. Be sure to use a few drops of oil on the valve stem and carefully coax the seal in place so it doesn't tear. 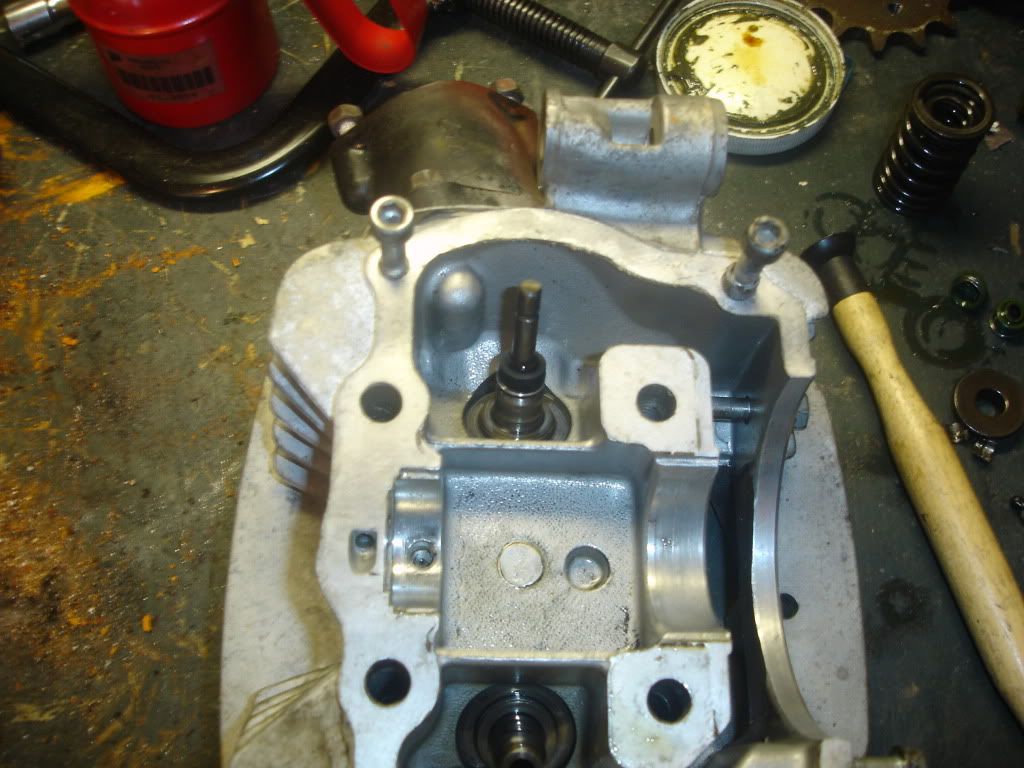 I measured the free length of the inner and outer springs, and they were well within spec. After reassembling the head, I installed the four valve cover bolts so that the head could be levelled while upside down. I then filled the chamber with water and left it for awhile. No water leaked out and no bubbles appeared, so I think it's ok. My theory is that when the valves are under compression, they'll only be forced more tightly closed. 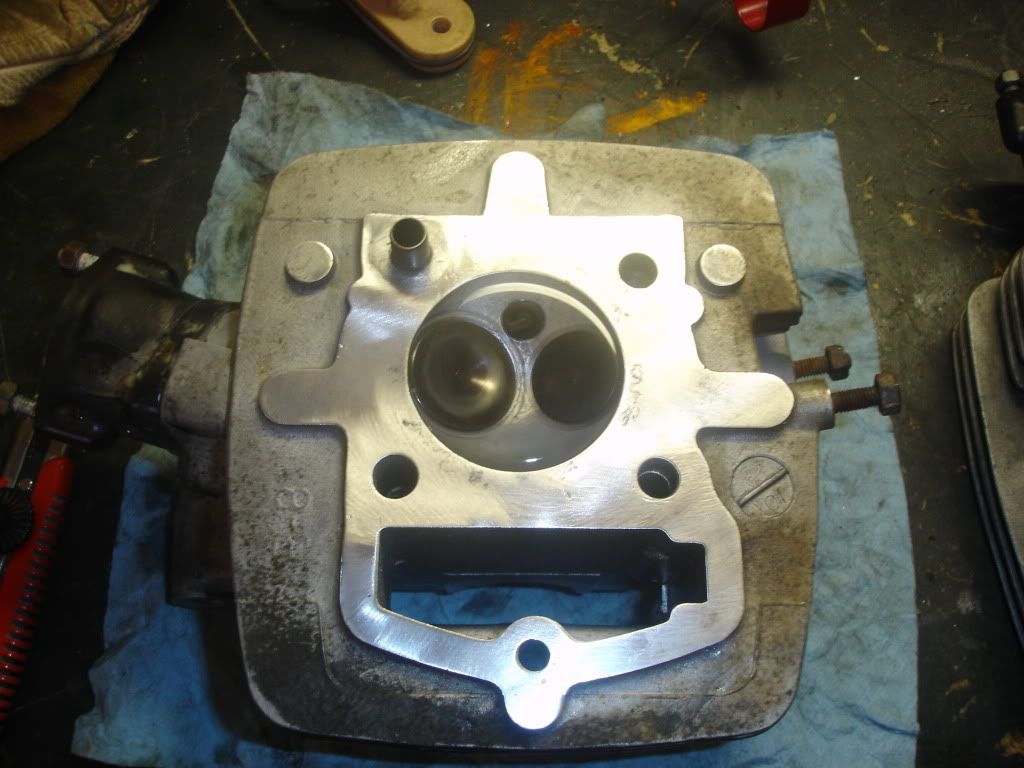 It's tough to tell from this photo, but the head with the bad journal is on the right. I want as much oil pressure as possible at the top, so i figured the nasty head was a better choice if it cleaned up. It did. 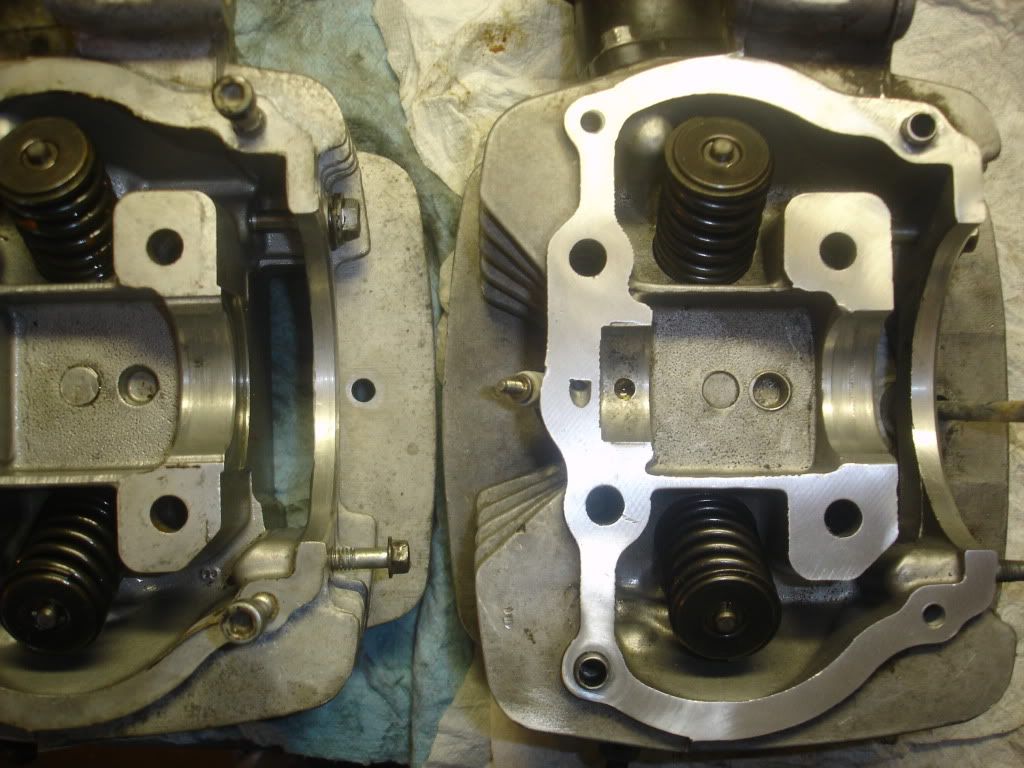 The best way is to start with new valves and have a machine shop grind the seats, but this meets my hillbilly needs.
__________________
Weldangrind "I figure I'm well-prepared for coping with a bike that comes from the factory with unresolved issues and that rewards the self-reliant owner." - Buccaneer |

|
|
|
#2 |
|
Join Date: Jul 2008
Location: Idaho
Posts: 25,054
|
Thank you for posting this great tutorial! As usual, your photographs are excellent, and your writing is superb. I learned a great deal by reading this post, and I appreciate you taking the time to document your work on this project.
 Spud 
__________________
Spud "Never argue with an idiot. He will drag you down to his level, and beat you with experience."  Mark Twain Mark Twain2015 Zongshen ZS250GY-3 (RX3) 2006 Zongshen ZS200GY-2 (Sierra 200) 2005 Honda XR650L 2004 Honda CRF250X 1998 Kawasaki KDX220 Mods made to my Zongshen ZS200GY-2: http://www.chinariders.net/showthread.php?t=6894 |

|
|
|
#3 |
|
Join Date: Oct 2009
Location: Alberta, Canada
Posts: 3,274
|
That XR is going to purr like a kitten when your done
 . Very nice rebuild, I haven't done it for a while but I used to love lapping the valves by hand... It's almost therapeutic! Or maybe I'm just weird... Again though, great job, I look forward to seeing that XR when it's all put together. Love the XR's! . Very nice rebuild, I haven't done it for a while but I used to love lapping the valves by hand... It's almost therapeutic! Or maybe I'm just weird... Again though, great job, I look forward to seeing that XR when it's all put together. Love the XR's!
|

|
|
|
#4 |
|
Join Date: Mar 2009
Location: Sardis, BC, Canada
Posts: 25,977
|
Thanks for the compliments guys. I was a little disappointed in some of the photos, but I'm hopeful that the point will come across.
I find lapping valves to be therapeutic as well. That said, the therapy loses its novelty when you're on valve 12 of 16 on a SBC. 
__________________
Weldangrind "I figure I'm well-prepared for coping with a bike that comes from the factory with unresolved issues and that rewards the self-reliant owner." - Buccaneer |

|
|
|
#5 |
|
Join Date: Apr 2007
Location: Show Low Arizona
Posts: 2,889
|
Cool, You should post a vid of it running after You're all done.
__________________
<br />2001 Suzuki DR200SE<br />1997 Suzuki RM250 YIKES<br />1995 Yamaha Breeze 125 daughters<br />1991 Honda XR80r Restored<br />maybe a 2003 Yamaha TTR90 |

|
|
|
#6 |
|
Join Date: Mar 2010
Location: Volcano, Ca
Posts: 7,102
|
Awesome work!
On my old Harley Ironhead....instead of using the suction cup tool for lapping.....after cleaning everything up, I'd take some No.7 polishing compound, put it on the valve lip, stuff it back in the head and put a low speed drill on it and spin it until it bit....SEALED! You can do that with cast iron, though. It was a 1974 model....and I only had to do it once in all those years. My brother-in-law has the bike now. Anyone who says AMF Harleys are junk have their head where the sun don't shine. Bike still has the original clutch! 8O Sorry for misguiding the thread a tad. Just had to say........ 8) Nice machine work, WAG!
__________________
"Light a fire for a man, and you heat him for a day. Light a man on fire, and you heat him for the rest of his life." 2007 Suzuki DRZ400S (SM convert) 2009 Q Link XP 200 1967 BSA B25 250cc Starfire 2022 Royal Enfield Interceptor 650 2023 Royal Enfield Scram 411 1948 Royal Enfield Model G 350 |

|
|
|
#7 |
|
Join Date: Mar 2009
Location: Southeastern Washington desert
Posts: 14,761
|
Good utorial and photography. Some good tips in there!
__________________
Happy to serve. |

|
|
|
#8 | |
|
Join Date: Sep 2008
Location: Surrey, B.C., Canada
Posts: 2,185
|
Quote:
Very nicely laid out and explained, Sir. Wish I could've been around to give you a hand. Looks like a pretty basic and easy to work on head. Probably the simplest part of those entire engines. Don't give up on the other head with the bad cam journal, as you know it might be rescuable and serviceable. I would add one word of caution to those reading.. you must be very careful with any abrasive on the surface of the cylinder head. I know it's a bear to remove old head gasket material, but any power discs will remove metal from aluminum causing dips, and if it's in the wrong spot *can* cause you problems. Even those sold by the tool companies as aluminum safe. (Like the plastic discs with the nubs on them)That's not to say you have a problem here, D, but for those out there reading must be very careful there. |
|

|
|
|

|
 |
|
|